Mastering Multisyllabic Words


“I’m Charlie the Chunking Chipmunk. What’s new?
I break words into small chunks and you can, too.
Look for little words or sounds that you already know,
Join these sounds together to be the star of the show!”

Chunking Chipmunk_with textCharlie the Chunking Chipmunk is one our decoding strategy animals in Hazel’s Reading Roost. Charlie motivates students to use strategies to decode multisyllabic words. Read more about Charlie’s strategy below…
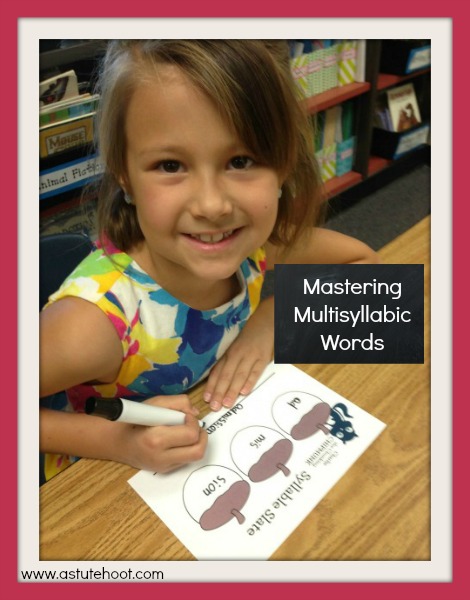
Mastering Multisyllabic Words

WHAT is chunking? Chunking means breaking multisyllabic words into small units such as onsets and rimes, phonograms or letter combinations, syllables or morphemes.

WHY is chunking important? As students begin reading multisyllabic words, it is important for them to know how to break words into units larger than individual sounds. Identifying individual syllables is important because it helps students determine the correct vowel sound. By following syllabication rules, students can learn how to properly divide or chunk a word into syllables, which improves decoding and spelling.

HOW do I teach chunking? Explain that Charlie helps readers decode larger, unknown words by breaking the word into smaller chunks. Teach specific syllable types to show students how to chunk words. Decide which syllable types to teach based on your students’ instructional levels.

  • Closed syllable: A syllable with one short vowel ending in one or more consonants (e.g., sunset, dishpan, lunchbox)
  • Open syllable: A syllable that ends with a long vowel sound, spelled with a single vowel letter (e.g., open, myself, redo)
  • Vowel consonant –e: A syllable with a long vowel, spelled with one vowel and one consonant and a silent e (e.g., shipmate, athlete)
  • Consonant –le: An unaccented final syllable that contains a consonant before /l/, followed by a silent e (e.g., apple, little)
  • Vowel team: A syllable with long or short vowel spellings that use two to four letters to spell the vowel (e.g., toaster, season)
  • Vowel –r: A syllable with er, ir, or, ar, or ur in which vowel pronunciation often changes before /r/ (e.g., return, perfect)

Rather than teaching syllabication rules and types in isolation, integrate direct instruction with time for application of the skill in authentic literature. Practice many examples of each syllable rule and type to achieve mastery of that pattern before moving on to the next. In addition to using strategies such as dictation, marking words and flashcards, push students to find words with targeted syllable types in literature and use those words in their writing.

We recommend using our Charlie Chunking Chipmunk resources as a supplement to a research-based, multi-sensory phonic program that includes structured, explicit, systematic, cumulative instruction. Although we do not endorse a specific program, our students have demonstrated great success using the Wilson Language System and the Spalding Method. Read reviews of specific literary programs at What Works Clearinghouse.

WHEN should I use chunking?
Explicit reading strategy instruction should be included in a balanced literacy program. Charlie Chunking Chipmunk can be incorporated into various components of literacy lessons. Here are some specific examples of when to use Charlie:

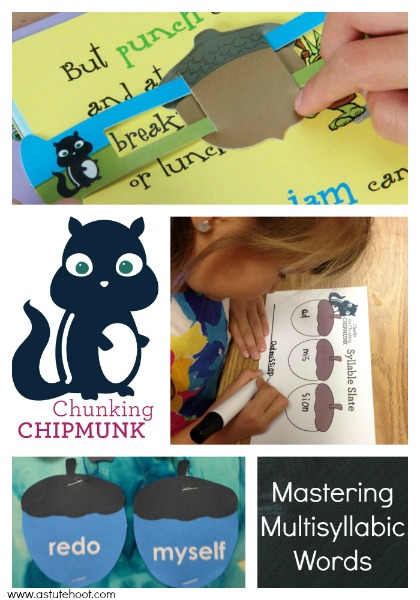
  • Phonics Fun: Choose several two- or three-syllable words from a weekly spelling list or phonics word study list. Choose a multi-sensory strategy (see below) to count syllables. Guide students through syllabication of each word on laminated Charlie’s Syllable Slates (see below). First students write each syllable in one of Charlie’s acorns and then write the whole word on the line below. Discuss syllable types and rules as applicable.
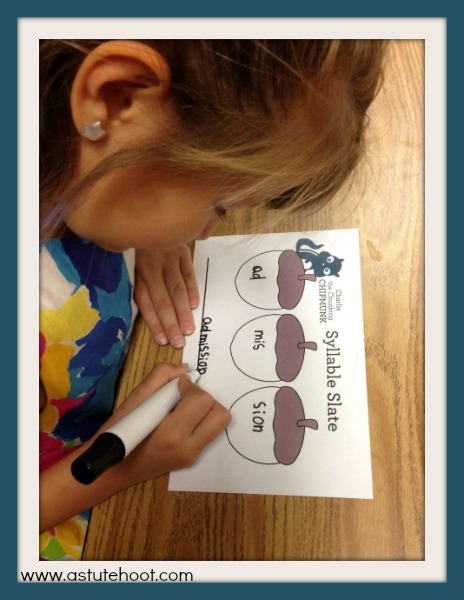
Syllable Slate

  • Guided Reading: Introduce or review the chunking strategy by reading the Charlie Chunking Chipmunk Poem. Read aloud your selected guided reading text and model using Charlie’s Syllable Slate to read multisyllabic words in context. Call on individual students to practice using Charlie’s Slate with additional words. Encourage students to use Charlie Chunking Chipmunk’s strategy when they are reading independently as well.
  • Chunking Chipmunk Reading Center: Create a portable reading center. Place Charlie’s Syllable Slate or a laminated copy of the Two-Syllable Chunking Chipmunk Reproducible and/or Three-Syllable Chunking Chipmunk Reproducible, dry erase marker, eraser, and 10 to 20 targeted multisyllabic words written on index cards or preprinted on flashcards in a large manila envelope with a copy of the Charlie Chunking Chipmunk Poem glued onto the front. Instruct students that during center time they are to take an envelope to their desks and apply Charlie’s strategy to practice reading the words and then practice spelling by using the dry erase marker to write the words on the laminated reproducible or slate.
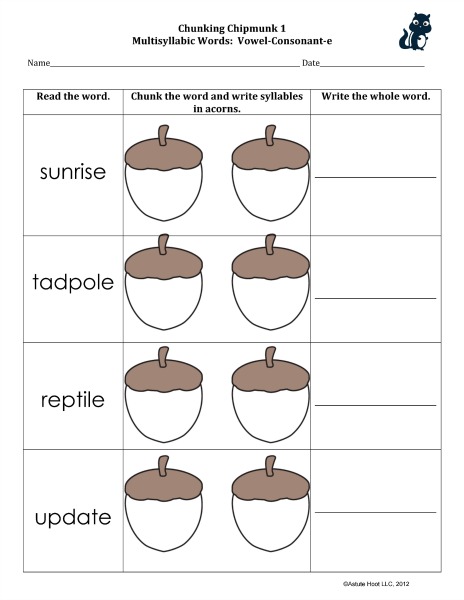
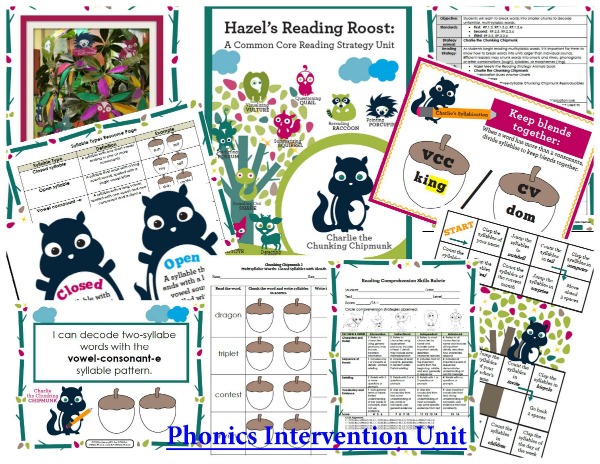
Vowel Consonant e Syllable Unit

Helpful hints:

  • Create a class set of Charlie Chunking Chipmunk Syllable Slates. Print slates onto cardstock using color printer and laminate. Distribute to class and explain specific procedures for using the slate (e.g., write one syllable in each acorn; no doodling, etc.). Use the slates to provide opportunities for strategy practice and application. They are perfect for spelling words, targeted phonics patterns or syllabication practice in a whole group, small group or one-on-one setting. These slates keep students actively engaged and serve as an informal assessment.
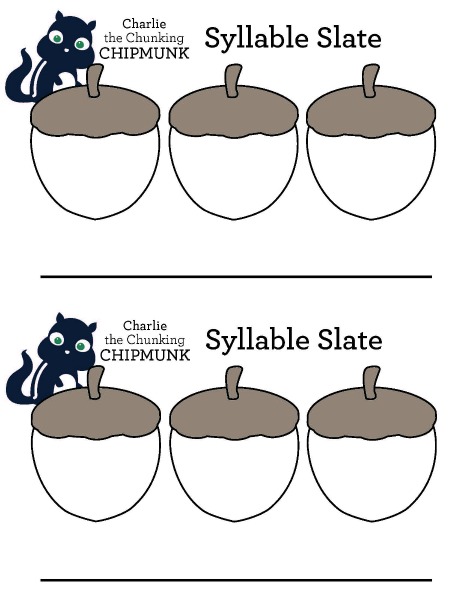
Syllable Slates

  • Incorporate multi-sensory components. Introduce a variety of ways to determine the number of syllables in words.
    • Visual: Using Charlie’s Syllable Slate, have students draw a scoop under each acorn, reading the syllable aloud as they draw.
    • Auditory: Prompt students to clap each part of the word to determine the number of syllables as they say the word aloud.
    • Tactile: Instruct students to put their hands under their chins and say the word. Tell them the number of times your hands move down is the number of syllables in the word.
    • Kinesthetic: Break apart the word and jump each part. Demonstrate how the number of jumps is equal to the number of syllables. Practice different syllable types using the Charlie Chunking Chipmunk game board.
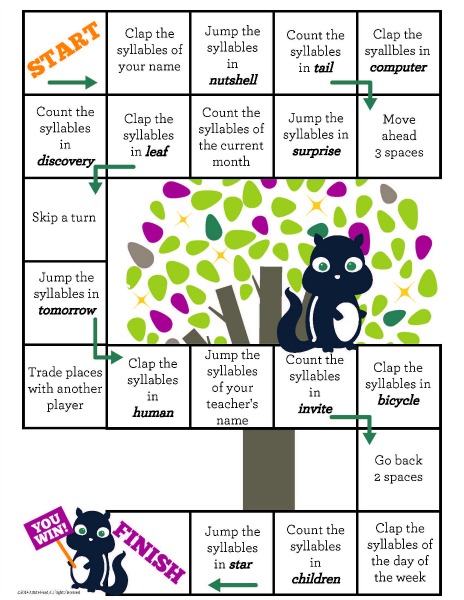
Charlie Chunking Chipmunk Syllable Gameboard

  • Use Chunking Chipmunk Slide and Learns.  With these fun hands-on slider tools, Charlie the Chunking Chipmunk makes breaking words into chunks easy. Just slide the acorn along the window to reveal one syllable at a time.  Available for purchase at Really Good Stuff.
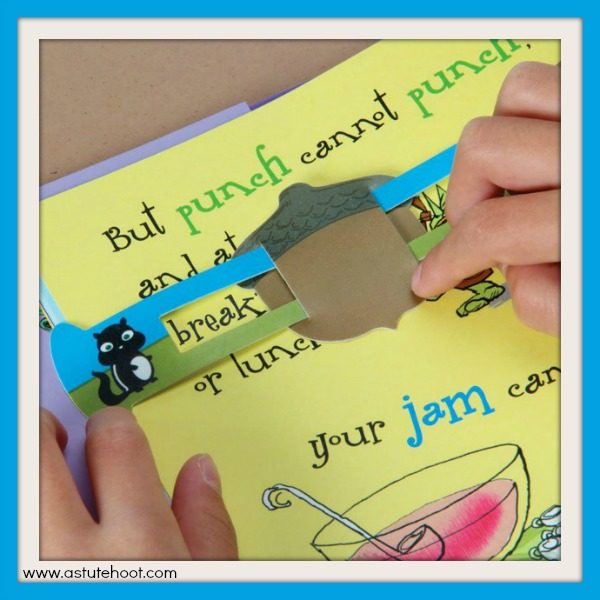
Charlie Chunking Chipmunk Slider

  • Display Syllable Word Wall. Print out Charlie’s Nutty About Syllables Word Wall and display in a prominent location near the guided reading table. Post each syllable type as it is introduced to students; use color-coded acorns to add examples of words used in instruction. Model referencing the Word Wall during reading and writing lessons.
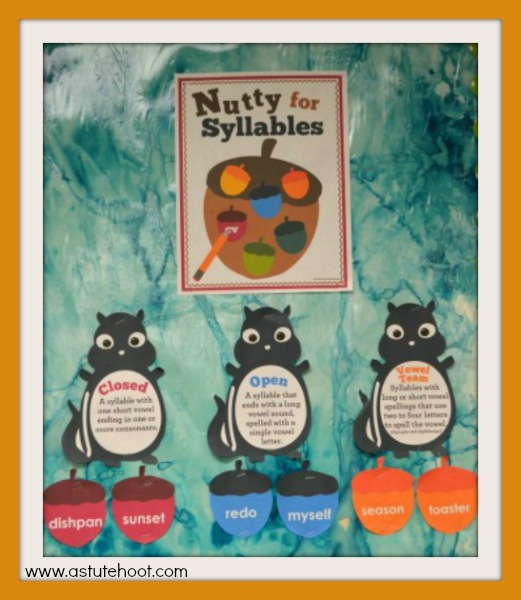
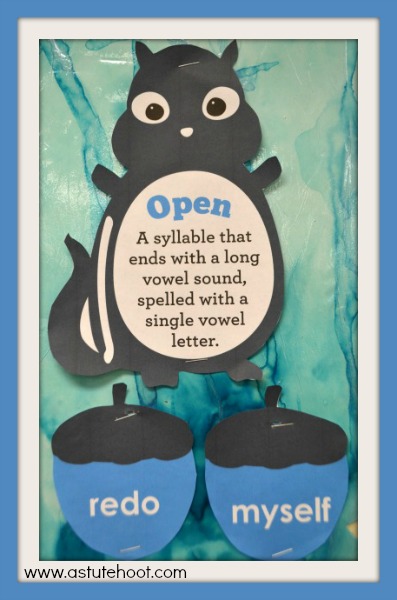
Nutty for Syllables Word Wall

Nutty for Syllables Example

Charlie’s unit is perfect for general education, special education, RTI and reading intervention.  Download the complete unit here.  Check out our complete line of supplemental hands-on resources at Really Good Stuff.
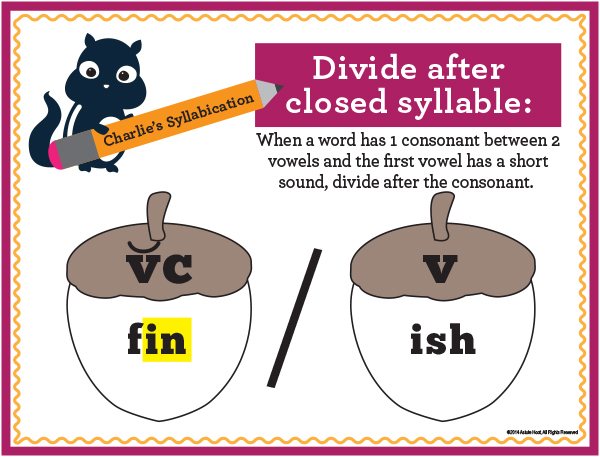
Charlie Sylla_Divide twins

Charlie Chunking Chipmunk PREVIeW

Jennifer_blog_signature-SMALL

Literature Studies Made Easy

Wondering how to integrate multiple strategies within context of authentic literature? Are you overwhelmed at thought of planning a comprehensive literature study? At last, the secret to successful literature studies is revealed in 5 simple steps.  Sound too good to be true?  It’s not!

Read our guest blog at Really Good Stuff to learn how to expertly plan and implement effective, engaging literature studies.

The Life-Changing Moment of My Teaching Career

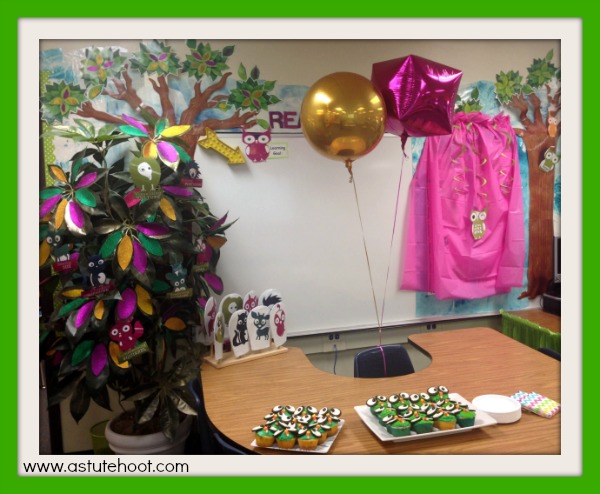
Before Spring Break, I announced to the class that there would be a big surprise when they returned. Some guessed it would be different seats, others said new name tags, but I had a much grander revelation in store. After a year of collaboration and production, all of our Really Good Stuff tools and products finally arrived and I couldn’t wait to share them with the class. Our reading and math strategy animals are an integral part of my classroom as they support and enhance the district prescribed curriculum. Students have such a connection with the animals; some even believe the animals are real so I knew they would be delighted to see the accompanying hands-on tools. I decided to host a Premiere Party to share the exciting news.

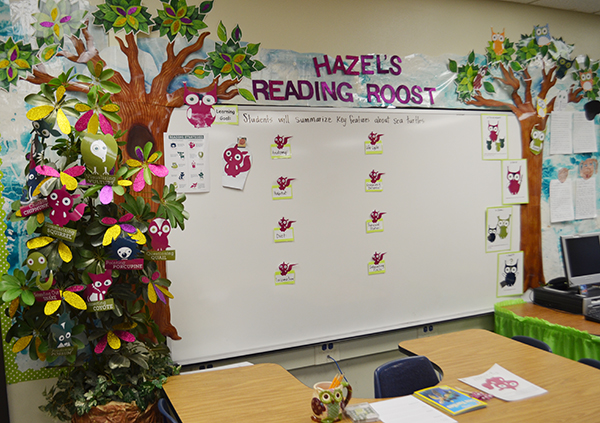
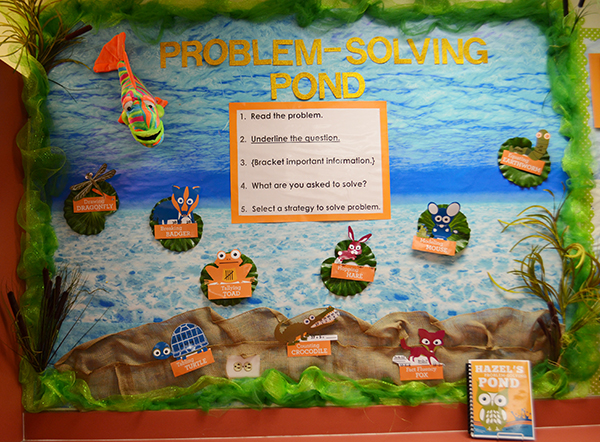
First, I added the new decoding and comprehension banners to the Reading Roost (my guided reading area) along with the problem-solving strategy banners at Problem-Solving Pond.

Reading Roost center

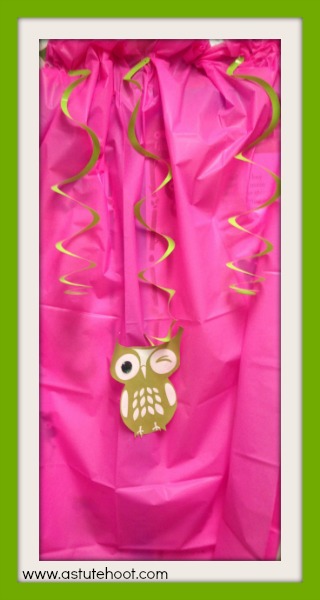
To enhance the surprise, I added these special reveal curtains using plastic tablecloths and a winking Hazel as a special clue.

Reveal curtains

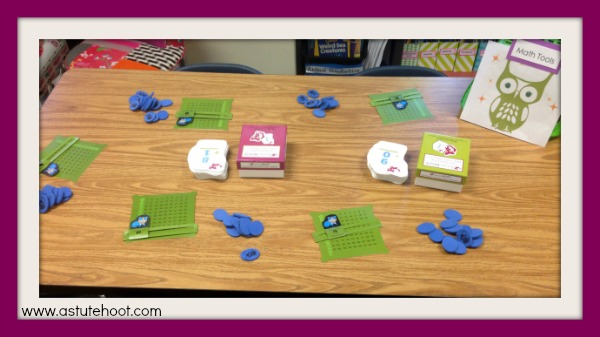
Next, I planned special centers in which students would be able to explore all of the new hands-on products and tools.

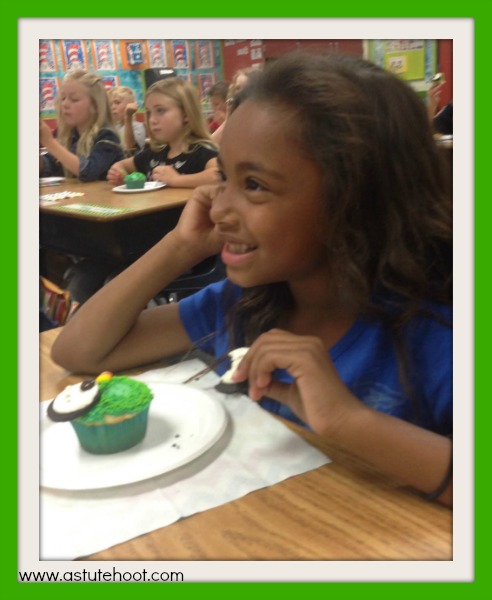
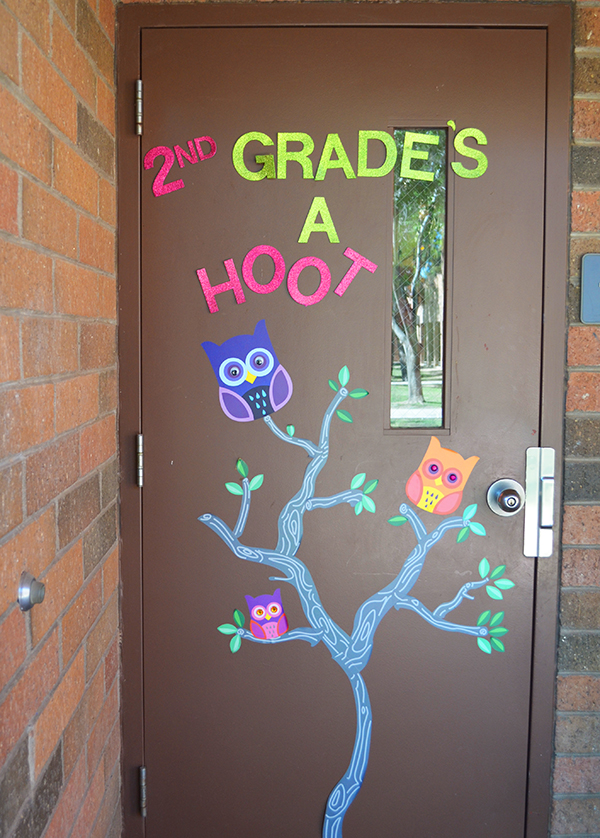
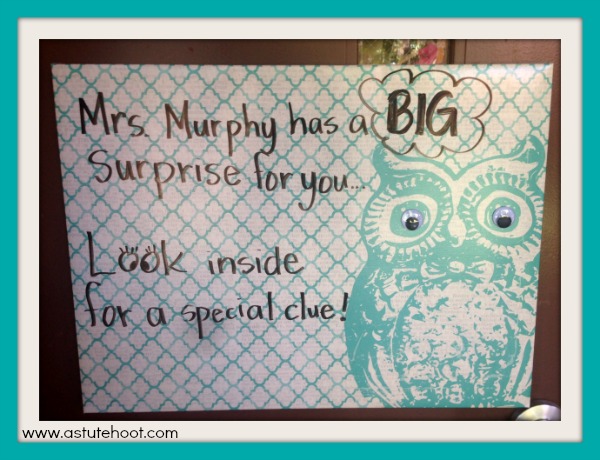
Math ToolsFinally, I made these adorable owl cupcakes and  wrote a special note on the door as a hint to the big surprise.
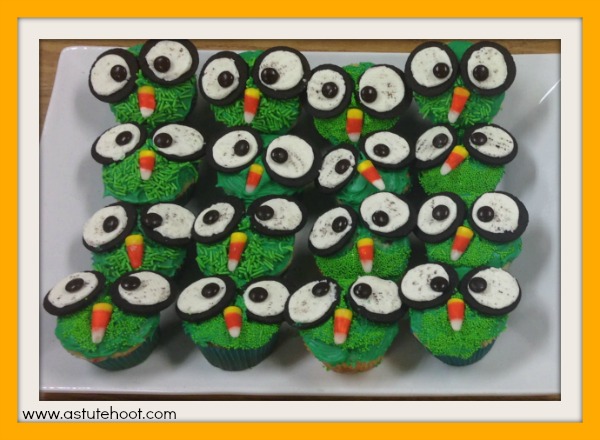
Owl cupcake

Reveal sign

When the class walked in, they were silent, staring at awe at the new room arrangement, balloons and cupcakes. I announced that we were having a Premiere Party to reveal a huge surprise. I explained that Really Good Stuff, a company that produces and sells teaching products, found our strategy animals online and loved them so much, they turned them into hands-on tools. I showed them the Really Good Stuff website with all of our products and they oohed and aahed.  As I scrolled through the products, I explained that they would get to explore each one in special Astute Hoot centers and they squealed in delight.
Reveal

Briana watching video

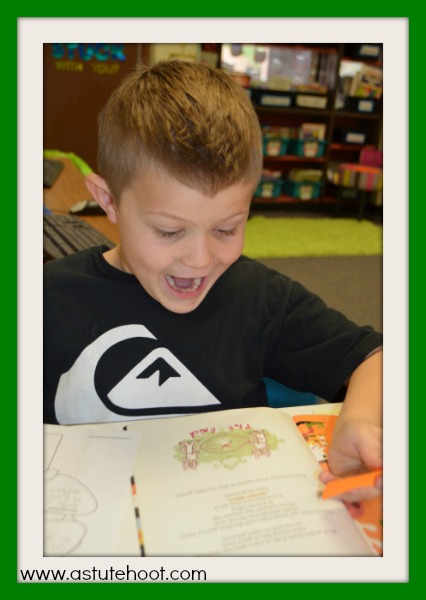
As students rotated through each Astute Hoot center, I was so moved by their excitement and enthusiasm. They were truly captivated by these new tools and demanded to know when we were going to use them “for real”. Their comments were so touching. “I’m so proud of you, Mrs. Murphy! You are amazing!” and “Mrs. Murphy, I am so lucky that you are my teacher.” My favorite was, “I know you are going to be famous so I better get your autograph.”

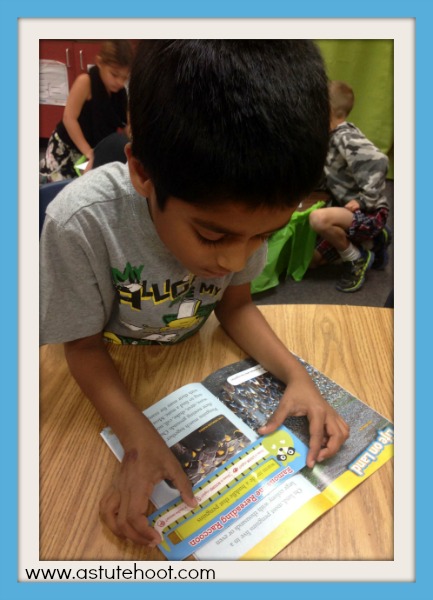
Rereading racoon

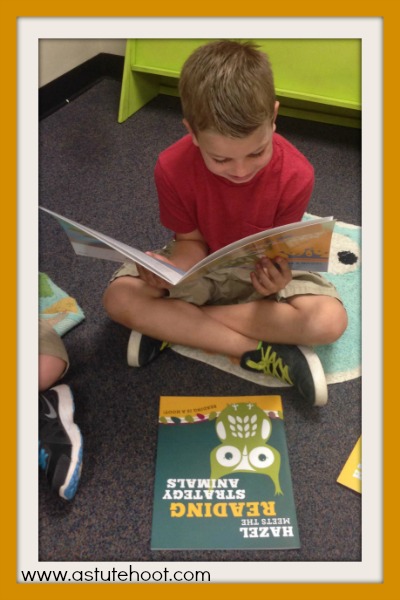
Reading Hazel books

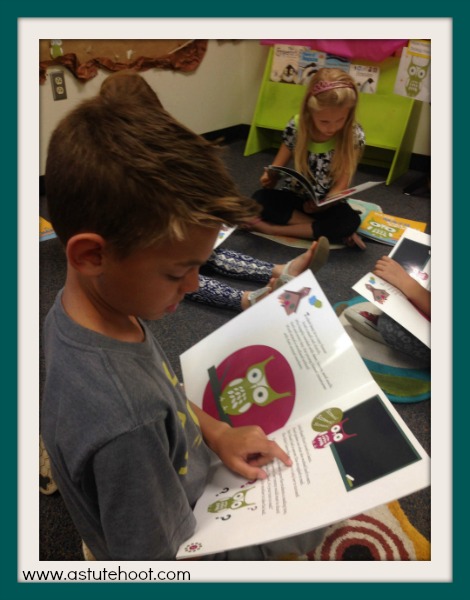
Hazel Books

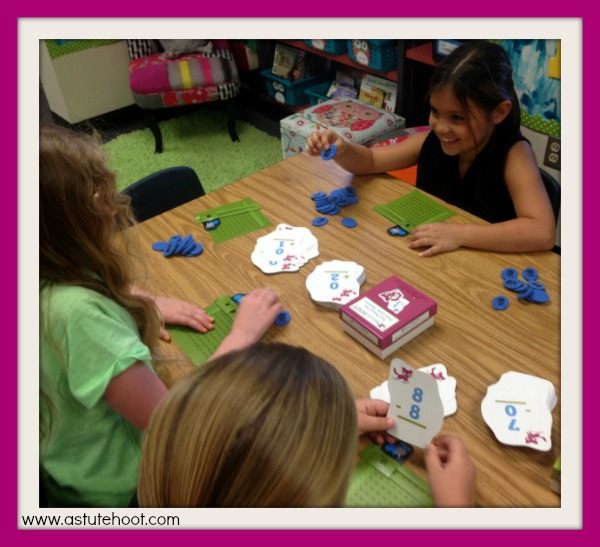
Modeling Mouse CountersMath mats

Problem-Solving Poster

Paco Pointer

Problem-Solving Journals

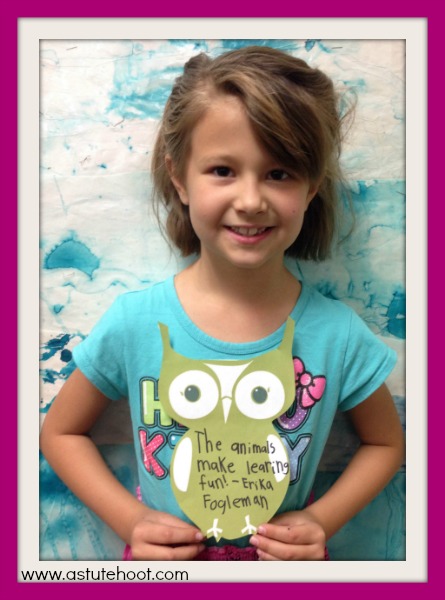
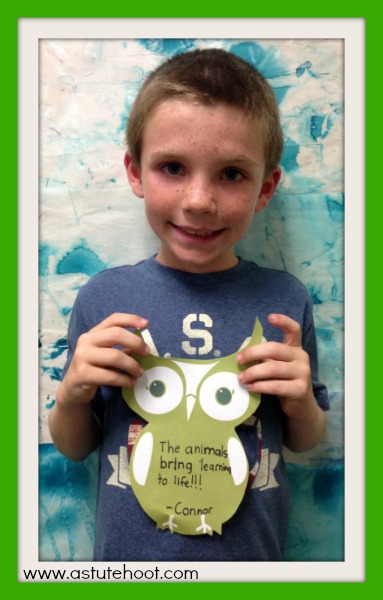
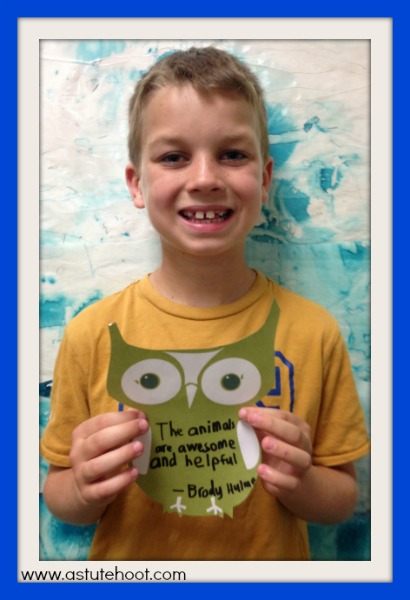
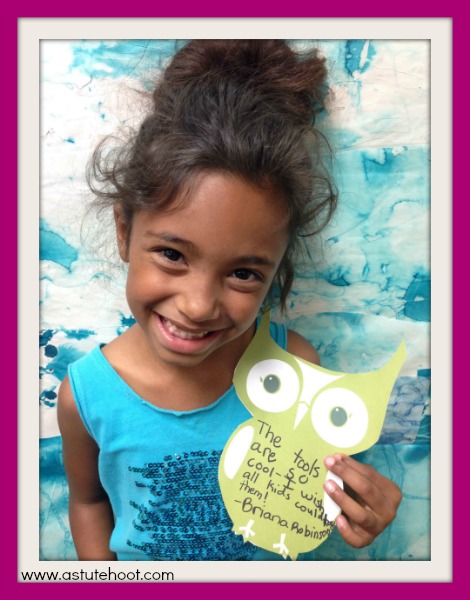
A few students even asked to write reviews and testimonials of the products. They are truly our biggest fans!

Erika Testimonial

Connor TestimonialBrody Testimonial

Briana Testimonial

Josh Testimonial

These pictures don’t fully convey the true joy of learning I saw as students explored all of the new materials. This was definitely the most monumental moment in my teaching career and one that will stay with me forever. Not only are my students getting to use these new, innovative tools to help them learn, but they witnessed that with drive, determination, and dedication, dreams do come true.

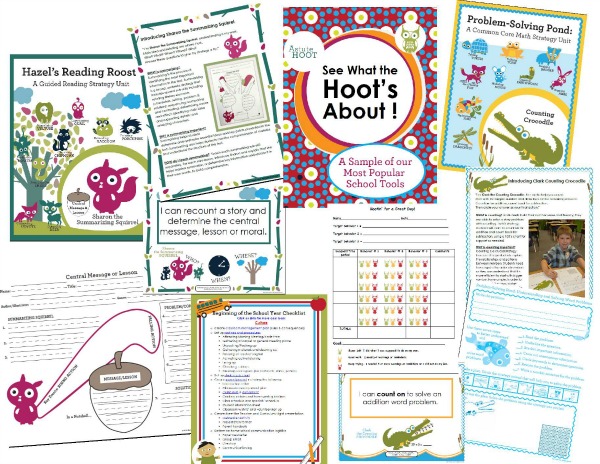
Check back each week to see these exclusive Really Good Stuff hands-on in action. Download See What The Hoot’s About, a comprehensive sample file that contains a glimpse into the magical world of Astute Hoot, guaranteed to spark enthusiasm in your classroom.

Jessica_blog_signature-SMALL

How to Use Elkonin Boxes and Sounding-Out Slates


“I’m Sally the Sounding-Out Snake.
S-s-say, have you heard?
Stretch out all the sounds that you see in a word.
Blend sounds together, it’s really quite nice.
S-s-smooth out the words. That’s my advice.”

Sounding Out Snake.blog

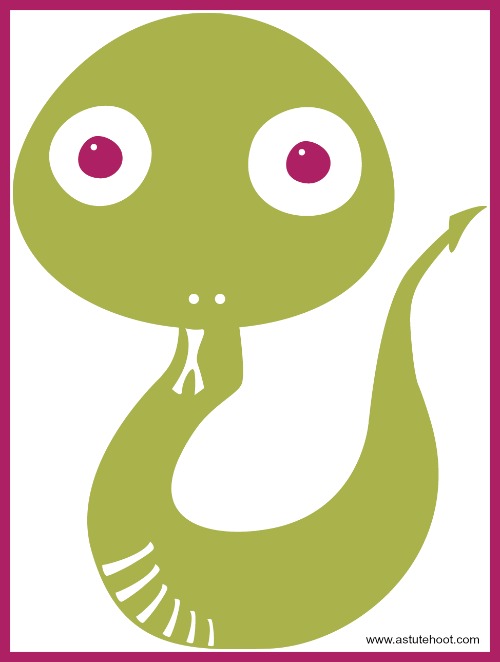
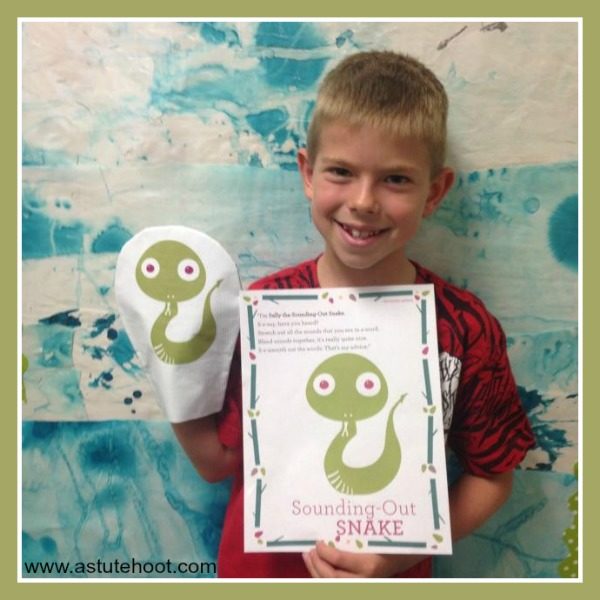
Sally the Sounding-Out Snake is one our decoding strategy animals in Hazel’s Reading Roost. Sally motivates students to practice critical early decoding skills. Read more about Sally’s strategy below…

WHAT is sounding-out? Sounding-out, or decoding, is the process of translating print into speech by rapidly matching a letter or combination of letters (graphemes) to their sounds (phonemes).

WHY is sounding-out important? Sounding-out, or decoding, is important because it is the foundation on which all other reading instruction builds. Proficient readers need to be able to segment words and hear individual phonemes in words. If students cannot decode words their reading will lack fluency, their vocabulary will be limited and they will struggle with reading comprehension.

HOW do I teach sounding-out? Explain that Sally helps readers decode unknown words by stretching the words out by sound and putting the sounds together to make a new word. Teach specific patterns to help students decode efficiently.

  • CVC: Words with the consonant-vowel-consonant pattern (e.g., run, sad, beg, fit)
  • Double consonants: Words with the double consonants f, l, s, or z pattern (e.g., puff, bell, kiss, fuzz)
  • Vowel consonant –e: Words with a long vowel sound, spelled with one vowel and one consonant and a final silent e (e.g., date, bike, cone, rule)
  • Blends: Words with a group of consonants whose sounds blend together (e.g., slim, flag, grip, crib)
  • Digraphs: Words with a pair of letters representing a single speech sound such as sh, ch, th, wh (e.g., shed, chin, math, whip)
  • Vowel –r: Words with the er, ir, or, ar, or ur pattern in which vowel pronunciation changes before /r/ (e.g., park, term, dirt, hurt)

Rather than teaching phonics patterns solely in isolation, integrate direct instruction with time for application of the skill in authentic literature. Practice many examples of each pattern to achieve mastery of that pattern before moving on to the next. In addition to using strategies such as dictation, marking words and flashcards, push students to find words with targeted patterns in literature and use those words in their writing.

We recommend using our Sally Sounding-Out Snake resources as a supplement to a research-based, multisensory phonic program that includes structured, explicit, systematic, cumulative instruction. Although we do not endorse a specific program, our students have demonstrated great success using the Wilson Language System and the Spalding Method. Read reviews of specific literary programs at What Works Clearinghouse.

WHEN should I use sounding out?
Explicit reading strategy instruction should be included in a balanced literacy program. Sally Sounding-Out Snake can be incorporated into various components of literacy lessons. Here are some specific examples of when to use Sally:

  • Guided Reading: Introduce or review the sounding-out strategy by reading the Sally Sounding-Out Poem. Read aloud your selected guided reading text and model using a Sally Sounding-Out Slates to decode unknown words in context. Call on individual students to practice using Sally’s Slate with additional words. Encourage students to use Sally Sounding-Out Snake’s strategy when they are reading independently as well.

Sally Sounding Out Snake Puppet

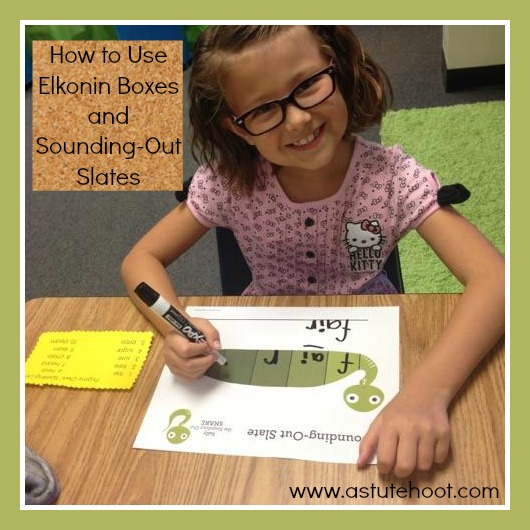
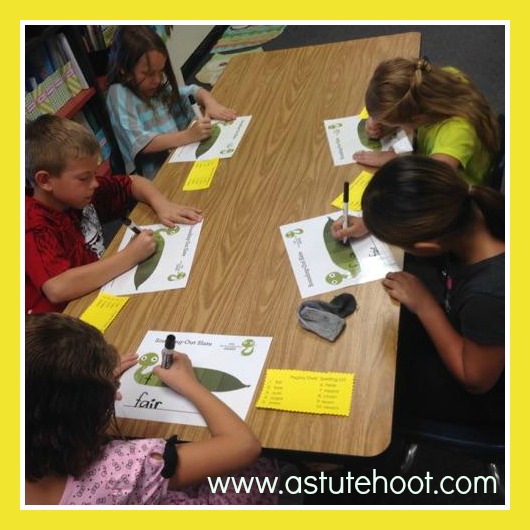
  • Phonics Fun: Choose several one-syllable words from a weekly spelling list or phonics word study list. Guide students through verbally segmenting, or stretching out, the sounds of the word. Then have students write each individual sound (phoneme), in one of Sally’s scales on laminated Sally Sounding-Out Slates (see below). Last, students write the entire word on the line and blend the sounds together to read the entire word.

Guided Reading.blog

  • Independent Practice: This unit contains a set of reproducibles for each phonics patterns, including sounding-out worksheets, flashcards and sentence writing practice. Copy and distribute appropriate materials for independent practice or homework activities. As an extension activity, direct students to find words with a specific pattern in authentic literature or leveled texts and record them on the Sounding-Out Snake reproducibles.
Helpful hints:

  • Create a class set of Sally Sounding-Out Slates. Print slates onto cardstock using color printer and laminate. Distribute to class and explain specific procedures for using the slate (e.g., write one sound in each scale; no doodling, etc.). Use the slates to provide opportunities for strategy practice and application. They are perfect for spelling words, targeted phonics patterns or syllabication practice in a whole group, small group or one-on-one setting. These slates keep students actively engaged and serve as an informal assessment.
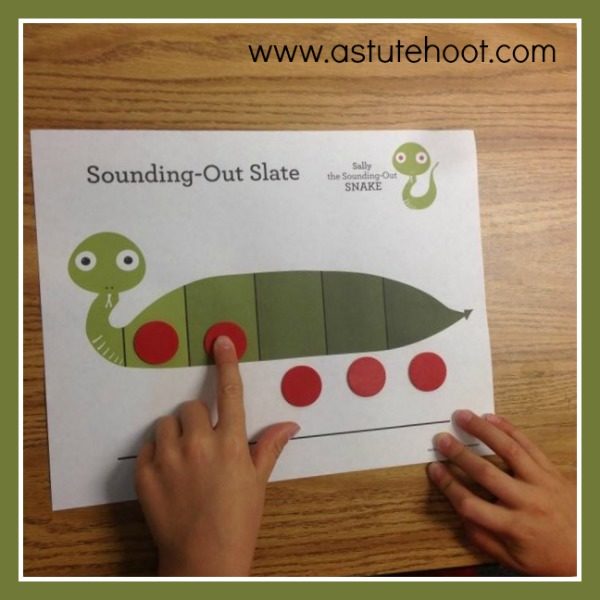
  • Use the Sally Sounding-Out Slates as Elkonin Boxes. Elkonin boxes are an instructional method used in the early elementary grades to build phonological awareness by segmenting words into individual sounds. Each box represents one sound or phoneme of a word. On the Sally Sounding-Out Slate, each scale is a box. To use Elkonin boxes, a student listens to a word and moves a token into a box for each sound or phoneme. In some cases different colored tokens may be used for consonants and vowels or just for each phoneme in the word.

Elkonin Box.blog

  • Incorporate multisensory components. Introduce a variety of ways to segment or sound-out words.
    • Visual: Using the Sally Sounding-Out Slate, have students draw a scoop under each scale, reading the sound (phoneme) aloud as they draw.
    • Auditory: Prompt students to clap each part of the word to segment the phonemes as they say the word aloud.
    • Tactile: Refer to the Elkonin box strategy listed above.
    • Kinesthetic: Break apart the word and jump each sound or phoneme. Demonstrate how the number of jumps is equal to the number of sounds.

Sally’s unit is perfect for general education, special education, RTI and reading intervention.  Download the complete unit here.

Microsoft Word - Sally Sounding Out Snake.Preview.doc

Jennifer_blog_signature-SMALL

Create Your Own Magical Guided Reading Strategies Roost

Do you love our reading strategies animals but aren’t sure how to incorporate into your classroom theme? It’s as easy as 1, 2, 3! You don’t need to have an owl or woodland theme at all.  Create your own personalized Guided Reading Roost in 3 easy steps:

Hazel's Reading Roost collage 2

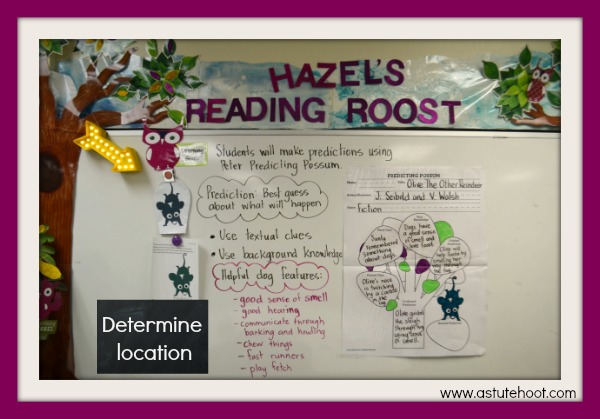
1. Determine Reading Roost location: Display reading strategy animals in a prominent location near the guided reading table, carpet area, or on a large, central bulletin board.

Determine location

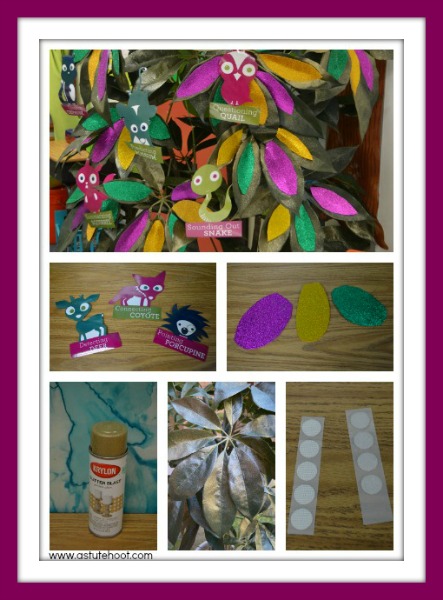
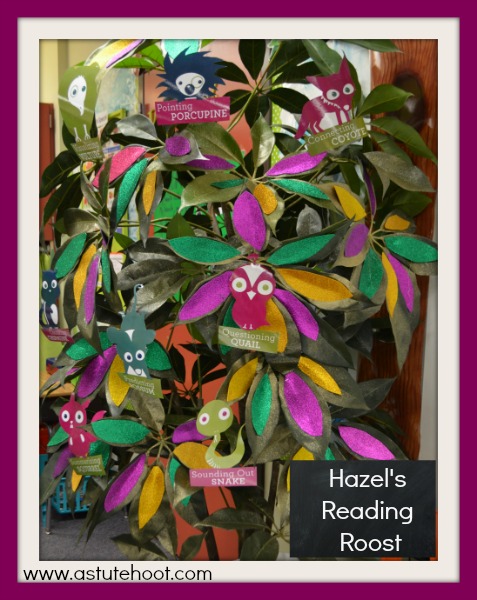
2. Create the magical tree: There are many ways to create the magical tree in the reading roost. Purchase a silk tree from local craft store or garage sale to use as the focus of the Reading Roost.

Create a magical tree

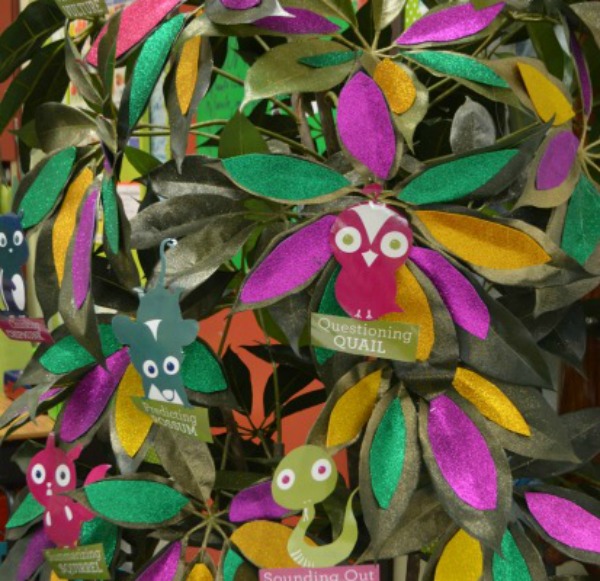
Lightly dust with gold glitter spray paint and cut out glitter foam leaves for a magical look.

Magical effects

Hazel's Reading Roost 2

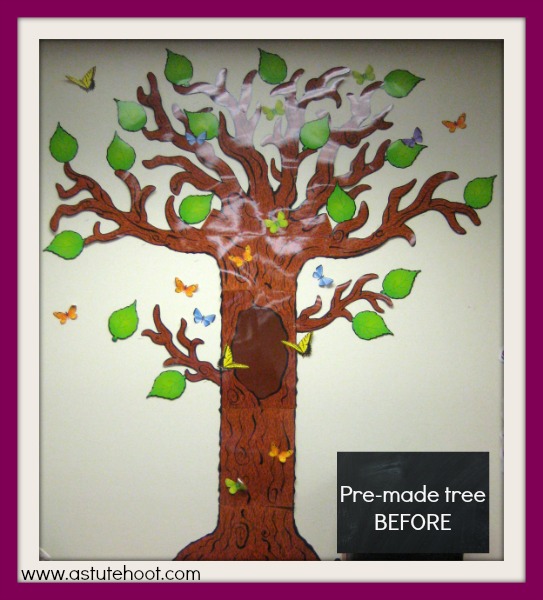
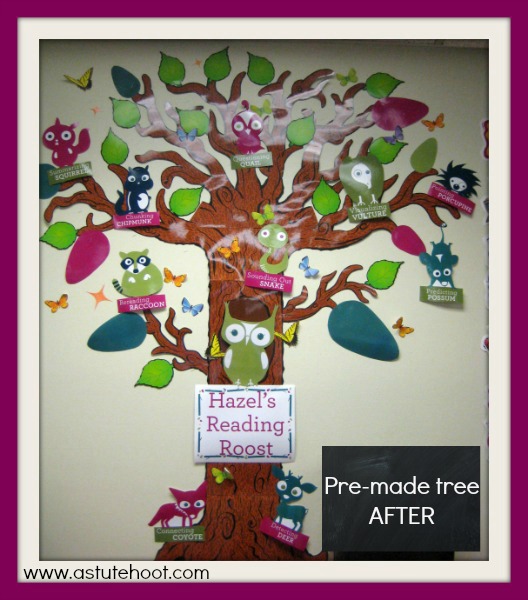
Use a pre-made tree like this one from Really Good Stuff. Simply purchase and assembly; add extra leaves as desired.

Pre-made tree before

Premade tree after

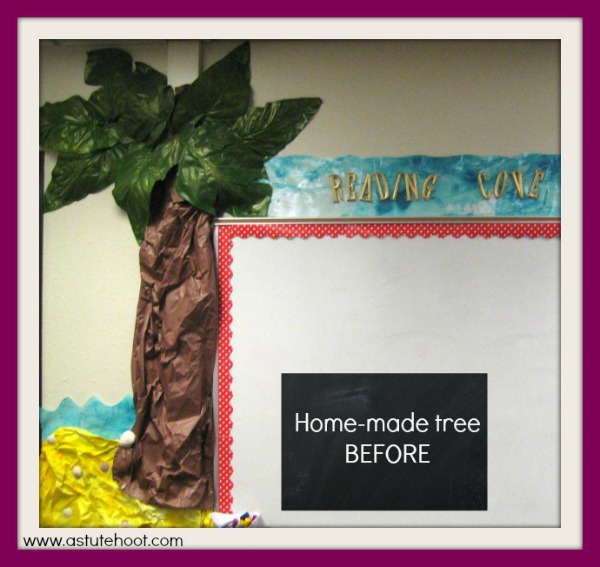
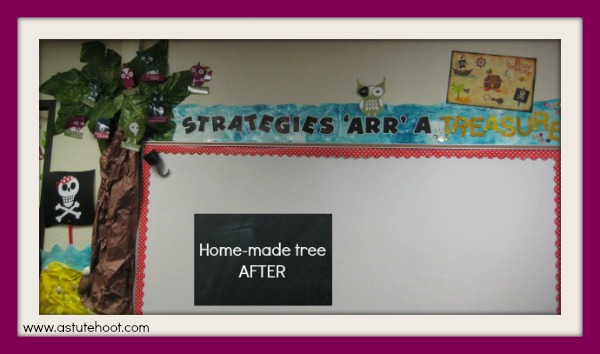
Make your own tree by crinkling brown butcher block paper to make a large, textured trunk and branches.  Add green butcher block paper leaves or purchase fabric leaves from local craft store to complete the look.

Homemade tree BEFORE Home-made tree AFTER

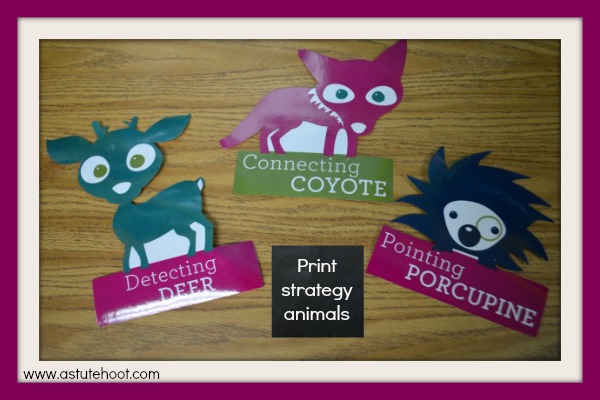
3. Print strategy animals: Use a color printer to print reading strategy animals on thick, durable cardstock and laminate for durability.

Print strategy animals

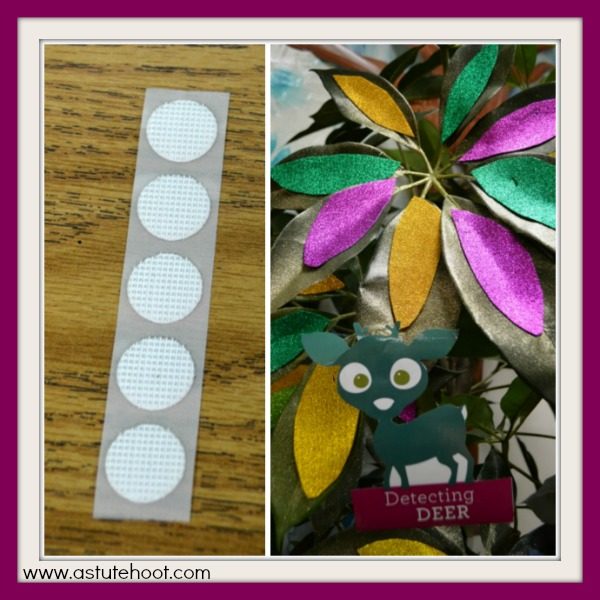
Place self-adhesive Velcro to the back of each animal and accompanying place where each animal lives (i.e., leaf or branch of Reading Roost tree). This allows you to pull appropriate strategy animal(s) to greet the students and teach the lesson.

Add velcro

Here are a few helpful tips to make our reading strategy animals fit into any “habitat” or classroom theme:

1. Pick a tree that works with your classroom: My classroom has a woodland theme, so the silk tree with the large, green leaves works perfectly. However, if you have a jungle, pirate, nautical, or tropical theme, a palm tree would be best for your roost. Trees are an integral part of most habitats and locations so it is natural to see one in any type of setting.

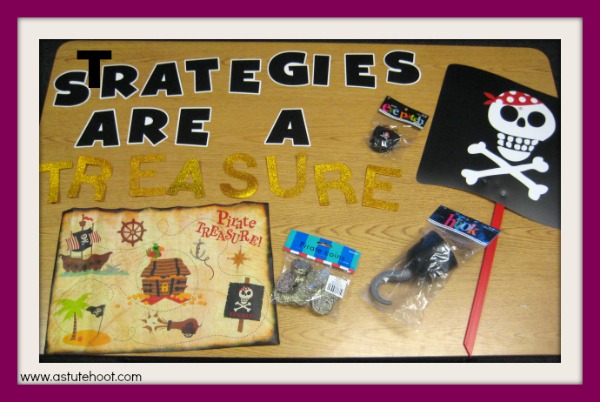
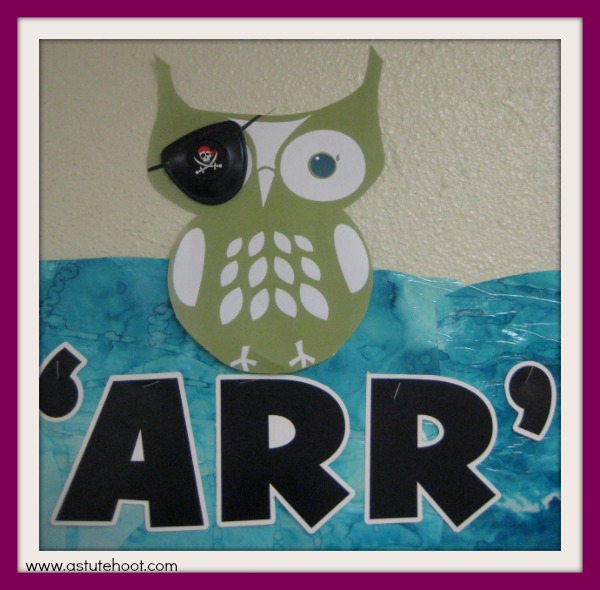
2. Add your own touch: Add minimal, themed items to enhance your tree. For this pirate themed, classroom, I found a variety of fun decorations at Hobby Lobby and added them to give it a personal touch.

Pirate accents

Hazel’s eye patch is my favorite feature! This pirate-themed Reading Roost is just one of the many possibilities.

Pirate Hazel

Other suggestions to incorporate into popular classroom themes include:
Ocean – Make a tropical palm tree and add shells and beach decor around base of tree with the saying, “A Sea of Strategies”
Bees – Add a bee hive to tree and hang a few buzzing bees around the tree with the saying, “We Are Buzzing With New Strategies!”
Sports -Add a few balls or sports-themed items around the tree with the saying, “Strategies Are A Ball!”

Get creative and think outside the box! Download our Guided Reading Strategies Bulletin Board Set to get started. Need suggestions or ideas to get started? Email me at jessica@astutehoot.com — I would love to help you bring the magical world of Astute Hoot to your students too!

Check out our complete reading strategy units here along with our hands-on resources and posters available from Really Good Stuff.

Jessica_blog_signature-SMALL

Whooo’s Hazel?

Hazel Hoot, an adorable green screech owl, is a struggling learner as she lacks the strategies needed to help her succeed. In our charming book, Hazel Meets the Reading Strategy Friends, Hazel stumbles upon a magical tree in the forest.

Magic Tree

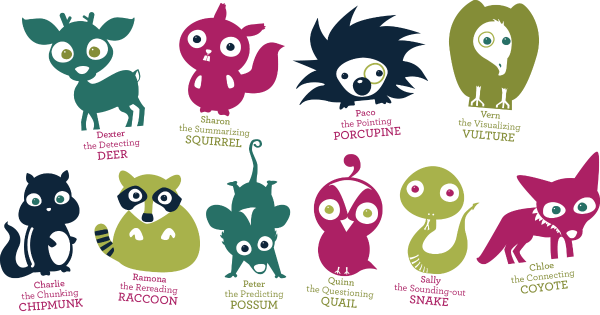
Out of the tree appear 10 colorful woodland animals that each introduce a research-based, standards-aligned reading strategy. These animals guide Hazel to become a proficient reader.

Astute Hoot's Reading Strategy Animals

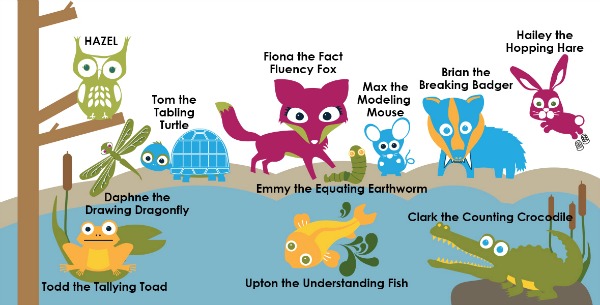
In the sequel, Hazel Meets the Math Strategy Friends, Hazel swoops down to catch her dinner at the local pond when she grabs Upton, an enchanted fish.

Hazel's Problem-Solving Pond

Upton oversees Problem-Solving Pond and promises to introduce Hazel to his animal friends, all who teach a special problem-solving strategy. Using these strategies and Upton’s guidance, Hazel blossoms into an accomplished mathematician who is able to tackle problems with ease.
Problem-Solving Pond

Astute Hoot’s unique cast of strategy animals make learning safe and fun while teaching critical strategies in a child-friendly way. Students make an immediate connection to the animals and relate to Hazel’s struggles. These delightful animals and rhymed text motivate the most reluctant readers and alleviate math anxiety.

Take a glimpse into the magical world of Astute Hoot by downloading See What The Hoot’s About, a comprehensive file with samples of our most popular resources and tools. Check out our store at www.astutehoot.com for complete units guaranteed to spark enthusiasm in your classroom.

See What The Hoot's About Preview

Guided Reading Strategies That Actually Work


Guiding reading can be daunting, especially with the new instructional shifts and standards. Teachers are asking themselves such questions as: “What text do I use?” “What strategies do I teach?” “How do I keep all students engaged?” “How do I foster rich literary discussions?”

Check out our guest blog at Really Good Stuff’s Teachers’ Lounge Blog to read about four essential instructional practices to maximize guided reading time.
The Time-on-Task Chart I Can’t Live Without!

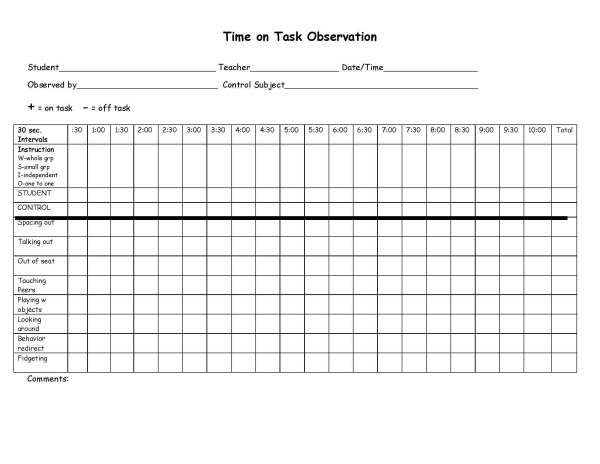
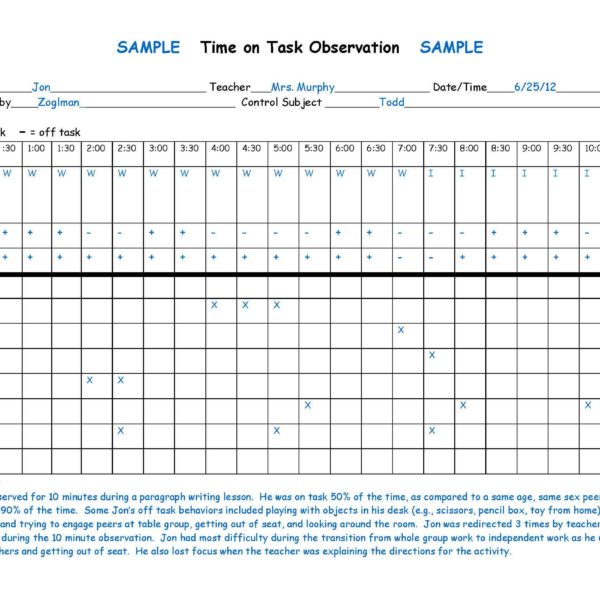
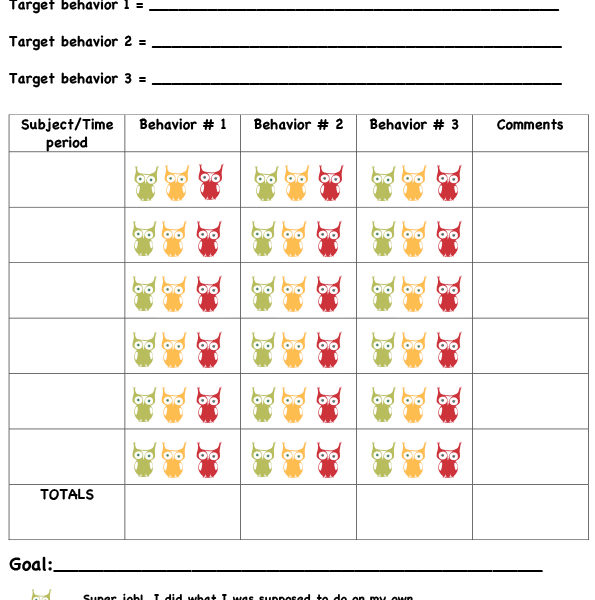
During my 14 years as a special educator, I’ve created and designed various tools, forms, and charts to support students and teachers.  This Time-On-Task Chart, however, is one of my top tools as it has enabled me to gather valuable data about student performance in both general education and special education settings. It measures behavior in 30 second intervals and tracks specific off task behaviors so teachers can easily see patterns in behavior in as little as 10 minutes.

TimeOnTaskObservationChart-1_Page_2Here are some examples of how I’ve use it throughout the years…

Pre-Referral: Data collection and documentation is an important part of the pre-referral and RTI process. This chart has been an effective tool in helping teachers gather baseline data, pinpoint patterns of behavior and determine triggers early in the process.  This information is then used to design behavioral interventions. The chart can be used to measure effectiveness of intervention and compare subsequent ratings to the baseline rating.  Furthermore, since time-on-task data is collected for a control subject as well, important information about the classroom environment, management, or teaching style is gained.  For example, if the control subject’s time-on-task behavior is just as low as the target child’s time-on-task, then perhaps there is an issue with the learning activity or behavioral expectations being provided during that time.

Evaluations: Classroom observations are critical components of multidisciplinary evaluations. I’ve used this chart to collect data and gather important information about how a child functions in the classroom for every single evaluation I’ve completed. I am able to provide concrete data regarding classroom functioning and on-task behavior which helps to provide a holistic picture of the child.

IEP Progress Updates: For students who have time-on-task or classroom functioning goals, I’ve used this chart to regularly progress monitor and update IEP goals.  It allows me to provide a concrete percentage of time-on-task, along with information about specific behaviors, learning tasks, grouping arrangements which impact student behavior.  I’ve also charted the data and shared with students and parents.  Students love to see when they make improvements!  If a student is not making progress, it is a great opportunity to discuss challenges and make necessary changes with them.  This helps to increase ownership and responsibility.

Behavior Intervention Plan: Data collected from the time-on-task chart provides key information about antecedents, behaviors, and consequences in authentic classroom settings. Since data collection is quick and easy, frequent data points can be collected throughout the day or week to measure effectiveness of behavior intervention plans.

Communication with Parents: In addition to sharing information about time-on-task behavior on formal IEP updates, I’ve also used this data during conferences and informal check-ins with parents.  Parents have also reported that this information was helpful to share with outside counselors and doctors to assist with ADHD diagnosis and monitor effectiveness of treatment and/or medication.

Directions
This easy-to-use documentation tool can be used by special educators, general educators, paraprofessionals and related service personnel.

1. Choose a target student to observe and a control subject (same age,same sex peer) to which to compare the student.
2. Indicate type of instruction: W-whole group, S-small group, I-independent, O-one to one for each interval of the observation.
3. Use a watch or stop watch to track the time. At every 30 second interval, either mark + for on task behavior or for off task behavior.
4. If the student is off task, indicate the specific off task behavior in the chart.
5. Total up data and calculate percent to determine total time the student was on task.
6. Use comments below to note additional observations and anecdotal data.

TimeOnTaskObservationChart-1_Page_1Download our Time-on-Task chart today!  Available on TPT and here. 

Don’t just take my word for it though…Here’s what others have said about this chart as well:


“Perfect! Just what I was looking for. Great observation form.” ~Jill Y.

“This is an excellent tool! I’ve used it for three students today! Very helpful…thanks!” ~Bill J.

“Exactly what I was looking. Thank you for saving me the time :).” Julie W.

“Really handy form to have to use for observations.” ~Renee R.

“I had my principal use this during one of my observations! It also gave me concrete data to take to my RTI meeting.” ~Marecela W.


Thanks for stopping by!

Jennifer_blog_signature-SMALL

Informational Text is a Hoot!

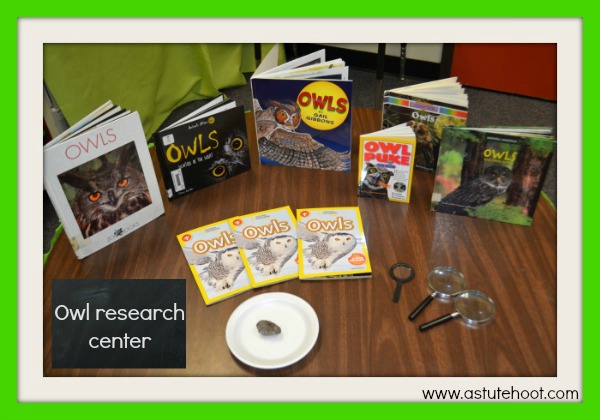
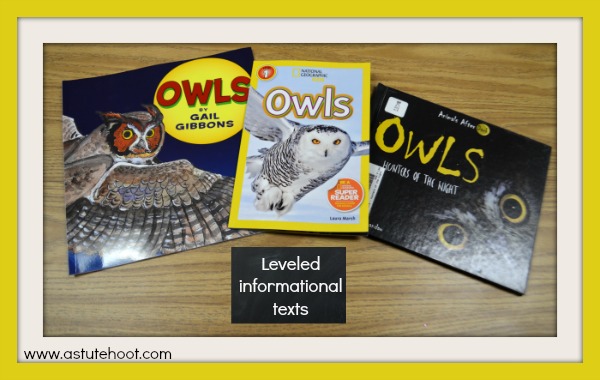
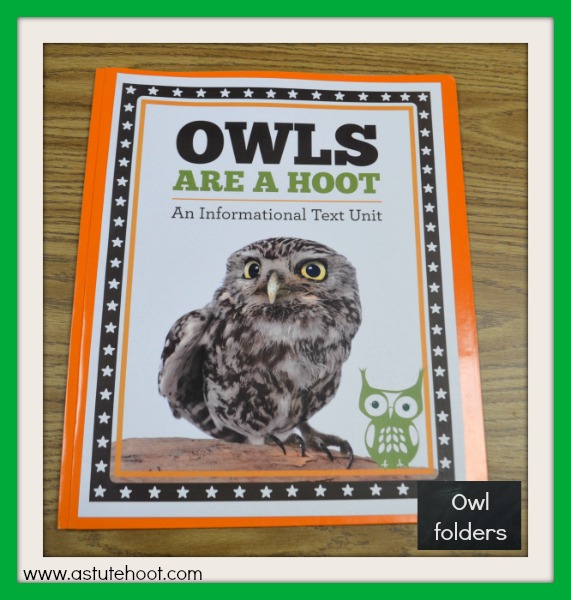
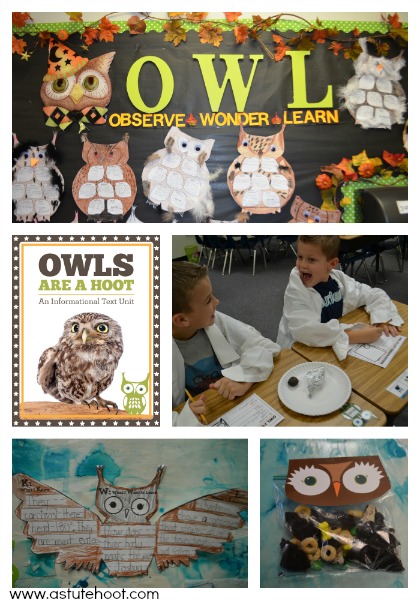
One of my New Year’s Resolutions is to incorporate additional informational text and shared research into my classroom so I created Owls Are A Hoot: An Informational Text Unit to meet these these needs in an engaging way. Before the unit, I gathered a variety of leveled informational text sources, purchased owl pellets from amazon.com and created these cute owl folders to hold student work. I set up a an owl research center as part of our daily reading rotations.

Owl research center

Leveled informational texts

Owl folders

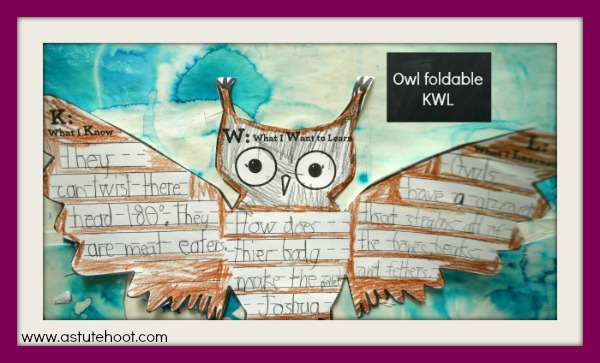
Before starting the unit we brainstormed a list of questions and students completed a foldable KWL owl.

Owl foldable KWL

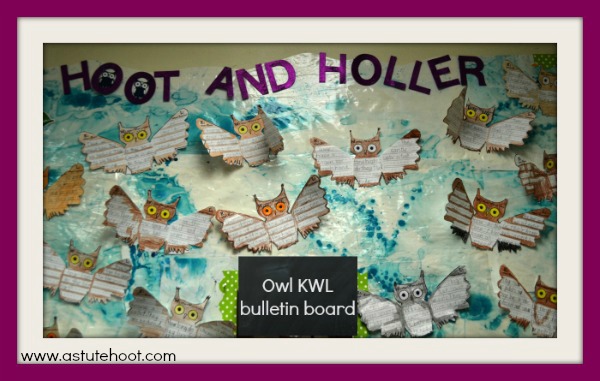
Owl KWL bulletin board

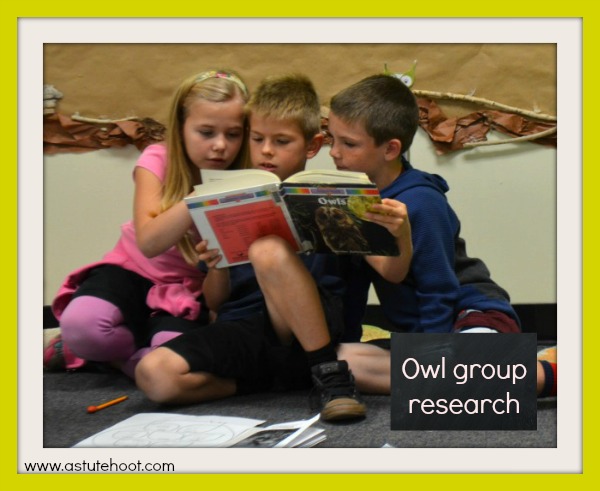
During reading time, I grouped students by instructional level. I provided a variety of owl informational text sources including brochures, books, poems and magazine articles. The sources provided were at a variety of levels–most were at students’ instructional level, but I also included more challenging text to increase stamina and push students to read complex text. I’ve found that when students read high-interest text, they are motivated to tackle difficult text, even if it is slightly above their level.

Owl research 1

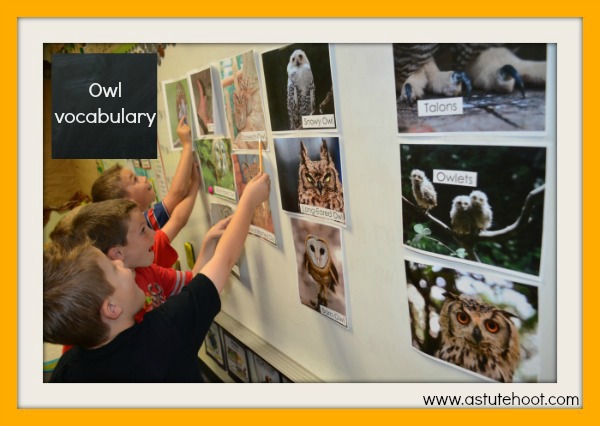
Owl vocabulary

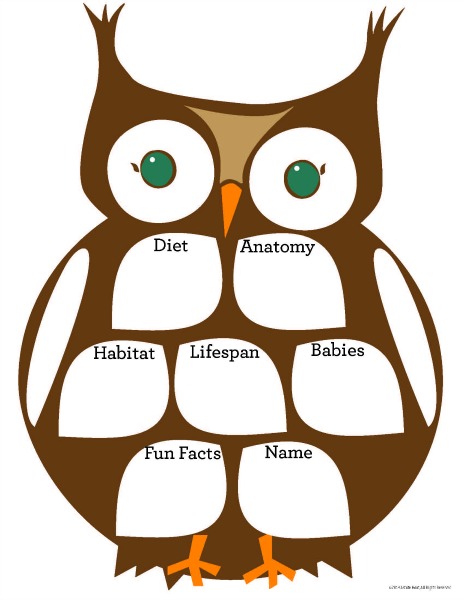
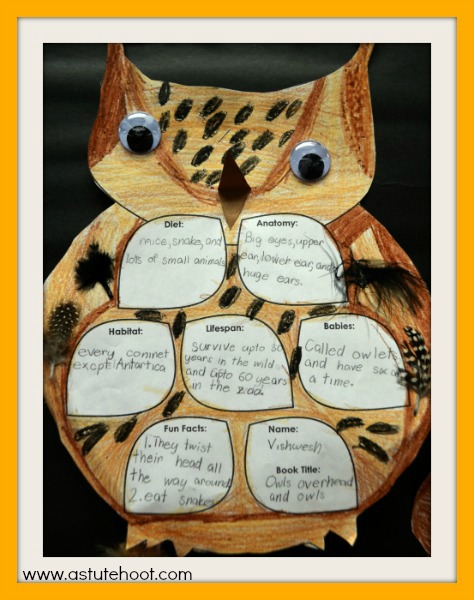
Students read to find answers to their owl questions, citing textual evidence with owl pointers. They recorded their information on the owl report template.

Owl pointers

Owl graphic organizer

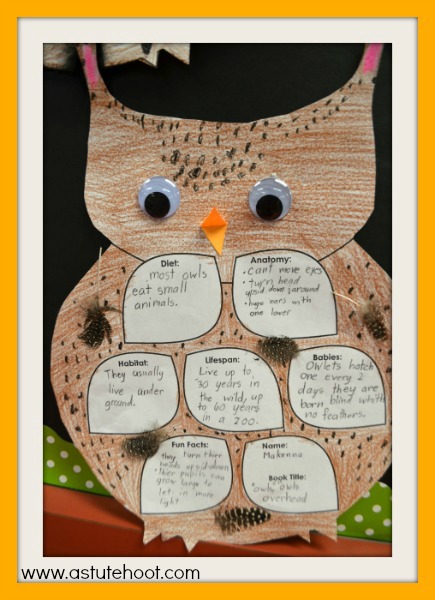
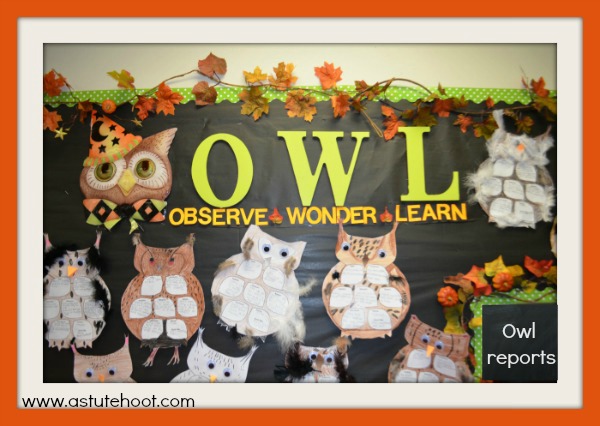
Students edited and published their own owl report, adding craft feathers and googly eyes after completion.

Owl report 2

Owl report 3

Owl reports

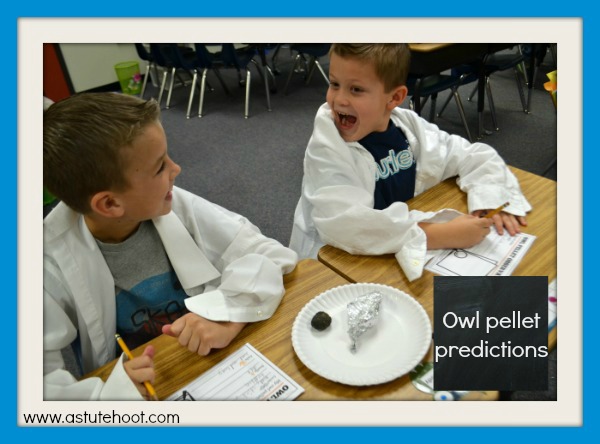
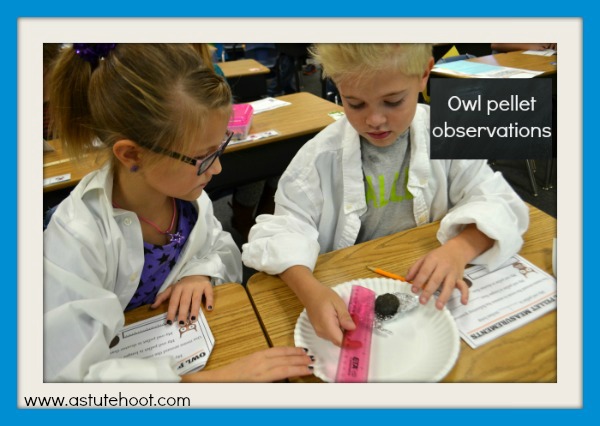
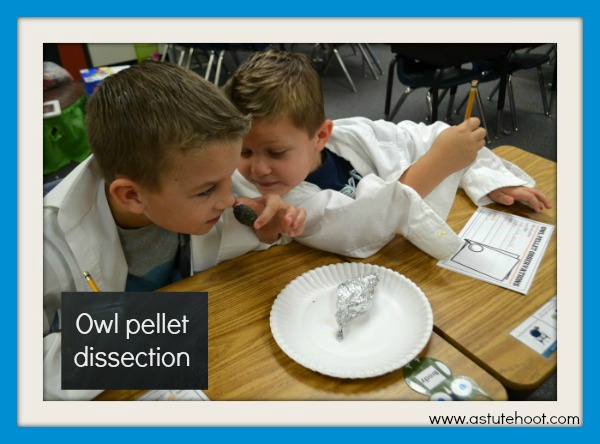
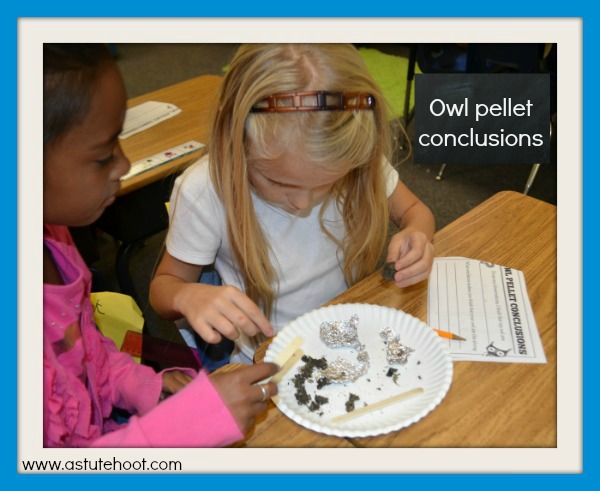
During science time, students worked in groups of 2 to dissect an owl pellet. They formed hypotheses, discussed observations and recorded conclusions in their own Owl Pellet Investigation Book (included in the unit). I gave them ‘lab coats’ (a.k.a. men’s white button down dress shirts) to wear during the investigation which they absolutely loved!

Owl pellet predictions

Owl pellet observations

Owl pellet dissection 1

Owl pellet conclusions

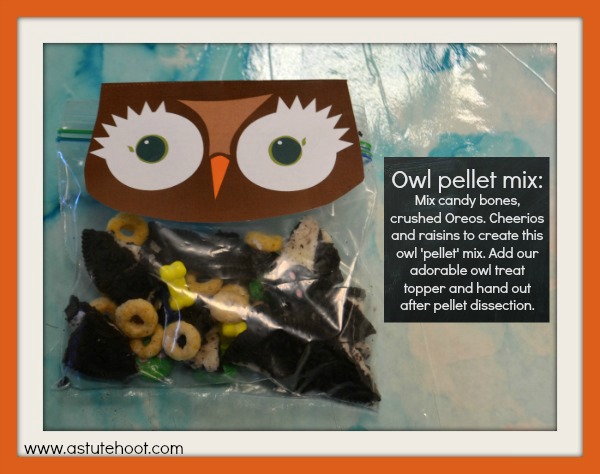
After a thorough hand-washing session, I passed out these owl pellet snack bags using the owl treat bag topper included in the unit.

Owl pellet mix

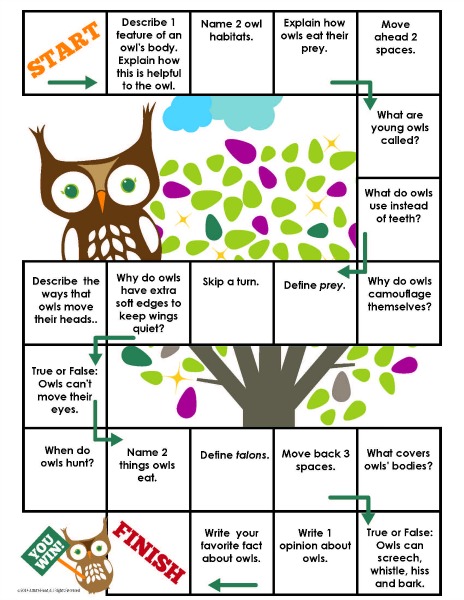
As a culmination to the unit, students played an owl review board game. Students answered all questions on white boards, citing textual evidence to support answers.

Owl Game 1

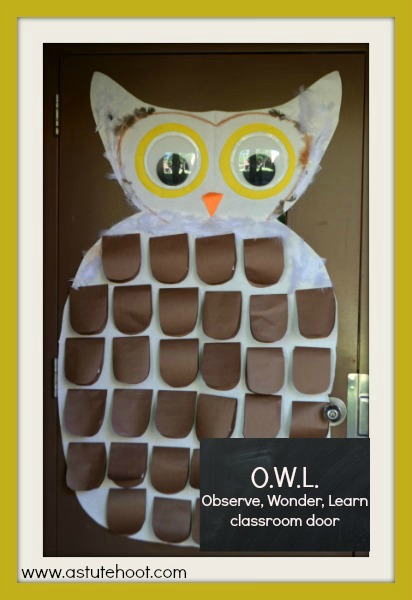
Students had so much fun and learned so many new facts during our owl study. I wanted to display this in an engaging way so I created our O.W.L: Observe, Wonder, Learn door.

OWL door

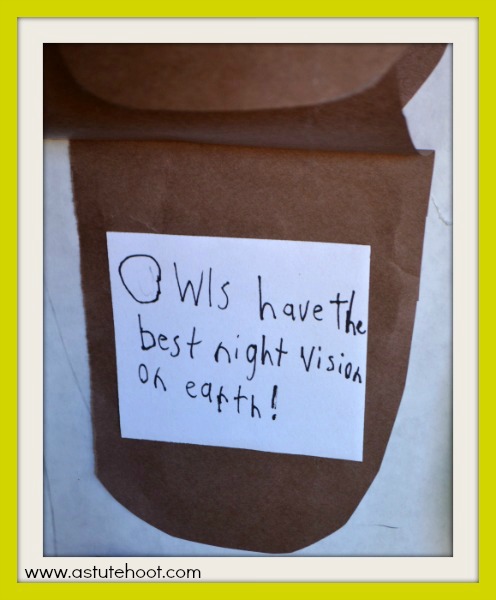
I started with a large piece of white butcher block paper and sketched the owl using a projected image from my document camera. I used white paper because my classroom door is brown and I wanted a contrast between the two. I added large googly eyes (from Target dollar section) and colored craft feathers. I then cut brown flap feathers to hold and display our new facts. After completing the L from our KWL foldable owls, I had each student write his/her new fact(s) on a white square and glue inside one of the brown feather flaps. I then glued all of the brown feather flaps on the owl and used a glue gun to adhere the owl to our classroom door (don’t tell the janitor).

Owl Q&A door 2

Students, teachers, and parents have all stopped by and read our facts as they pass by our classroom. My students are so proud when they see someone stop to read our owl. This was a powerful closure activity, one that my students will always remember.

Download the complete unit to get your students to hoot and holler over informational text and shared research!

Owl Informational Unit


Check out some other great lessons linked up on the “Loved that Lesson” Linky!
http://www.theteacherstudio.com/2015/01/loved-that-lesson-january.html


Jessica_blog_signature-SMALL


Olive the Other Reindeer to the Rescue!


There are still a few more weeks until winter vacation, but Santa, stockings and sugar are the focus of children’s minds! Olive the Other Reindeer is coming to the rescue! Our adorable  Olive the Other Reindeer Unit will capture students’ attention while engaging them in integrated reading and writing activities aligned to Common Core Standards.  Olive the Other Reindeer is one of my favorite holiday books and my students always come to love Olive each year too!

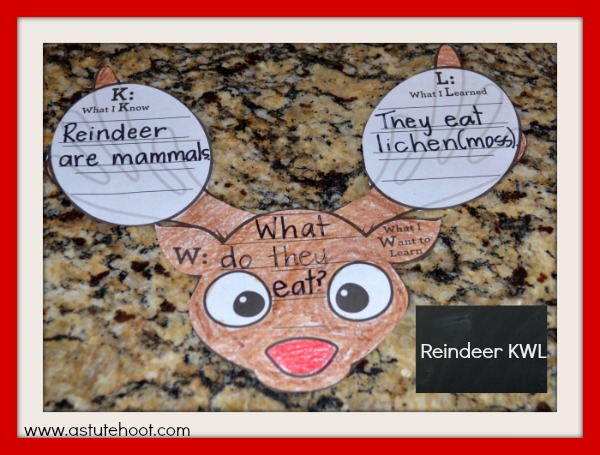
Activate background knowledge and build excitement: To begin the unit, make a foldable reindeer KWL. Discuss why it is important to think about what we know before starting a lesson, ask questions about what we want to learn and summarize our learning at the end of the unit.

Introduce key vocabulary terms: Teach key vocabulary terms using vocabulary anchor charts and accompanying graphic organizer.

Olive the other reindeer vocabulary

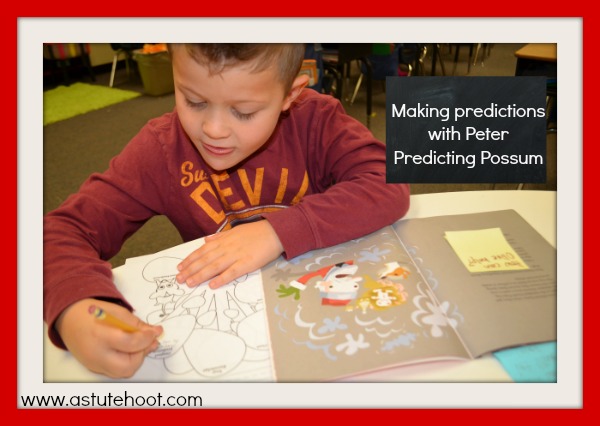
Make predictions with Peter Predicting Possum: Teach students how to make predictions using background knowledge and text features and use textual evidence to confirm or revise predictions.

Making predictions with Peter

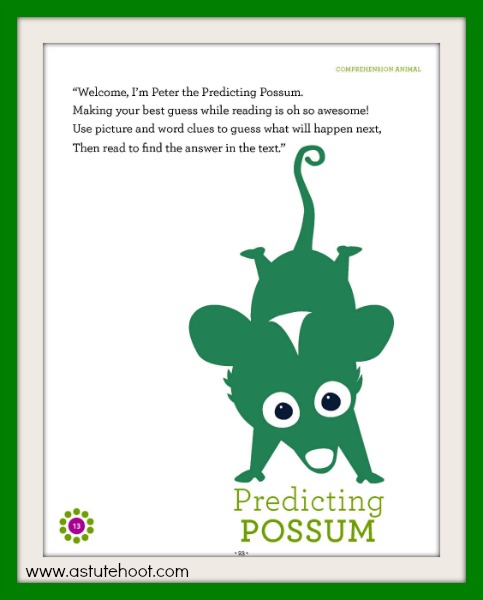
Introduce Peter Predicting possum and read his poem to teach predicting strategy. Explain that good readers make predictions before and during reading. They stop to confirm or adjust predictions based on evidence from the text. This makes reading more enjoyable and helps build comprehension.

Peter Predicting Possum Poem

Model prediction strategy by using the cover of the book. Think aloud as you explain, “I’m reading the title, Olive the Other Reindeer and looking at this picture. I see a dog hanging from a sleigh, but I know that reindeer guide Santa’s sleigh. I think that Olive is a dog who will serve as a reindeer on Santa’s sleigh. I will have to read to see if my prediction is correct.As I read, I will look for clues and evidence that support my prediction or will help me change my prediction. Then read the first two pages of the text and discuss. “Based on what I’ve read, I am going to confirm my prediction. Olive thinks the song says, ‘Olive, the other reindeer’ and so she thinks she is a reindeer.

Make predictions on the following pages:

  • Read until Olive gets to the North Pole just in time. Make a prediction–will Olive join the sleigh? Ask students to support prediction using clue from the text. After confirming that Olive will join Santa’s sleigh, brainstorm a list of dog behavior and discuss how these behaviors might be helpful to Santa.
  • Read until the sleigh crashes into the tree. Have students read the first 3 paragraphs of the page and discuss. Refer back to dog’s behavior list and ask what behavior might be helpful in this situation Students will make a prediction and then pull Post-It to read, confirming or revising prediction.
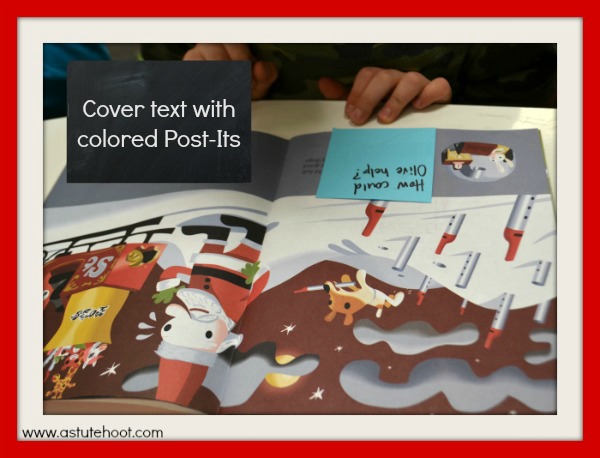
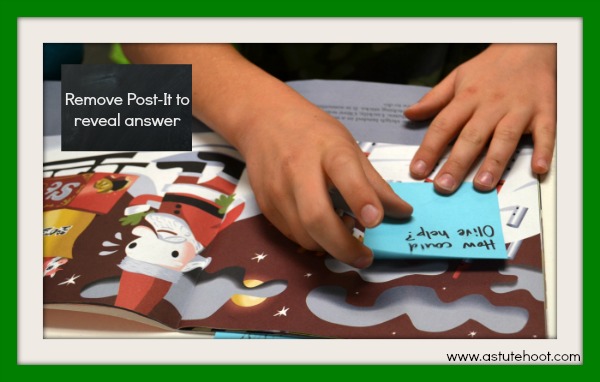
  • Turn the page and show students only the picture of falling gumdrops. (You can cover the text on opposite page with a large Post-It.) Use background knowledge about dogs to help make a prediction about how Olive will keep the sleigh safe from falling gumdrops. Remove Post-It, confirming or revising prediction.
  • Turn the page and have students stop right before, “Olive had to howl louder than the wind instruments. Cover this sentence and rest of text on page. Repeat prediction process using background knowledge.
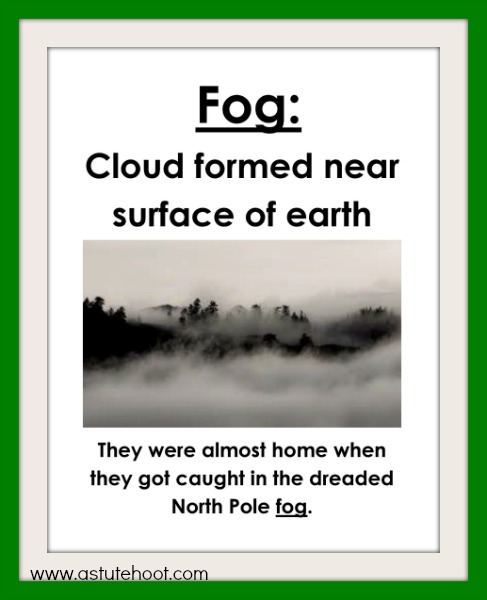
  • Read the first paragraph on the page with North Pole Fog (the rest of the text should be covered). Repeat prediction process. Lift Post-It, read and confirm or revise prediction.
  • Read the last page and have students stop right after, “There was just one present left. It was for Olive.” (The rest of the text should be covered). Repeat prediction process.

Cover text with Post-Its

Remove Post-It to reveal answer

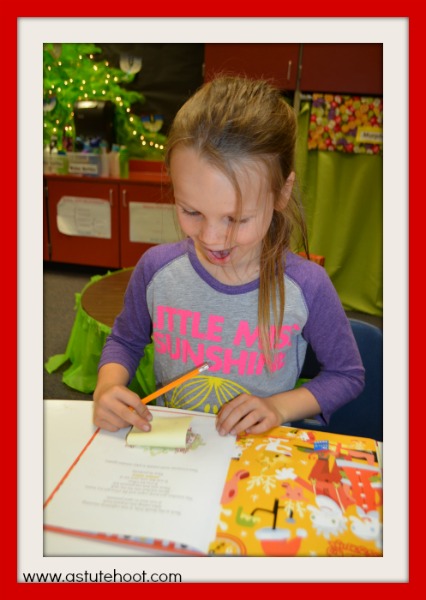
Students’ reactions are priceless as they reveal the Post-It to confirm or revise prediction.

Prediction reactions

Prediction reactions 2

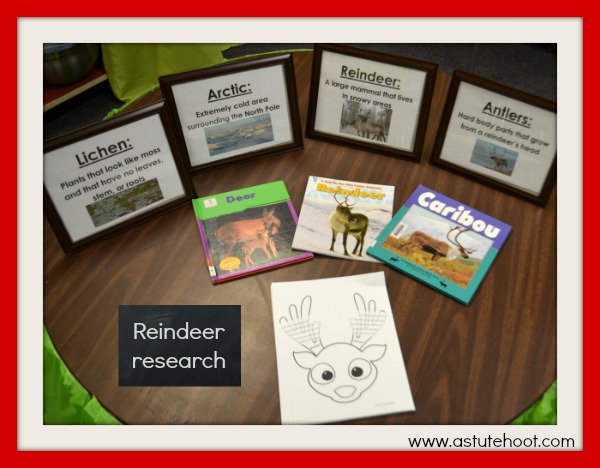
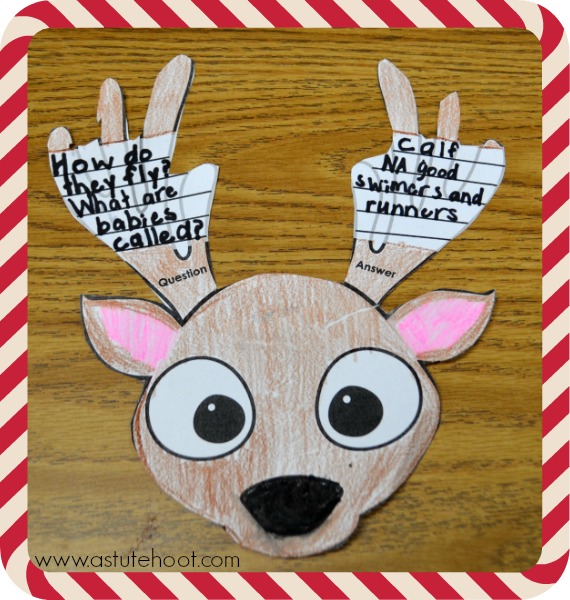
Integrate informational text: Each student uses his/her question from KWL reindeer and records it on the question and answer reindeer printable. I set up a reindeer research center with key vocabulary terms and leveled reindeer text where students can read and research to answer the question.

Reindeer research

Reindeer question and answer

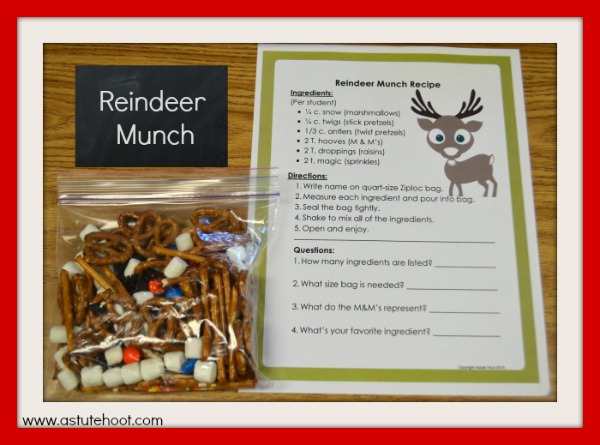
Have fun: Students can read and follow directions to make Reindeer Munch while practicing key measurement skills.

Reindeer munch

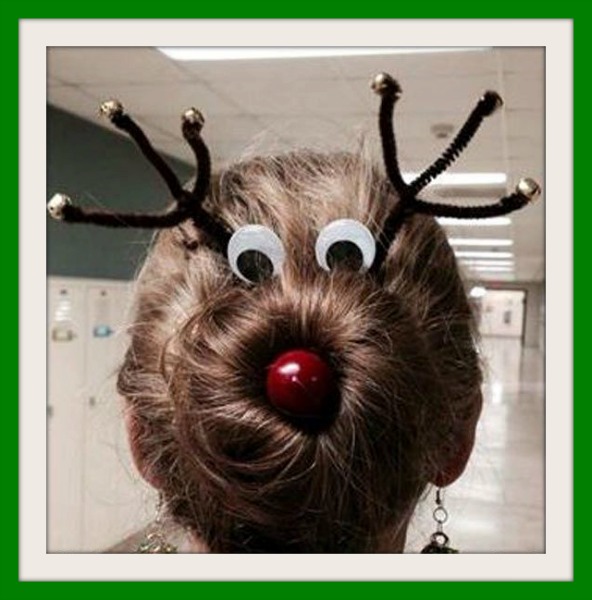
Wear your hair in a bun and add googly eyes, pipe cleaner antlers, and a red pom-pom for a festive hairdo.

Reindeer hair

Download our complete Olive the Other Reindeer unit and Reindeer In The Room Holiday Behavior System to bring these ideas to life in your classroom.

Jessica_blog_signature-SMALL

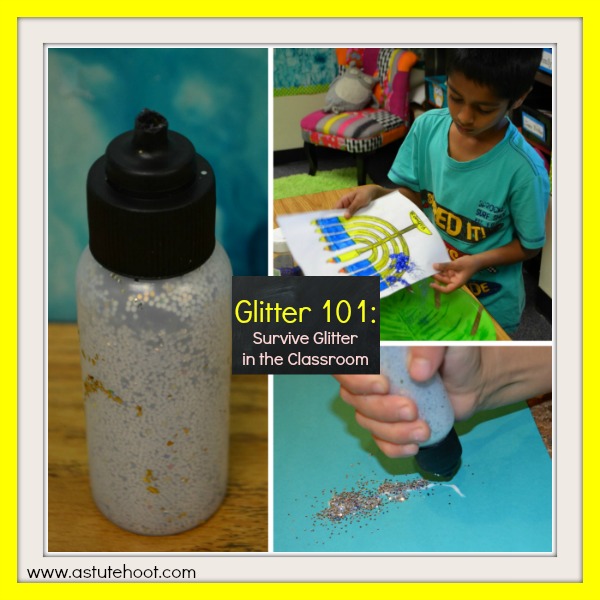
Glitter 101: How to Survive Glitter in the Classroom

For most, glitter evokes the holiday season, but for elementary teachers, just the thought makes their toes curl and sends shivers down their spines. Glitter is messy, time-consuming and ever-lasting (hence those few pesky sprinkles lingering around at the end of the year). The messiness discourages many teachers from incorporating glitter into art projects, but it is something every child should experience. Here are 6 tips to help you survive glitter in your classroom:

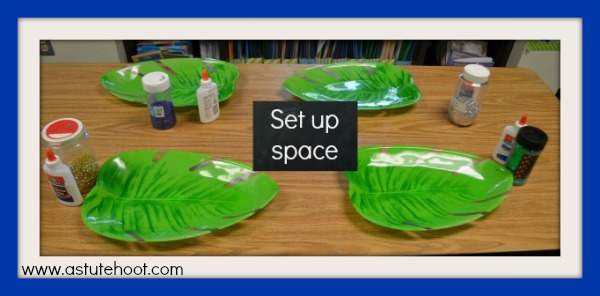
1. Set up space: Determine a large, easy-to-clean space that allows children to spread out during the glitter process. Plan a drying space within steps of the glitter location. I use my large, rectangular table by my classroom library. I pull the table away from the books, stack the chairs and place needed materials on the table. I set up a large canvas drop cloth at the carpet area (right next to the glitter table) where children place their masterpieces. The drop cloth catches any loose glitter and prevents children from walking across the room to the counter space, which is a glitter disaster just waiting to happen.

Set up space

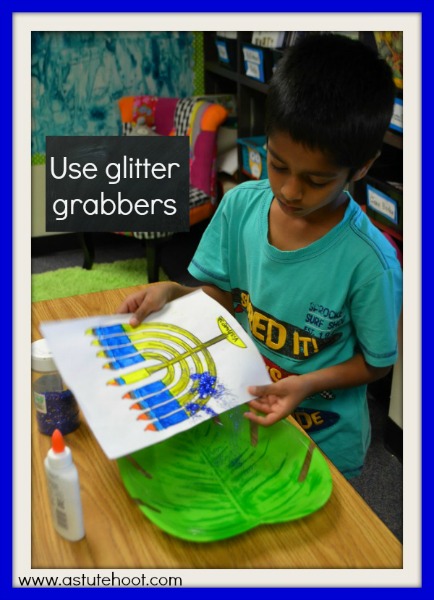
2. Use glitter grabbers: I provide children with the leaf trays (as shown in picture) or large plastic tubs to shake off extra glitter. Lunch trays, copy paper box lids, and dish pans (found at Dollar Store) are all perfect glitter grabbers. Plus they stack easily for storage.

Glitter grabbers

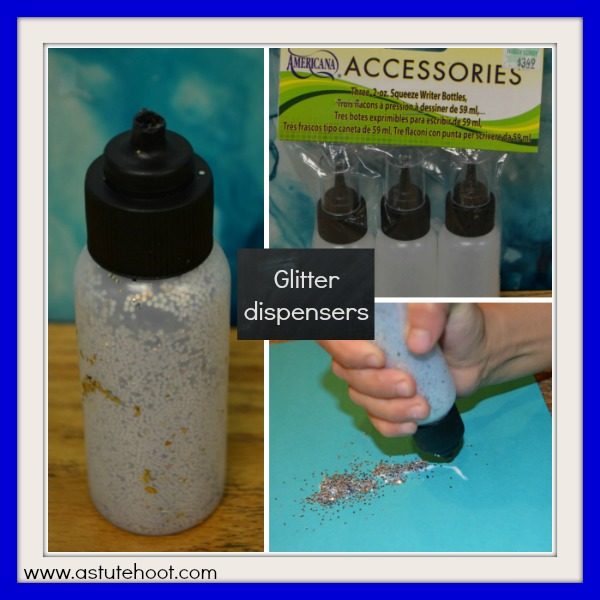
3. Make glitter dispensers: Avoid flying glitter by creating these inexpensive glitter dispensers. Simply purchase clear, squeezable condiment or paint bottles and fill with glitter. Cut the tip at the base to make a wider hole. Children squeeze glitter over desired area, providing more precise distribution of glitter.

Glitter dispenser

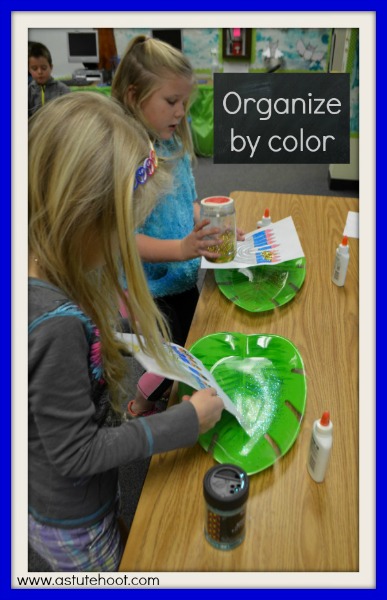
3. Organize by color: I have 4 different colors of glitter on my rectangular table and each color has its own glitter grabber.  This allows you to recycle extra glitter without creating a large container of ‘rainbow’ glitter at the end of each project.

Organize by color

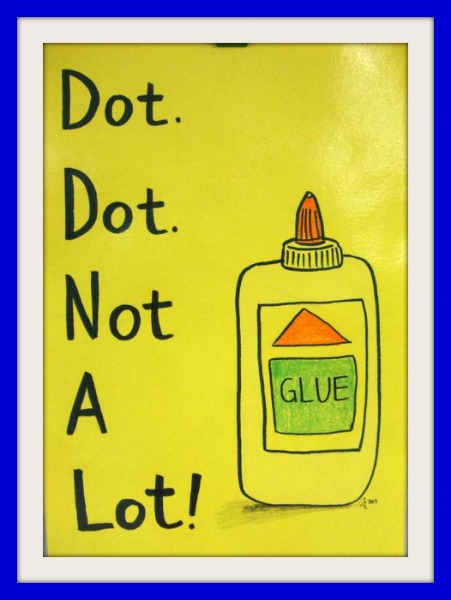
4. Modeling is a must: This week when I mentioned the words, “add glitter” my second graders squealed with joy. One child shouted, “I’ve never used glitter!” Shocked, I asked the rest of my class if they’ve used glitter before and only half raised their hands.  While planning this project, I assumed that all had used glitter, thus assuming that they all knew how to use it as well. However, as teachers we must never assume that children have required background knowledge or previous experience. Glitter, like anything else, must be modeled explicitly. I first show how to use the Elmer’s glue by saying, “Dot, dot, not a lot.” I then show how to gently shake a SMALL amount of glitter over the glue and gently shake to cover all glue spots. Then I carefully tap excess over the glitter grabber. I talk aloud through each step so children thoroughly understand each step.

Dot Dot Not a Lot

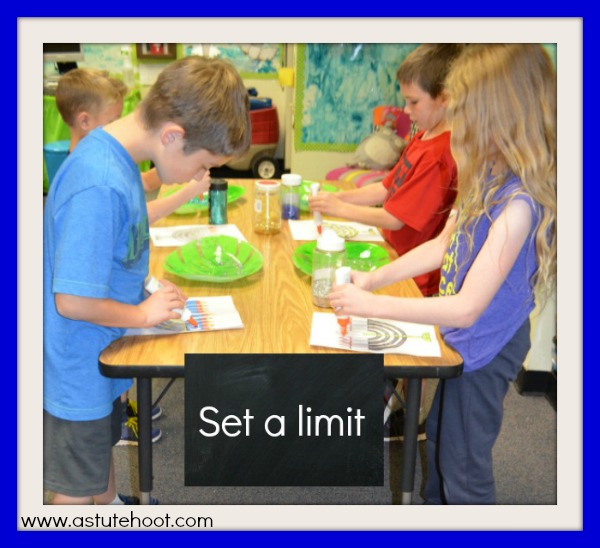
5. Set a limit: I only allow 4 children to glitter at a time; this gives students plenty of space and access to all of the necessary materials. I also set a timer and give a reminder half-way through to ensure that every child has equal glitter time. If you don’t limit the time, you will have a few who will try to spend all day there.

Set a limit

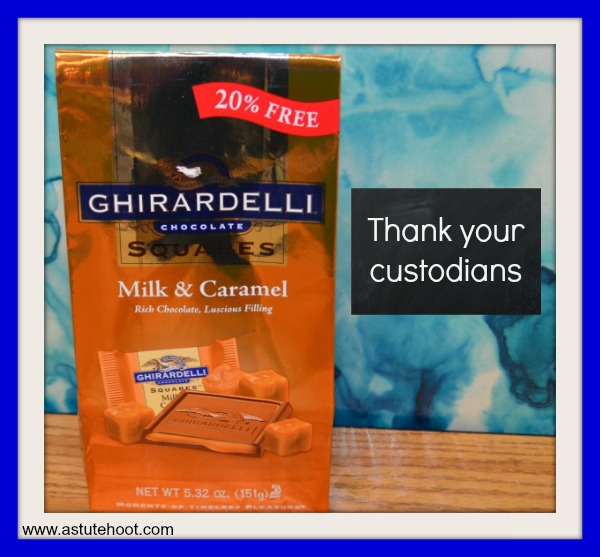
6. Thank your custodians: Even with these tried-and-true tips, children can get a little zealous with the glitter, causing a little extra work for your custodians. Let’s face it, school vacuums aren’t the most powerful machines out there. I always give my custodians a small, special treat to express my gratitude. They love this gesture and it prevents them from cursing my name after glitter sessions.

Thank your custodians

Have a glitter tip? I’d love to hear from fellow glitter gurus.

Jessica_blog_signature-SMALL

4 Dirty Little Homework Confessions


As a former special education teacher, I always thought that homework time would be a breeze when my boys Alec and Jake got to school.  I knew all of the most effective strategies and consulted many parents during conferences and IEP meetings about homework tips.  I even helped create this Free Homework Reward Chart.  Some days really do go very smoothly.  I have a delicious, healthy snack waiting for them when they get home; they are focused, independent, and complete all of their work quickly; they look forward to reading their book and read for more than the required daily minutes!

Sometimes, however, things do not go as smoothly and we really struggle to get through homework.  On these days, all of my best strategies back fire and I have to admit that homework time stinks!  Here are my homework confessions on these not so ideal days…

1) I don’t always make my boys read the full 30 minutes listed on their reading logs, but I still sign off on them. One day I was volunteering at school and another mom and I started talking about homework.  We shared that sometimes we let out kids just read for 15 or 20 minutes.  We both felt so naughty for admitting to it, but also relieved that we weren’t the only slacker mom!  When I think about the overarching purpose of daily reading time, I am confident in saying that my boys get daily reading practice and that they truly enjoy reading.  I do not want to get in a power struggle about reading exactly 30 minutes or more.  Reading should not be an unwelcome chore.  It is a part of our daily routine, but we are flexible about the exact minutes because my boys read for enjoyment on the weekends as well.

2) Sometimes we do not have a quiet, distraction free, organized space for homework. I know that children work best under these peaceful, scholarly environments, but when the reality of our busy schedule sets in, we need to adjust at times.  My boys have completed their homework in the car, on the soccer fields, and in the doctor’s office before.  We’ve also gone on whole family searches for necessary homework supplies such as a ruler, sharpener, or glue stick that is not dried out.  These experiences have taught us to go with flow and adapt to get things done.  That’s an important life skill!

3) On occasion, I have served up an unhealthy snack after-school. I work from home now so I am so fortunate to be able to greet my boys when they walk home from school and have a healthy snack ready for them on most days.  Like these yummy apple crescent roll-ups I found on Pinterest…

images

There have been days, however, when my work day has run longer or I have been on a call and the boys have had to fend for themselves to get snacks.  Those snacks will usually consist of Cheetos, fruit punch or candy.  Eeek!  Definitely not brain food, but it kept them quiet while I wrapped up work.

images-1

4) We’ve experienced our share of full on homework meltdowns. If you’ve never experienced this, consider yourself lucky.  For the rest of us, I’m sure you know what this consists of: tears, crumpled up papers, broken pencils, slammed doors, yelling, refusal to work, etc. Unfortunately, I’ve lost my cool a few times in these situations.  I had difficulty understanding why the boys were not accepting my help, were shutting down when I knew they were fully capable, were struggling to stay in their seat and focus, or why an assignment that usually takes 5 minutes is now taking 30 minutes to complete.  Well, guess what?  We all have bad days and get stressed out, even kids. Through the years, I’ve learned that it is much more effective to take that movement break, provide them with some extra help even though I know they can do it, break assignments into smaller parts, give them some extra TLC and empathize with them because homework can be overwhelming.

Overall, I’m so proud of how far my boys have come along with homework and school in general. They are now in 4th and 2nd grades (Alec got on Honor Roll this past quarter and Jake got straight As) and the for the majority of the time homework time is a success.

homework-first-aid-1

Some days, however, I know it is going to be a rough day from the moment they walk in the door. Now, I do some deep breathing and put on some relaxation music in the background in preparation for what lies ahead!  I’d love to hear what your challenges and successes are as well! Please leave your comments and homework tips below.

Jennifer_blog_signature-SMALL


The Classroom Party Everyone Will Talk About


Does the thought of a classroom party make you cringe? Recruiting parent volunteers, planning engaging activities, asking for donations, keeping students calm….it’s a lot to juggle. Here are 6 tips to create easy, stress-free parties that everyone will rave about:

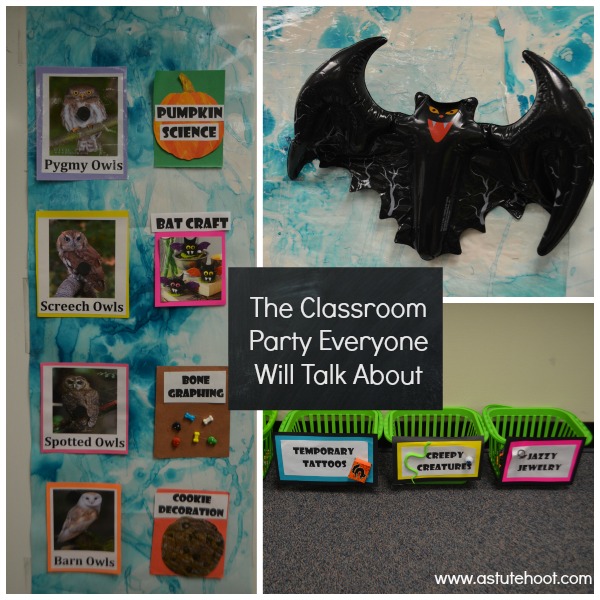
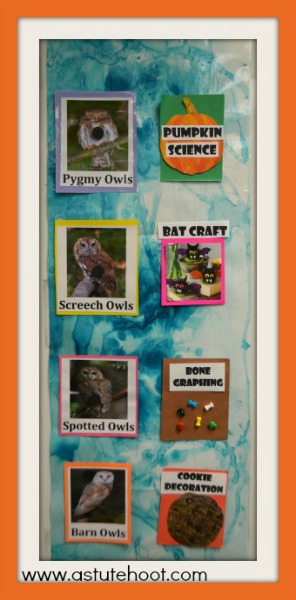
1. Plan organized centers: Depending on your class size, pick 4 to 5 center activities for students to complete. Students will rotate through these activities just as they would for reading and math centers. These activities should be structured, (somewhat) academic, and take the same time to complete. For my Bat Bash, students read directions to complete a bat craft, conduct pumpkin science experiments, decorate a bat cookie, and sort and graph bone candy. I use center icons to label each center and students move in the same direction as they do during regular centers. This adds necessary structure and routine to an unstructured time.

Organized centers

Make sure necessary materials are provided at each center (i.e., glue sticks, scissors, napkins, etc.). Post center directions as well. Be sure to review and  practice center procedures and expectations before parents get there.

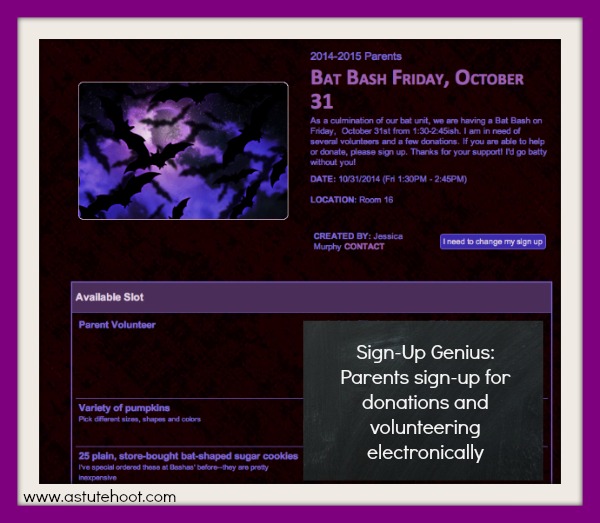
2.  Recruit parent volunteers and donations: For years, I sent home a letter to parents asking them to volunteer and/or donate for the classroom party and without fail, parents would all sign up for the same items, sprinkles and napkins. I had to send additional letters for items that I was missing and keep track of all of those pesky RSVP forms. What a headache! Now I use Sign-Up Genius, a FREE electronic sign-up system. You build a custom sign up, send email invites to your selected group and your group members sign up when convenient. Sign-Up Genius notifies you via email when someone signs up; you can customize reminders so that members receive them via email or text.

Sign-up Genius

I use Sign-Up Genius to coordinate weekly parent volunteers, request classroom donations and plan all of my school events.

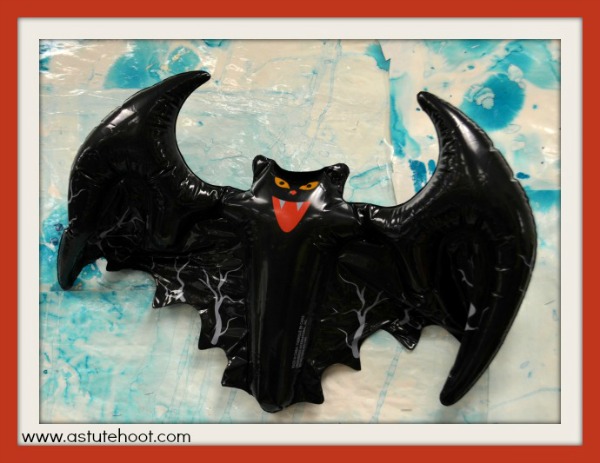
3. Buy decorations: Inexpensive, cute holiday decorations can be found everywhere! I especially love Target’s dollar section and The Dollar Tree as they both have a wide selection. Be sure to get there early–many items sell out quickly (I’ve learned the hard way).

Dollar store decorations

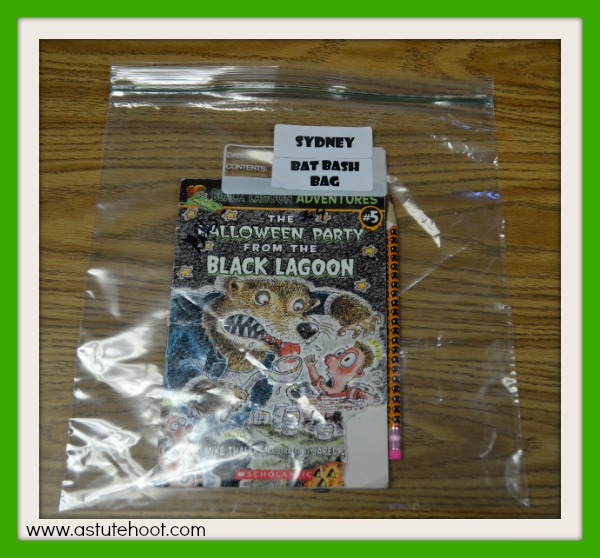
4. Provide center bags: Provide center bags to hold student work as they rotate through centers or party activities. When students complete their work, they put right into bag which prevents ‘missing’ projects and materials. I label each bag and include pencils and extra activities for early finishers so students won’t feel the need to rove the room or get off-task after they are finished.

Bat bash bag

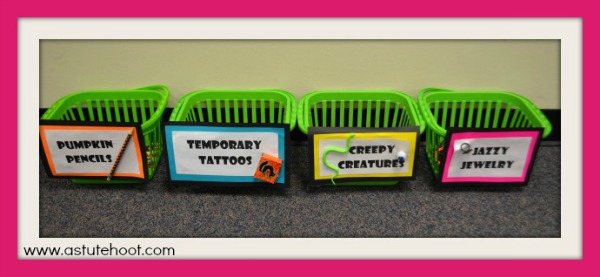
5. Organize Bingo prizes: Most teachers include Bingo as a party activity and include prizes at the end for all players. However, this can be a major headache as students usually take a long time to pick prizes. Select 4 or 5 prizes and organize them into individual, labeled containers so students can easily see the options, making selection a breeze. I include visuals on the labels as well.

Bingo prizes


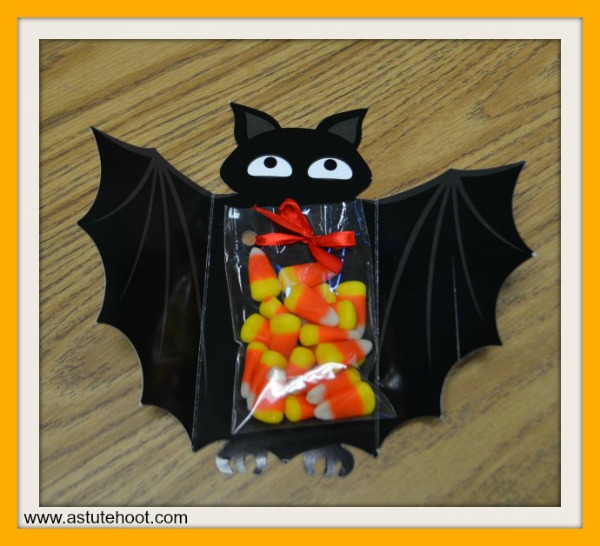
 6. Provide treat bags: At the end of the party, I had out small theme-based treat bags with candy and a homework pass. I also hand out treat bags for the parent volunteers and they love this gesture. I found these bat bags at The Dollar Tree.

treat bags

Have any great party tips? Please share them below.

Jessica_blog_signature-SMALL

It’s Fall Y’all! 50% Off Sale on EVERYTHING on Website!!!


The holiday season is quickly coming upon us! To show our appreciation for your support we have marked every single product 50% off when you purchase directly from our website. Click here to check out our store! Hurry…sale lasts from October 12-18 only!

While you are at our website view our newest video here to see our prodcuts in action and download FREEBIES here. Our specialty is intervention and special education resources for grades K-2. We’d love to hear your comments and feedback!

See what the hoot’s about….

Halloween Black Lagoon Literature Study
“Absolutely LOVE it & thanks so much for including photos of the finished products. This makes things so much easier and eliminates the guess work. :)” ~Nicole S.

Ultimate Special Education Survival Kit
“This was amazing! I feel so organized and ready for the year thanks to this! Some of the things in here felt like fun and creative super tools. I am still a fairly new Sped teacher and after going through this I feel like a have a rock solid foundation for the year in several areas (behavior, back to school, and even reporting out intervention plans in a more effective, clear, and concise manner). Thank you, thank you, thank you!”~Meliss G.

Reading Intervention Essentials Bundle
“A phenomenal resource that will allow my students to improve their reading abilities. I am looking forward to using this. This will be one of my life savers for guided reading next year. Thank you so much for sharing!” ~Sonia R.

Math Problem Solving Unit
“We have just embarked on our journey into the Problem Solving Pond. The students are loving it and I am loving the results. Thanks so much!” ~Kim T.

Intervention tools for RTI and Special Education
“Amazing resource for intervention planning! It’s so nice to have it all in one place and ready to go at my fingertips. Thanks!” ~Lauren G.

Phonics Intervention Essentials Bundle for Multisyllabic Words
“Super cute! My kiddos enjoyed the chipmunk! It was easy to do as well because everything was made for me!” ~Shayna R.

RTI Resources: Secrets of Successful Teams
“I absolutely love all of the forms included in this packet. I think they are going to work great for our RTI committee next year!” ~Kelli F.

Jennifer_blog_signature-SMALL

2014 Halloween Bash Blog Hop

Welcome to our 2014 Halloween Bash Blog Hop, hosted by Teaching 2 Step! To celebrate our first Blog Hop, we are having a HUGE 50% off sale on our products this week only until October 18 here!

Halloween in in the air and students become consumed with costumes and candy. Keep them engaged in learning with our Black Lagoon Halloween CCSS Unit, our 2014 Halloween Bash Blog Hop featured product!
Black Lagoon Halloween Blog Hop

hazel and the black lagoon_cover_NEW

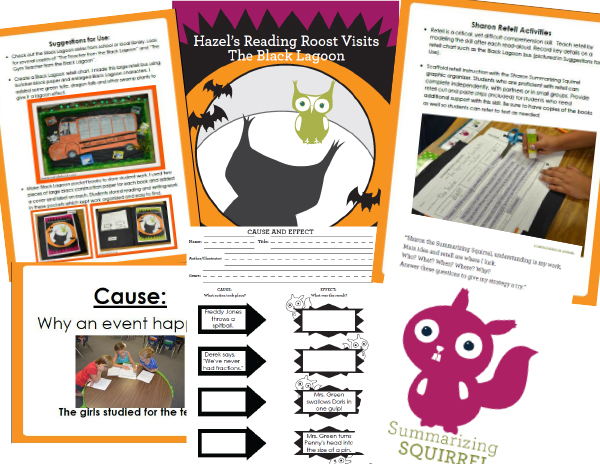
In this 103 page unit, students learn critical comprehension strategies such as summarizing, determining cause and effect, comparing and contrasting characters and text and analyzing character traits. Students also create a new Black Lagoon character and make their own Black Lagoon story. Here are some of my favorite highlights:

Retell Bus:
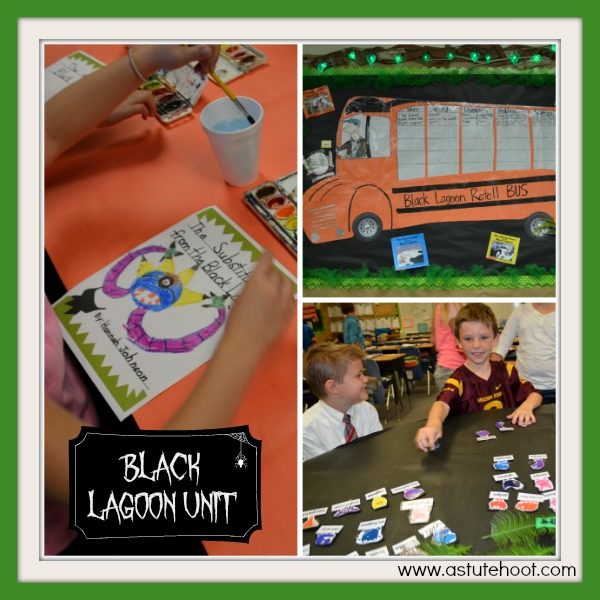
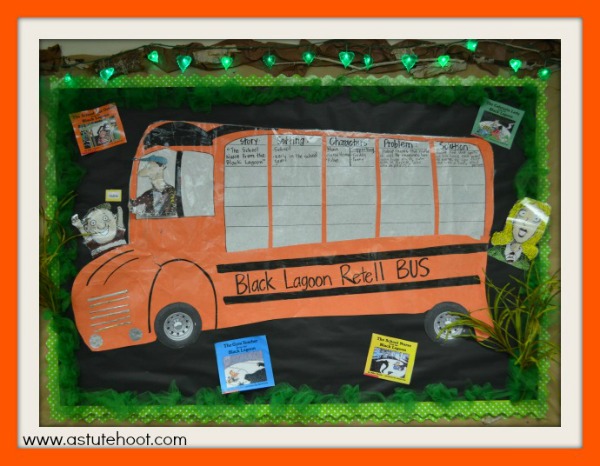
Students love reading the Black Lagoon books so they are perfect for teaching key comprehension skills such as summarizing and retelling. Make a Black Lagoon Retell Bus and chart story elements after each read-aloud. I made this large retell bus using butcher block paper and enlarged Black Lagoon characters. I added some green tulle, dragon tails and other swamp plants to give it a lagoon effect.
Black Lagoon retell bus-- Halloween Blog HopBlack Lagoon Pocket Books:
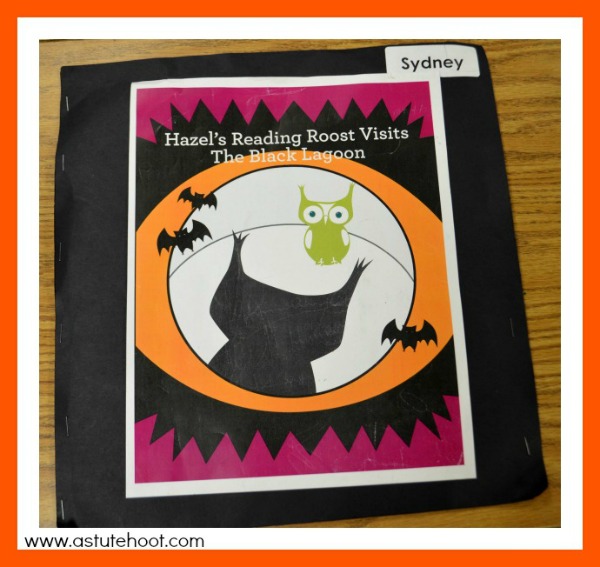
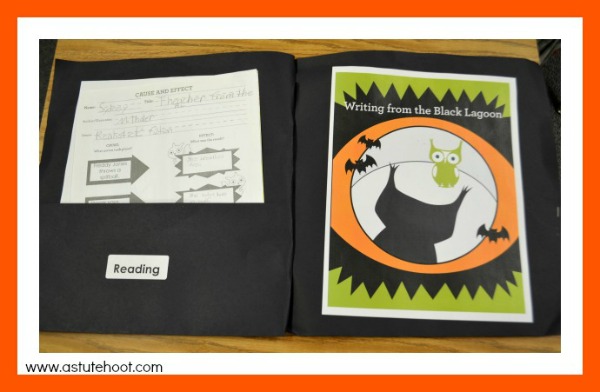
Make these easy Black Lagoon pocket books to store and organize student work. I used 2 large pieces of black construction paper for each book and made a 5′ pocket on each piece by folding and stapling paper. I added these adorable covers and labels on each.
black lagoon books Halloween Blog Hopblack lagoon books 2Black Lagoon Books:
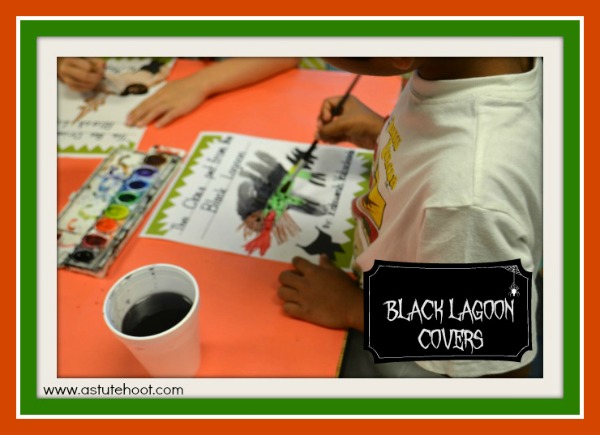
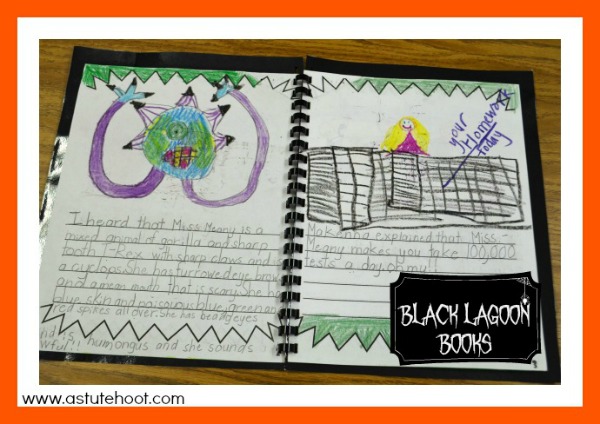
In this unit, students brainstorm new Black Lagoon characters, select a new character, and write a narrative based on typical Black Lagoon story structure.  Students then make a crayon resist cover as a finishing touch. Students draw a detailed picture of their monstrous character in the center of the cover and then paint character with black watercolor. The crayon will resist the watercolor, giving it a textured effect. Once dry, students can outline character in thin black Sharpie.

Black Lagoon covers Halloween Blog Hop

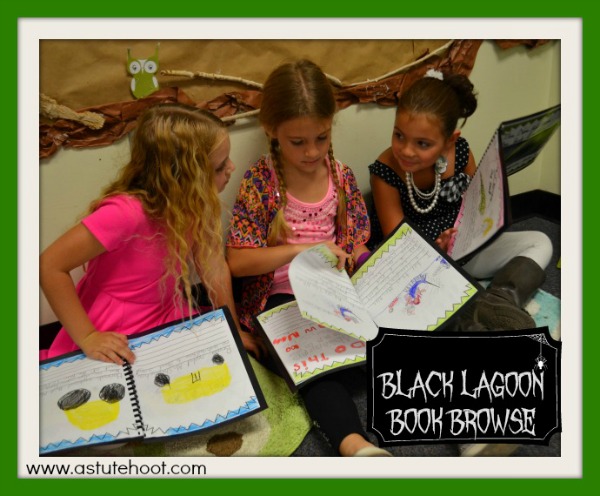
Laminate covers and bind to create published books. Place published books in a Book Browse center so students can read each others’ books. To increase accountability, include a graphic organizer for students to complete.

black lagoon published book Halloween Blog Hop

black lagoon book browse

Grammar from the Black Lagoon:
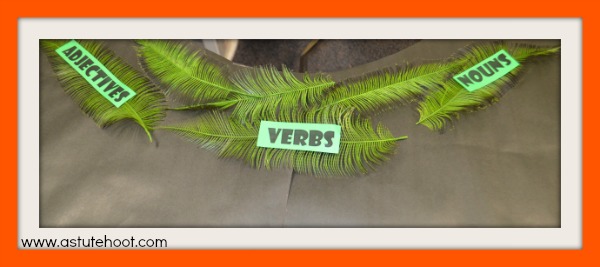
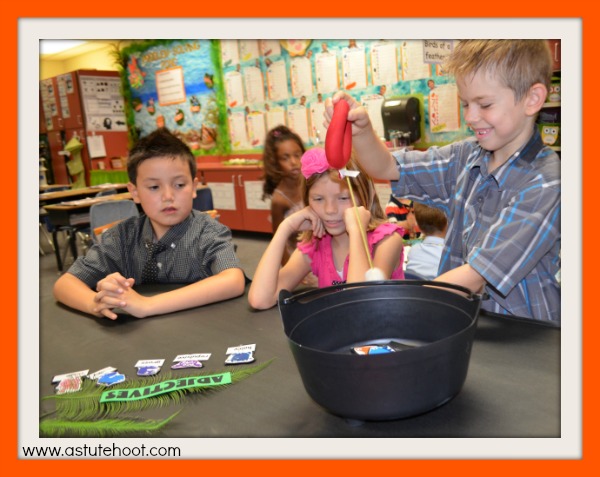
Print grammar monsters (included in unit) on color printer. Cut out and laminate. Glue small magnet strips on the back of each one. I put the grammar monsters in a small black cauldron (found at Target dollar section). Print out Black Lagoon grammar posters on color printer and laminate. Place near game for student reference. Purchase (or make) a fishing rod. I found my fishing rod at Walmart in the toys section, but it can be easily made. Set up a lagoon. I covered my horseshoe table with black paper and glued Nouns, Verbs and Adjectives labels on swamp-like ferns.

grammar fishing

Students take turns fishing from the black lagoon (cauldron). They read the grammar monster(s) and determine if they are nouns, verbs or adjectives. Require students to justify response.

grammar fishing 2

Black Lagoon Cups:
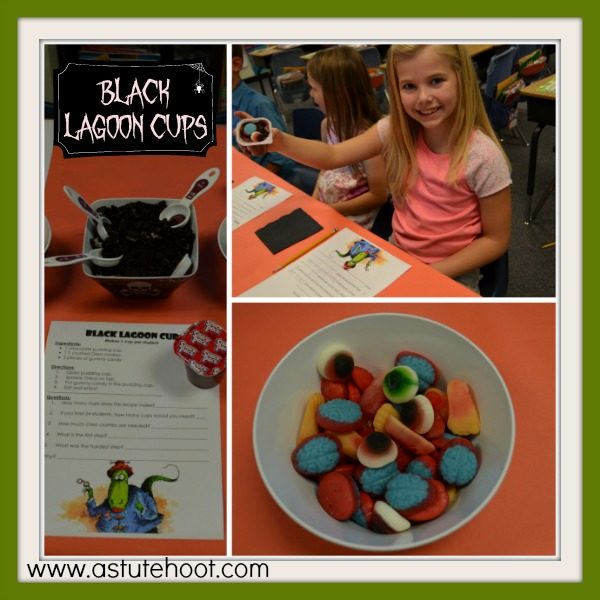
As a culmination to the unit, students will read and follow a recipe to make Black Lagoon cups. This functional text activity requires 3 ingredients (pudding cups, crushed Oreos and gummy candy) and minimal preparation, but one that students will remember.

black lagoon cups

Looking for more Halloween ideas? Download our FREE Going Batty unit here!

Thank you for joining the Teaching 2 Step Halloween Hop. We hope you enjoyed our post.  Be sure to follow like us on Facebook and Pinterest. Hop through more Bash Bloggers below.

Prize Pack_k to 2

K – 2 Giveaway Pack
a Rafflecopter giveaway
2-5 Giveaway Pack a Rafflecopter giveaway

Secondary Giveaway Pack
a Rafflecopter giveaway


Walk the Line: 5 Tips to Teach Lining Up Procedures

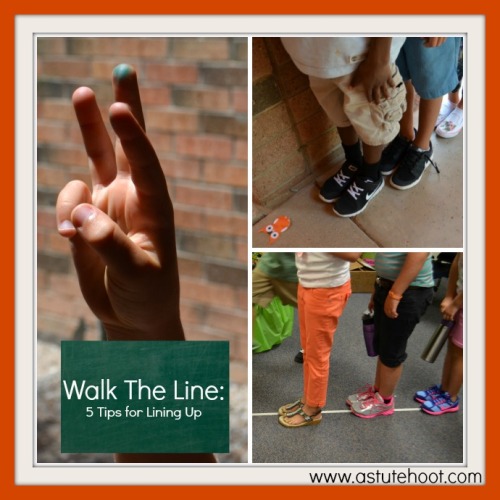
Do you have difficulty getting your class to line up quickly and quietly? Does your line seem to go on forever? Like most teachers, I have experienced the frustrations of lining up and walking in line. Follow these five easy steps to put an end to the talkers, the stragglers and the wanders once and for all.

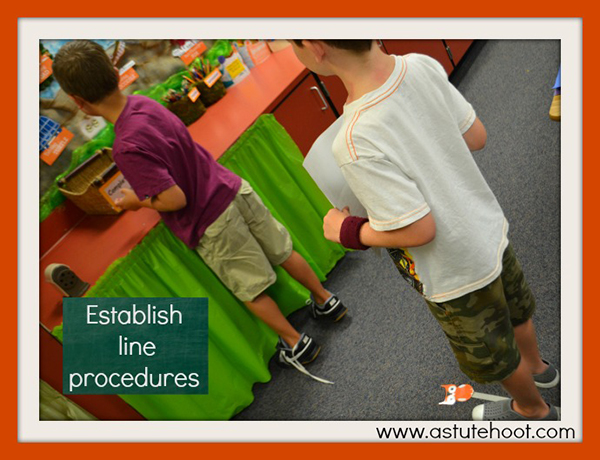
1. Establish line procedures: Explain and model expectations. Students will face forward with arms at side and closed, quiet mouths. As students walk in line, they stay close to person in front of them and use gentle, walking feet.

Establish line procedures_web

Scaffold the steps by using these sentences:
“When I say one, please stand up and push in your chairs.”
“When I say two, please turn and face the door.”
“When I say three, please follow your line leader to the place to lineup.”
When students are very familiar with these steps, simply call the number or use a nonverbal cue by holding your fingers. You should expect this process to take two-three weeks and constant reinforcement.

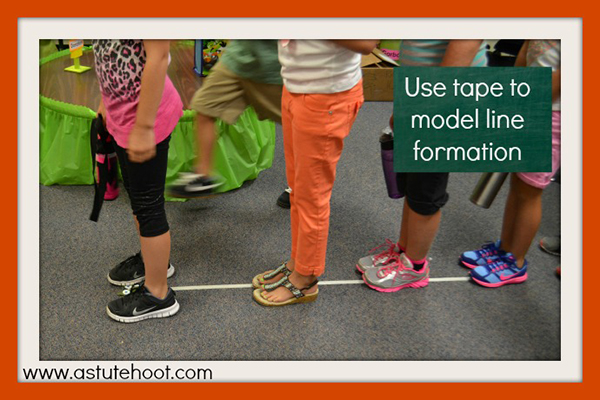
2. Use tape to model line formation: To design effective transitions in your classroom, start by mapping the route. There is one right way to line up, one path each student follows on the way to the reading area, door and other areas. Teach students to follow the same path every time. First model this path and then students practice it under your watchful eye, several times per day. You can even tape each path using a different color of masking tape so students know the exact route to get to designated area. Once students have mastered these routes, remove masking tape so it doesn’t leave a permanent mark on the carpet.

use tape to model line _web

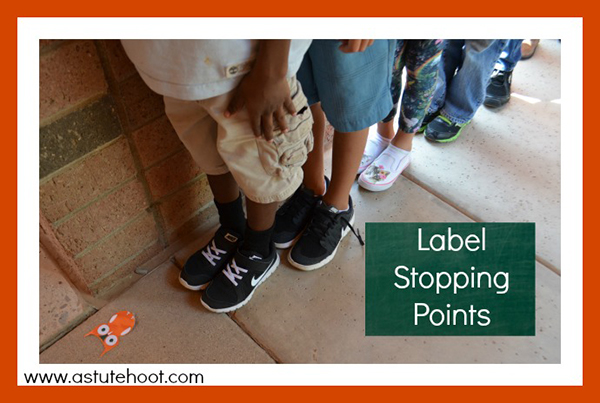
3. Label stopping points: Map the route to important places around the campus. Take the same routes to specials, cafeteria, playground and bathrooms, labeling stopping points along the way. Stopping points allow the students in back to keep up with the line (no more stragglers) and help wanders remember the designated routes to specific destinations. I tape small owl decals to the sidewalk at class stopping points; these serve as a good visual cue to remember these important points. Remove decals after stopping becomes automatic.

Label stopping points_web

4. Provide visual cues: Create a visual cue to remind students to stay (or get) quiet in line. We are Weinberg Wranglers at my school and students all use a ‘Wrangler W’ to signal quiet time. Visual cues don’t add any additional noise and give students feedback.

provide visual cues_web

5. Reward and reinforce: Add some fun to the line by setting a daily goal. For example, set a stopwatch and time students as they line up in ABC order. Encourage students to beat the previous time. Be sure to provide modeling, praise and constructive feedback as needed.

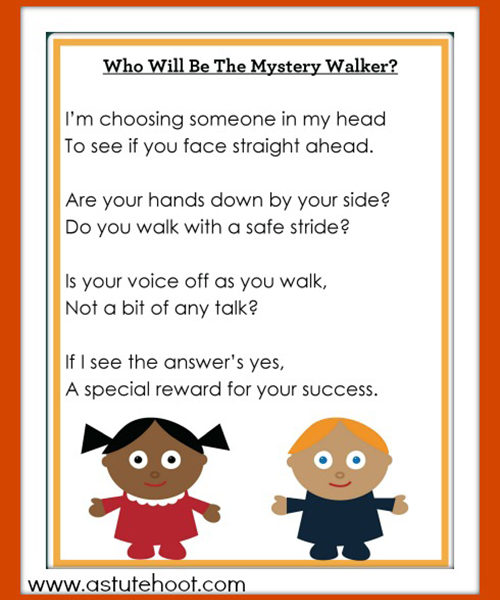
I also use the Mystery Walker poem and select one Mystery Walker for each line. This student gets a ticket to Treasure Box drawing at the end of the week. You can also give students Mystery Walker paper bracelets or a hat as a reward. If all students are doing a great job, give them a Quiet Line Loop. Attach loops together to make a class chain. Determine how long the chain needs to before the class earns a reward. If the class earns a compliment in line, add an additional loop to the chain.

Mystery Walker_web

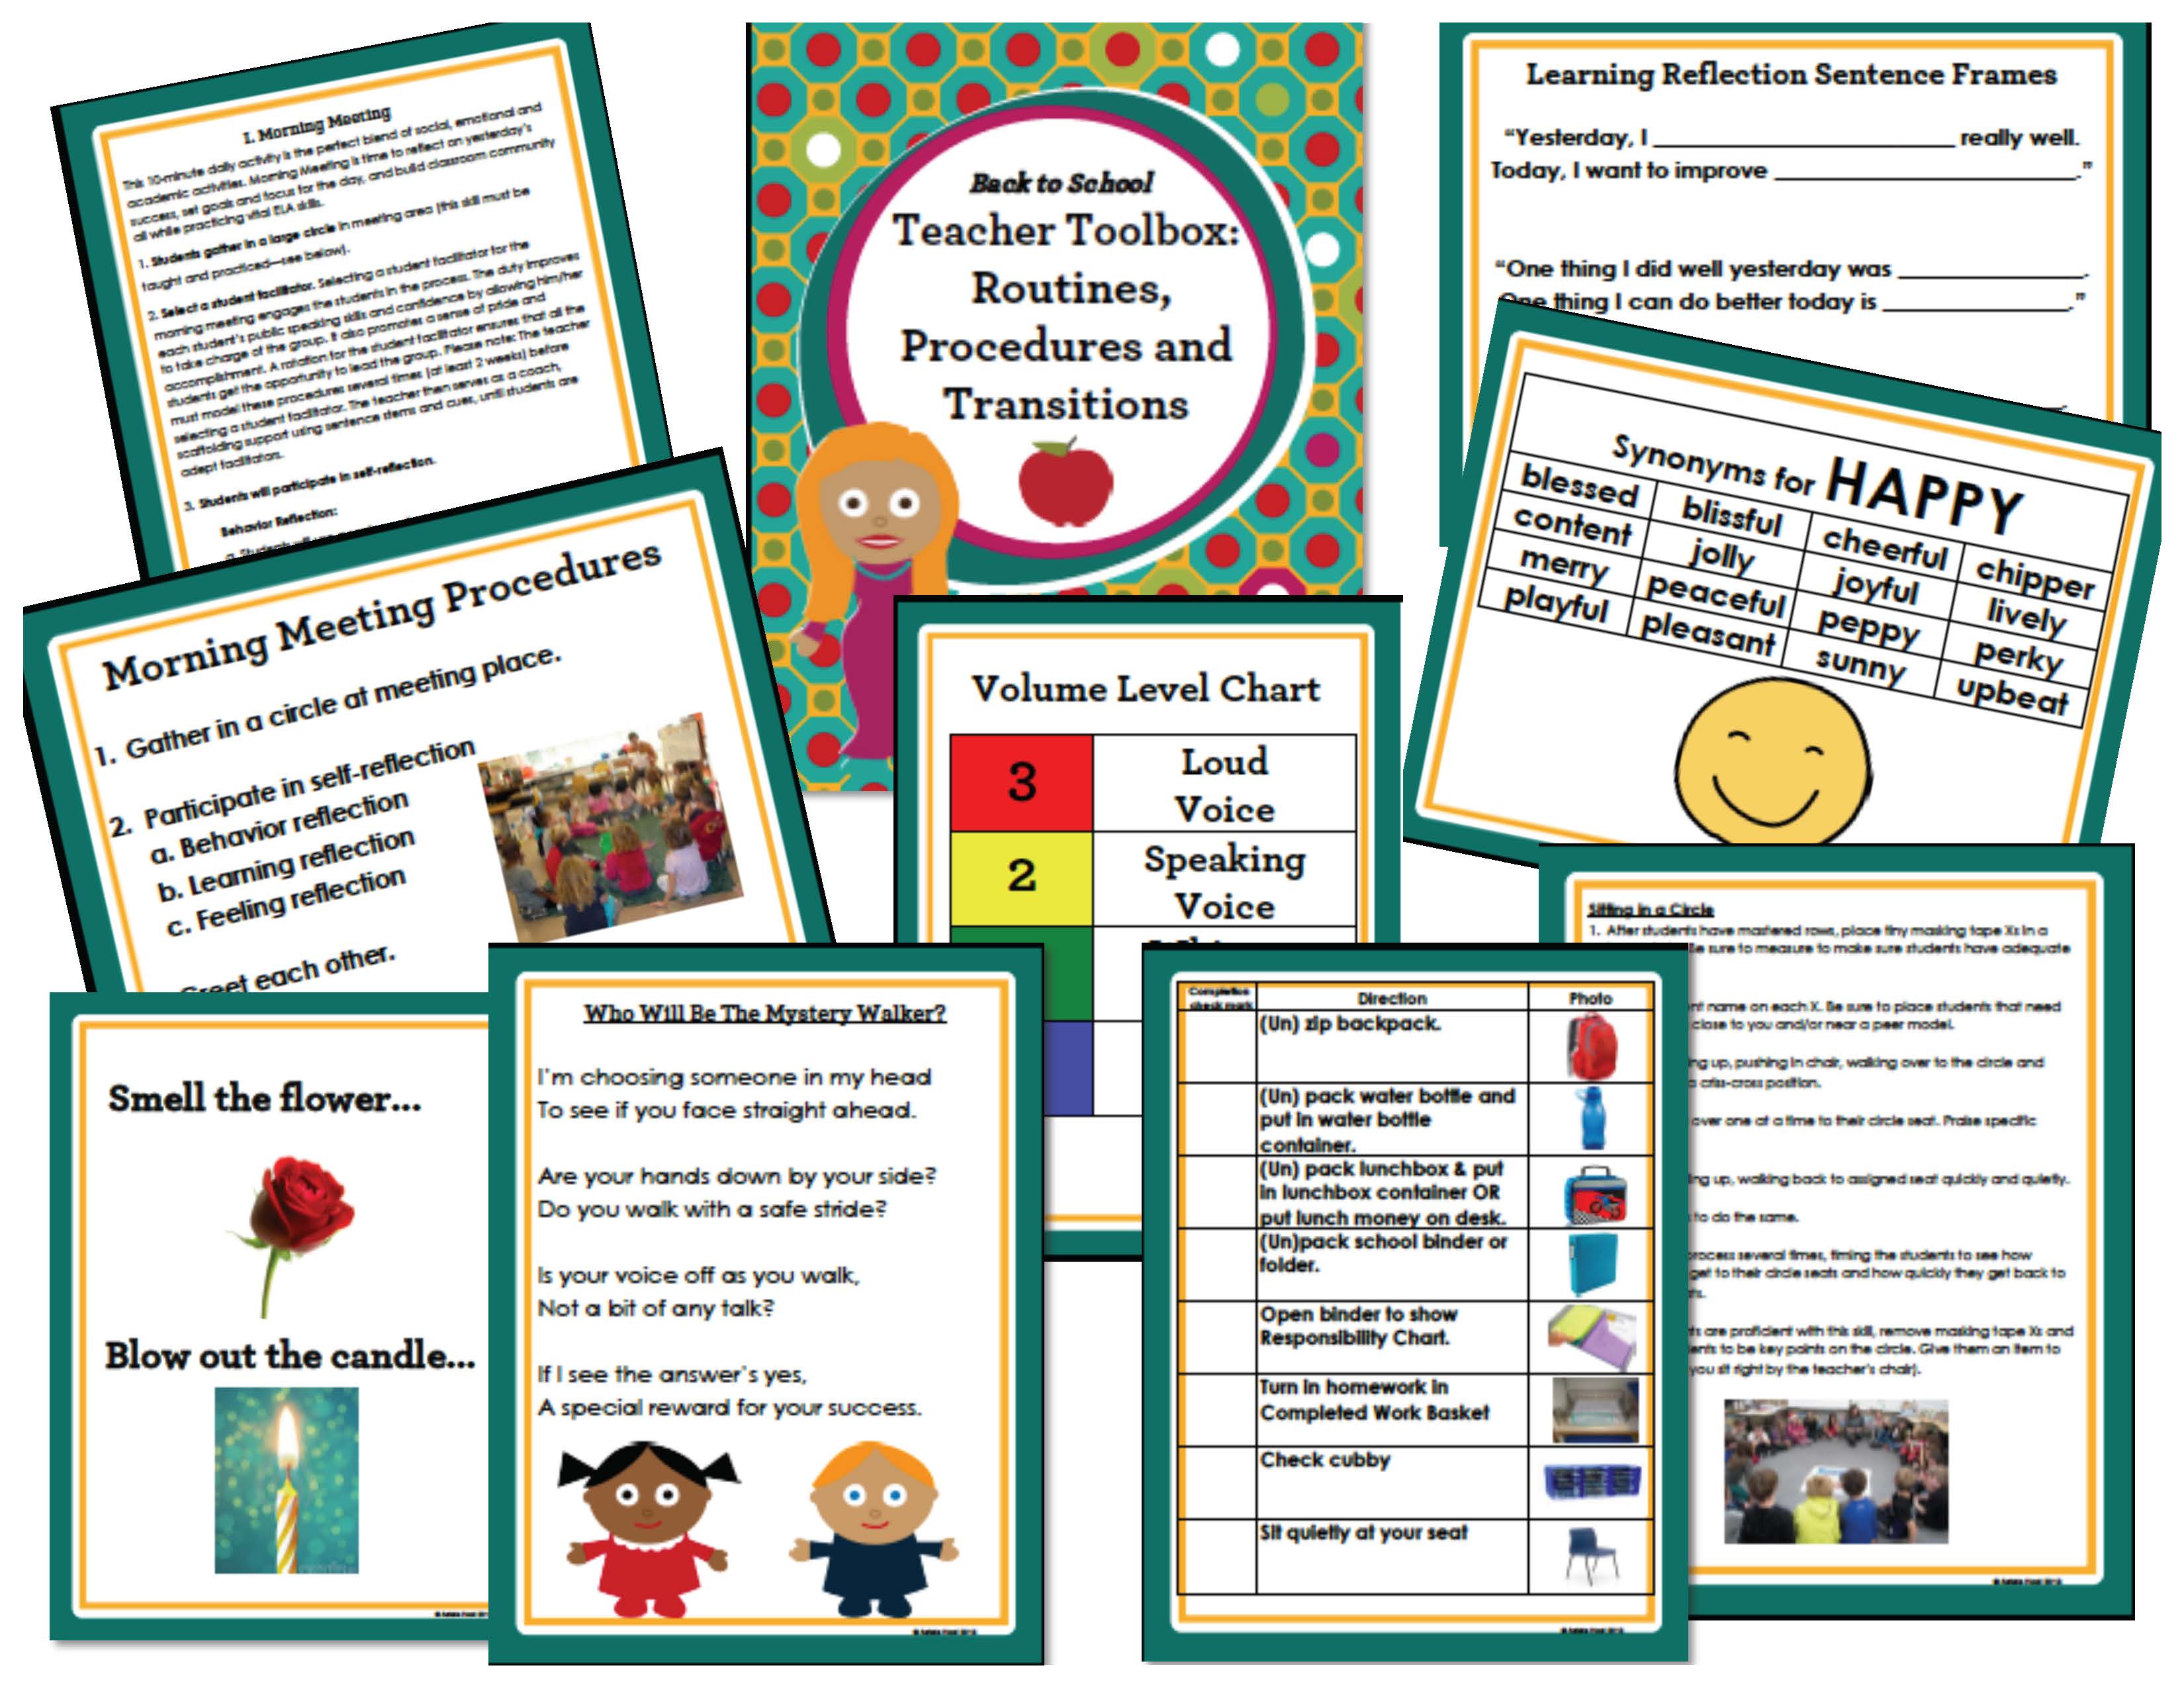
Download our Back to School Toolbox: Routines, Procedures & Transitions unit for additional tips and activities for teaching effective transitions and routines.

Jessica_blog_signature-SMALL

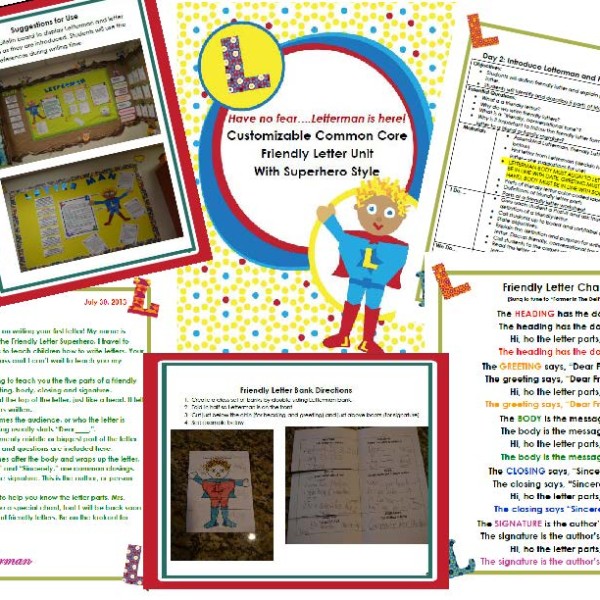
Students love Letterman, our Friendly Letter Superhero.

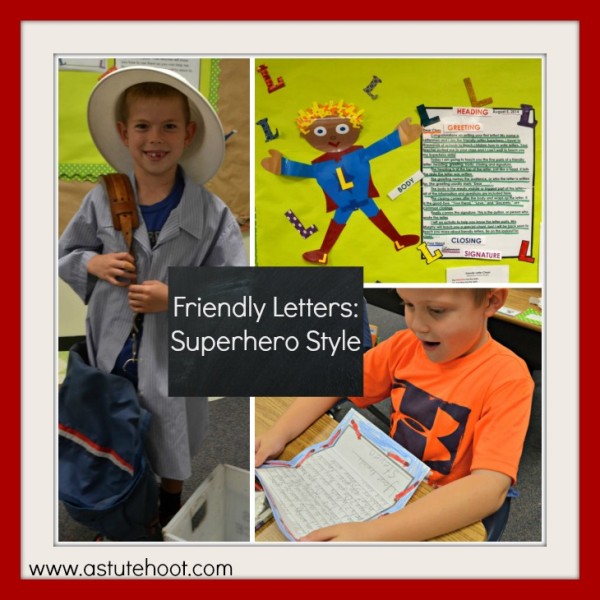
Friendly Letters: Superhero Style

Children love superheroes so what better way to engage them in writing than with Letterman?

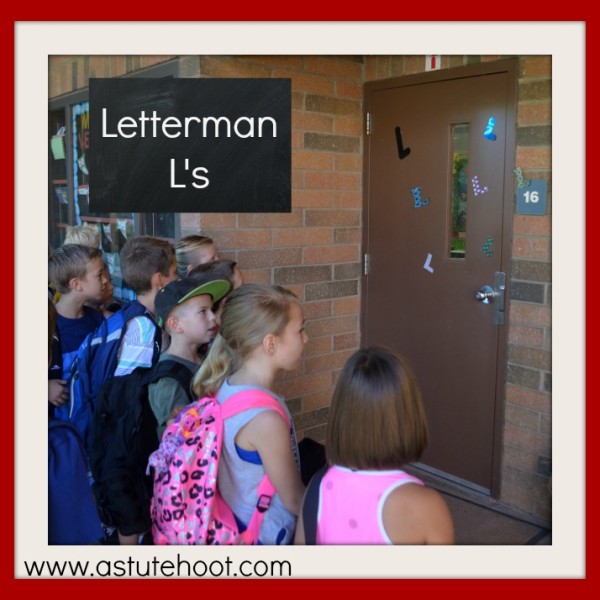
During my second-grade friendly letter study, Letterman, our Friendly Letter Superhero, visits the classroom each day to teach a specific friendly letter skill. He leaves colorful L’s on the classroom door to signal his visits. My students are true believers! They are so excited to see L’s on the door in the morning; they race over to the Learning Nest to read his latest letter. 

Students love Letterman, our Friendly Letter Superhero.

Letterman first introduces himself and asks students to write a letter to him, a perfect pre-assessment. The next day, he teaches the parts of a friendly letter with a color-coded letter and special chant. During subsequent lessons, he teaches students how to plan, draft, edit, revise and publish letters. Students pull name sticks to determine which classmate they will write to. Using Letterman’s superhero skills, students complete the writing process and mail the letters after publishing.

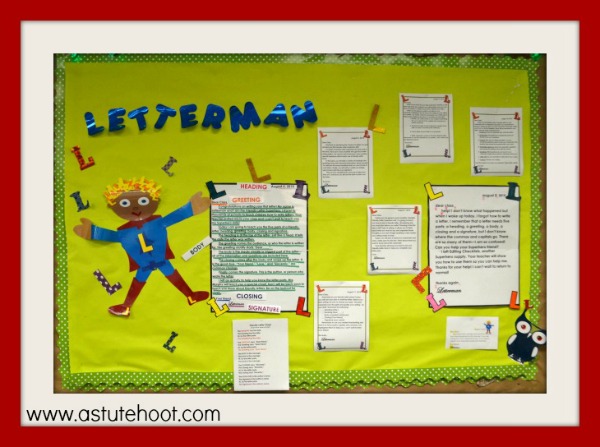
Letterman bulletin board

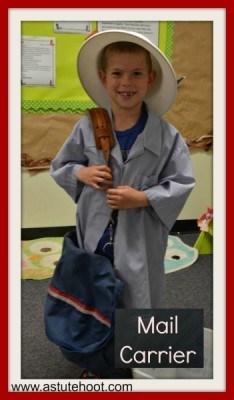
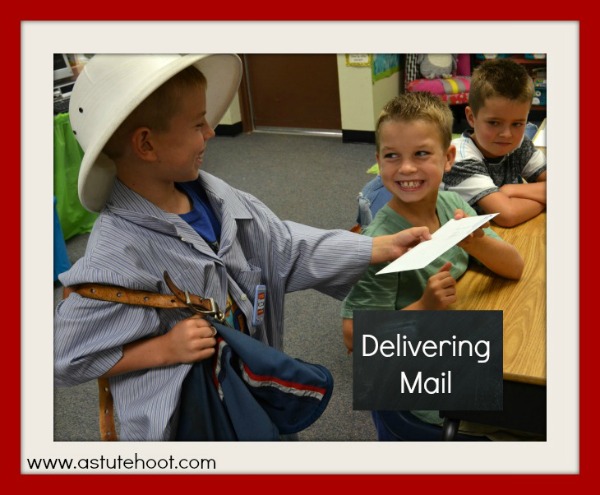
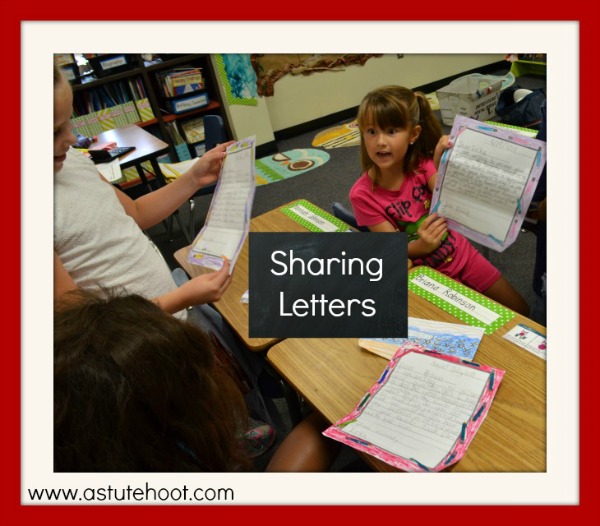
I pick a mail carrier to deliver the mail using authentic United States Postal Service materials. Students love wearing the mail carrier shirt, hat and mailbag as they walk around to classmates’ desks, delivering the much-anticipated letters. Students read and share their letters with each other.

Mail carrier

Delivering mail

As a post-assessment, students write a friendly letter to me to demonstrate their new friendly letter superhero skills. I copy all of the letters, including the pre- and-post-assessments and make a Line of Letters for all students. I fold 12×18′ construction paper in half like a book. On the back, I staple the pre- and post-assessments next to each other and glue the accompanying rubric underneath the letters. On the inside of the construction paper, I staple the student’s letter to classmate with classmate’s response and rubric underneath. These are perfect to share at parent-teacher conferences or to send home with report cards.

Sharing Letters 2

Letterman comes to visit the class throughout the year to keep students’ friendly letter superhero skills sharp.

Letterman preview

Click here to bring Letterman to life in your classroom, too!

Jessica_blog_signature-SMALL


Giving Back is a Hoot: Berlin’s Story

Giving back is so important to us and one of the main reasons we started Astute Hoot. Part of our mission is to help all children learn. We love hearing stories about children overcoming the odds.  Meet Berlin, a little girl who is near and dear to us, who was diagnosed with Autism.  Please consider giving back and making a donation for this wonderful cause.  Click here to make a donation.

Berlin 3

Berlin’s Story:

At the age of two when most parents enjoy watching their child reach milestones like talking and interacting with other toddlers, Berlin’s parents were relentlessly trying to find out why their child would not speak, make eye contact and why the poor little girl would scream in agony from triggers like noise or crowded areas.  Then the answer came in a diagnosis of autism.  Berlin is now six years old and since that day of diagnosis her parents have spent numerous hours and dollars trying every intervention possible to help their little girl have a normal life. And while Berlin has showed some progress, she has also regressed but there is hope!  As Berlin’s mother spends most her nights tirelessly searching the internet for any new breakthroughs in autism she was blessed to come across a new therapy called MRT.

MRT stands for Magnetic Resonance Therapy.  A recent breakthrough in autism, this treatment can actually reprogram the brainwaves in as little as four weeks.  What researchers have found is that autistic children have minimal alpha wave activity in their frontal lobe.  The back of the brain takes information in, but the front of the brain controls cognitive function and allows one to respond to others and function like a “normal” person.  The autistic child can hear, see and take in all the information available from their surroundings, yet the malfunctioning of their frontal lobe locks them in a prison where they cannot respond to others or express themselves.  MRT technology sends a magnetic current to the frontal lobe, inducing an EEG response, in other words producing alpha waves where there was once little or none.  The induced waves create a pathway that once opened will stay open allowing the frontal lobe to function properly.  The result is a child with a proper functioning frontal lobe and therefore a reduction in autism symptoms.
Berlin 2
Not all children respond to MRT, but those that do have had lasting results so far.  Recently Berlin received a trial treatment of MRT at the Brain Treatment Center in Newport and showed a positive response.  The week trial that Berlin received alone cost more than $1000, in addition to travel expenses from Arizona to California for the week.  The purpose of the week trial was to determine if Berlin was a good candidate for therapy.  The good news is her before and after EEG results showed a positive response to treatment and therefore doctors recommended a four week treatment, the bad news is the four week treatment is over $12,500!  Berlin’s parents have already exhausted all their funds doing their best to help their child.  That is why I hope that just a little from a lot can raise enough funds to give Berlin a chance at a normal happy childhood.  Any amount no matter how little is greatly appreciated.  We are trying to raise $15,000 total, the treatment is over $12,500 and the remainder will be used for board and travel expenses.  With your help we hope Berlin will be starting her treatments in January 2015.

Click here to make a donation.

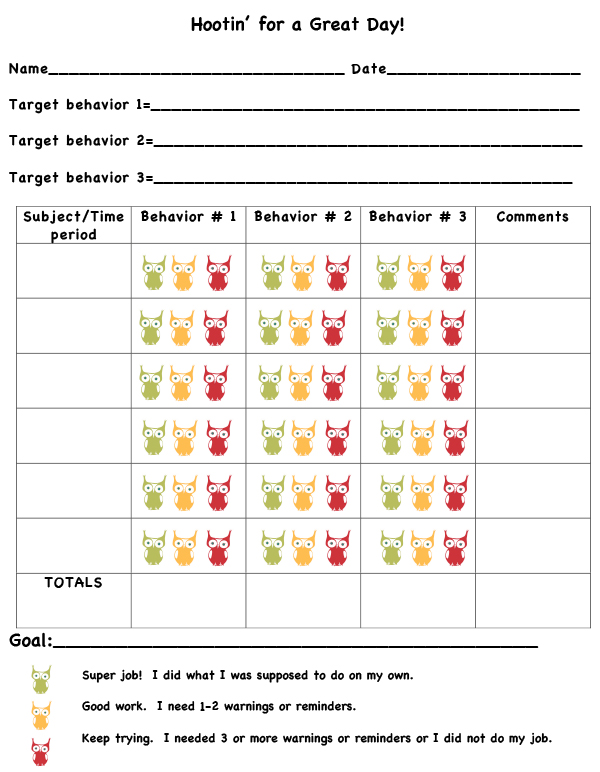
Thank you for your support!  Here is a freebie as a thank you.  Hootin’ for a Great Day Behavior Chart.  Microsoft Word - Hootin for a great day.doc

Jessica_blog_signature-SMALLJennifer_blog_signature-SMALLTina-Blog-Signature

Special Education 101: Setting Up Your Classroom

Welcome to the first post in our Special Education 101 blog series. I’ll be sharing my top tips, tools and resources I’ve gathered from over 15 years as a special educator.

The classroom environment is a critical component to academic success. Teachers can proactively set up their classrooms to minimize distractions, decrease misbehavior, and increase academic engagement.  Here are 5 key considerations when you set up your classroom.

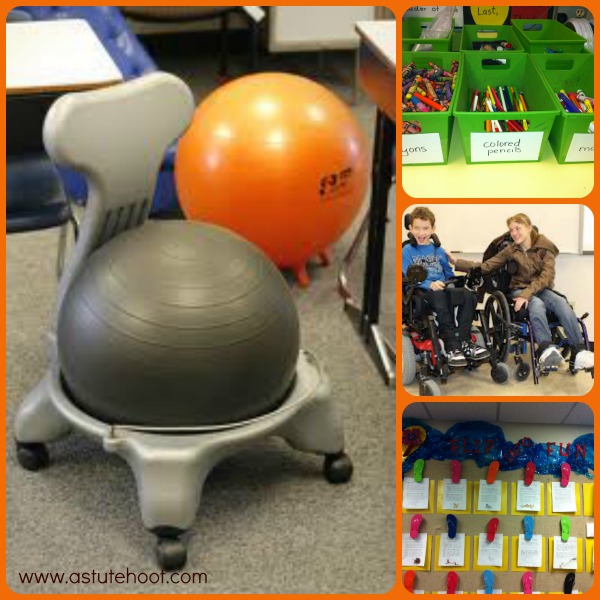
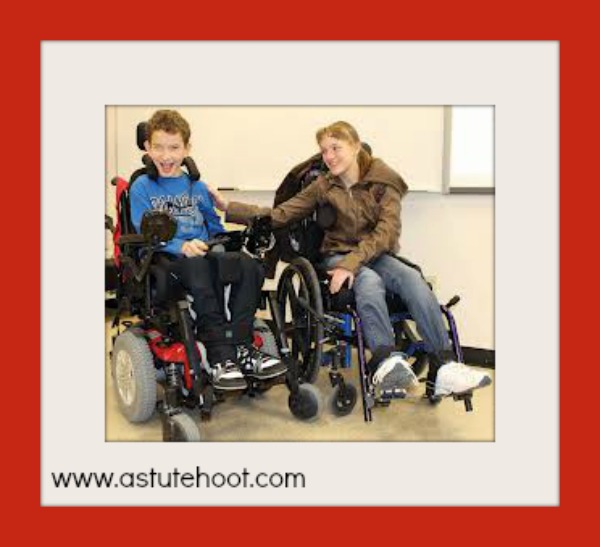
1. Keep space clear for easy access and movement for students in wheelchairs.  Set up desks and tables to allow for wide aisles and space to turn around.

wheel chair access

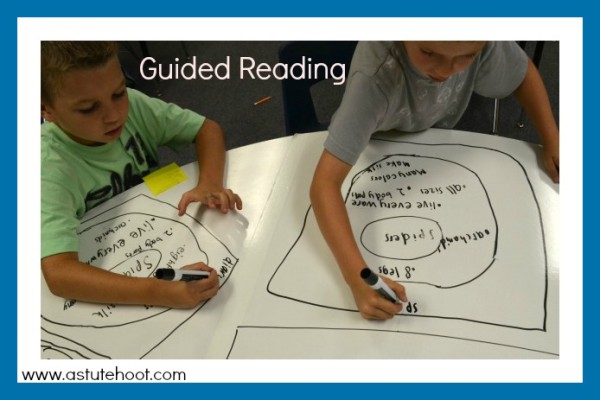
2.  Set up tables for small group work.  It is important to have designated space for guided reading groups, small group interventions, and center-based instruction.  Small group instruction allows for easy differentiation when working with students with a wide range of ability levels and needs.  Check out this recent post on how to create a DIY interactive whiteboard table.

Use this dry erase table to promote active engagement during small group instruction.

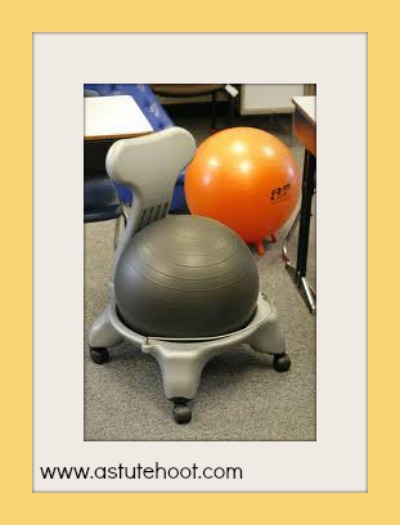
3. Provide room for sensory equipment if needed.  Even if your school has a designated room or space for sensory equipment, it will be important to have a special space for sensory breaks in your classroom as well.  This space can be a quiet place for students to take a break when over-stimulated or a place refocus by completing activities per their sensory diet.

sensory equipment

4. Create a literacy rich environment.  Label classroom objects and materials to strengthen reading skills.  Set up a motivating and comfortable reading corner with a variety of text genres and levels. Use word walls to post commonly used words and thematic vocabulary.

labels

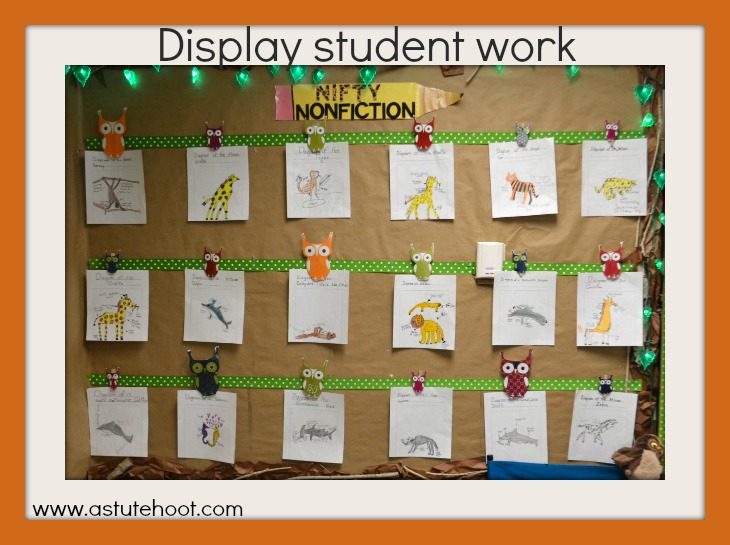
5. Display student work on engaging bulletin boards.  Encourage students to take pride in their work and show what they know by showcasing their work on a special bulletin board.

Display Student Work

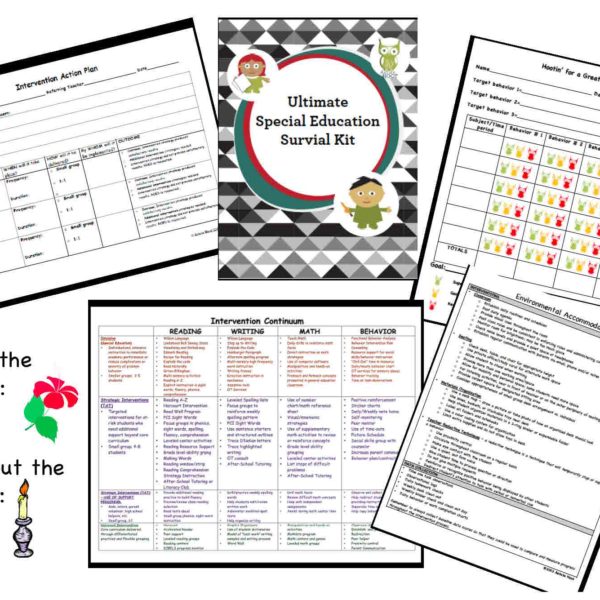
Looking for more resources and ideas?  Check out our Ultimate Special Education Survival Kit with over 125 pages of ready-to-use tools, assessments, templates and resources.

UltimateSpecialEducationSurvivalKit_Page_1


Jennifer_blog_signature-SMALL

Does Anyone Hear Me? The Art of Active Listening

Does anyone hear me? Am I speaking English? Why aren’t my students listening to me?

Do these questions run through your mind frequently? I found I was repeating myself over and over like a broken record and ready to bang my head against the wall. I finally realized that I was making a costly oversight that was hindering academic achievement and testing my sanity.

Listening is such a critical skill, yet I never took the time to truly teach it. I expected that my students would walk into my classroom with the understanding and ability required for active listening. When they didn’t listen, I would punish them for something that hasn’t been taught.

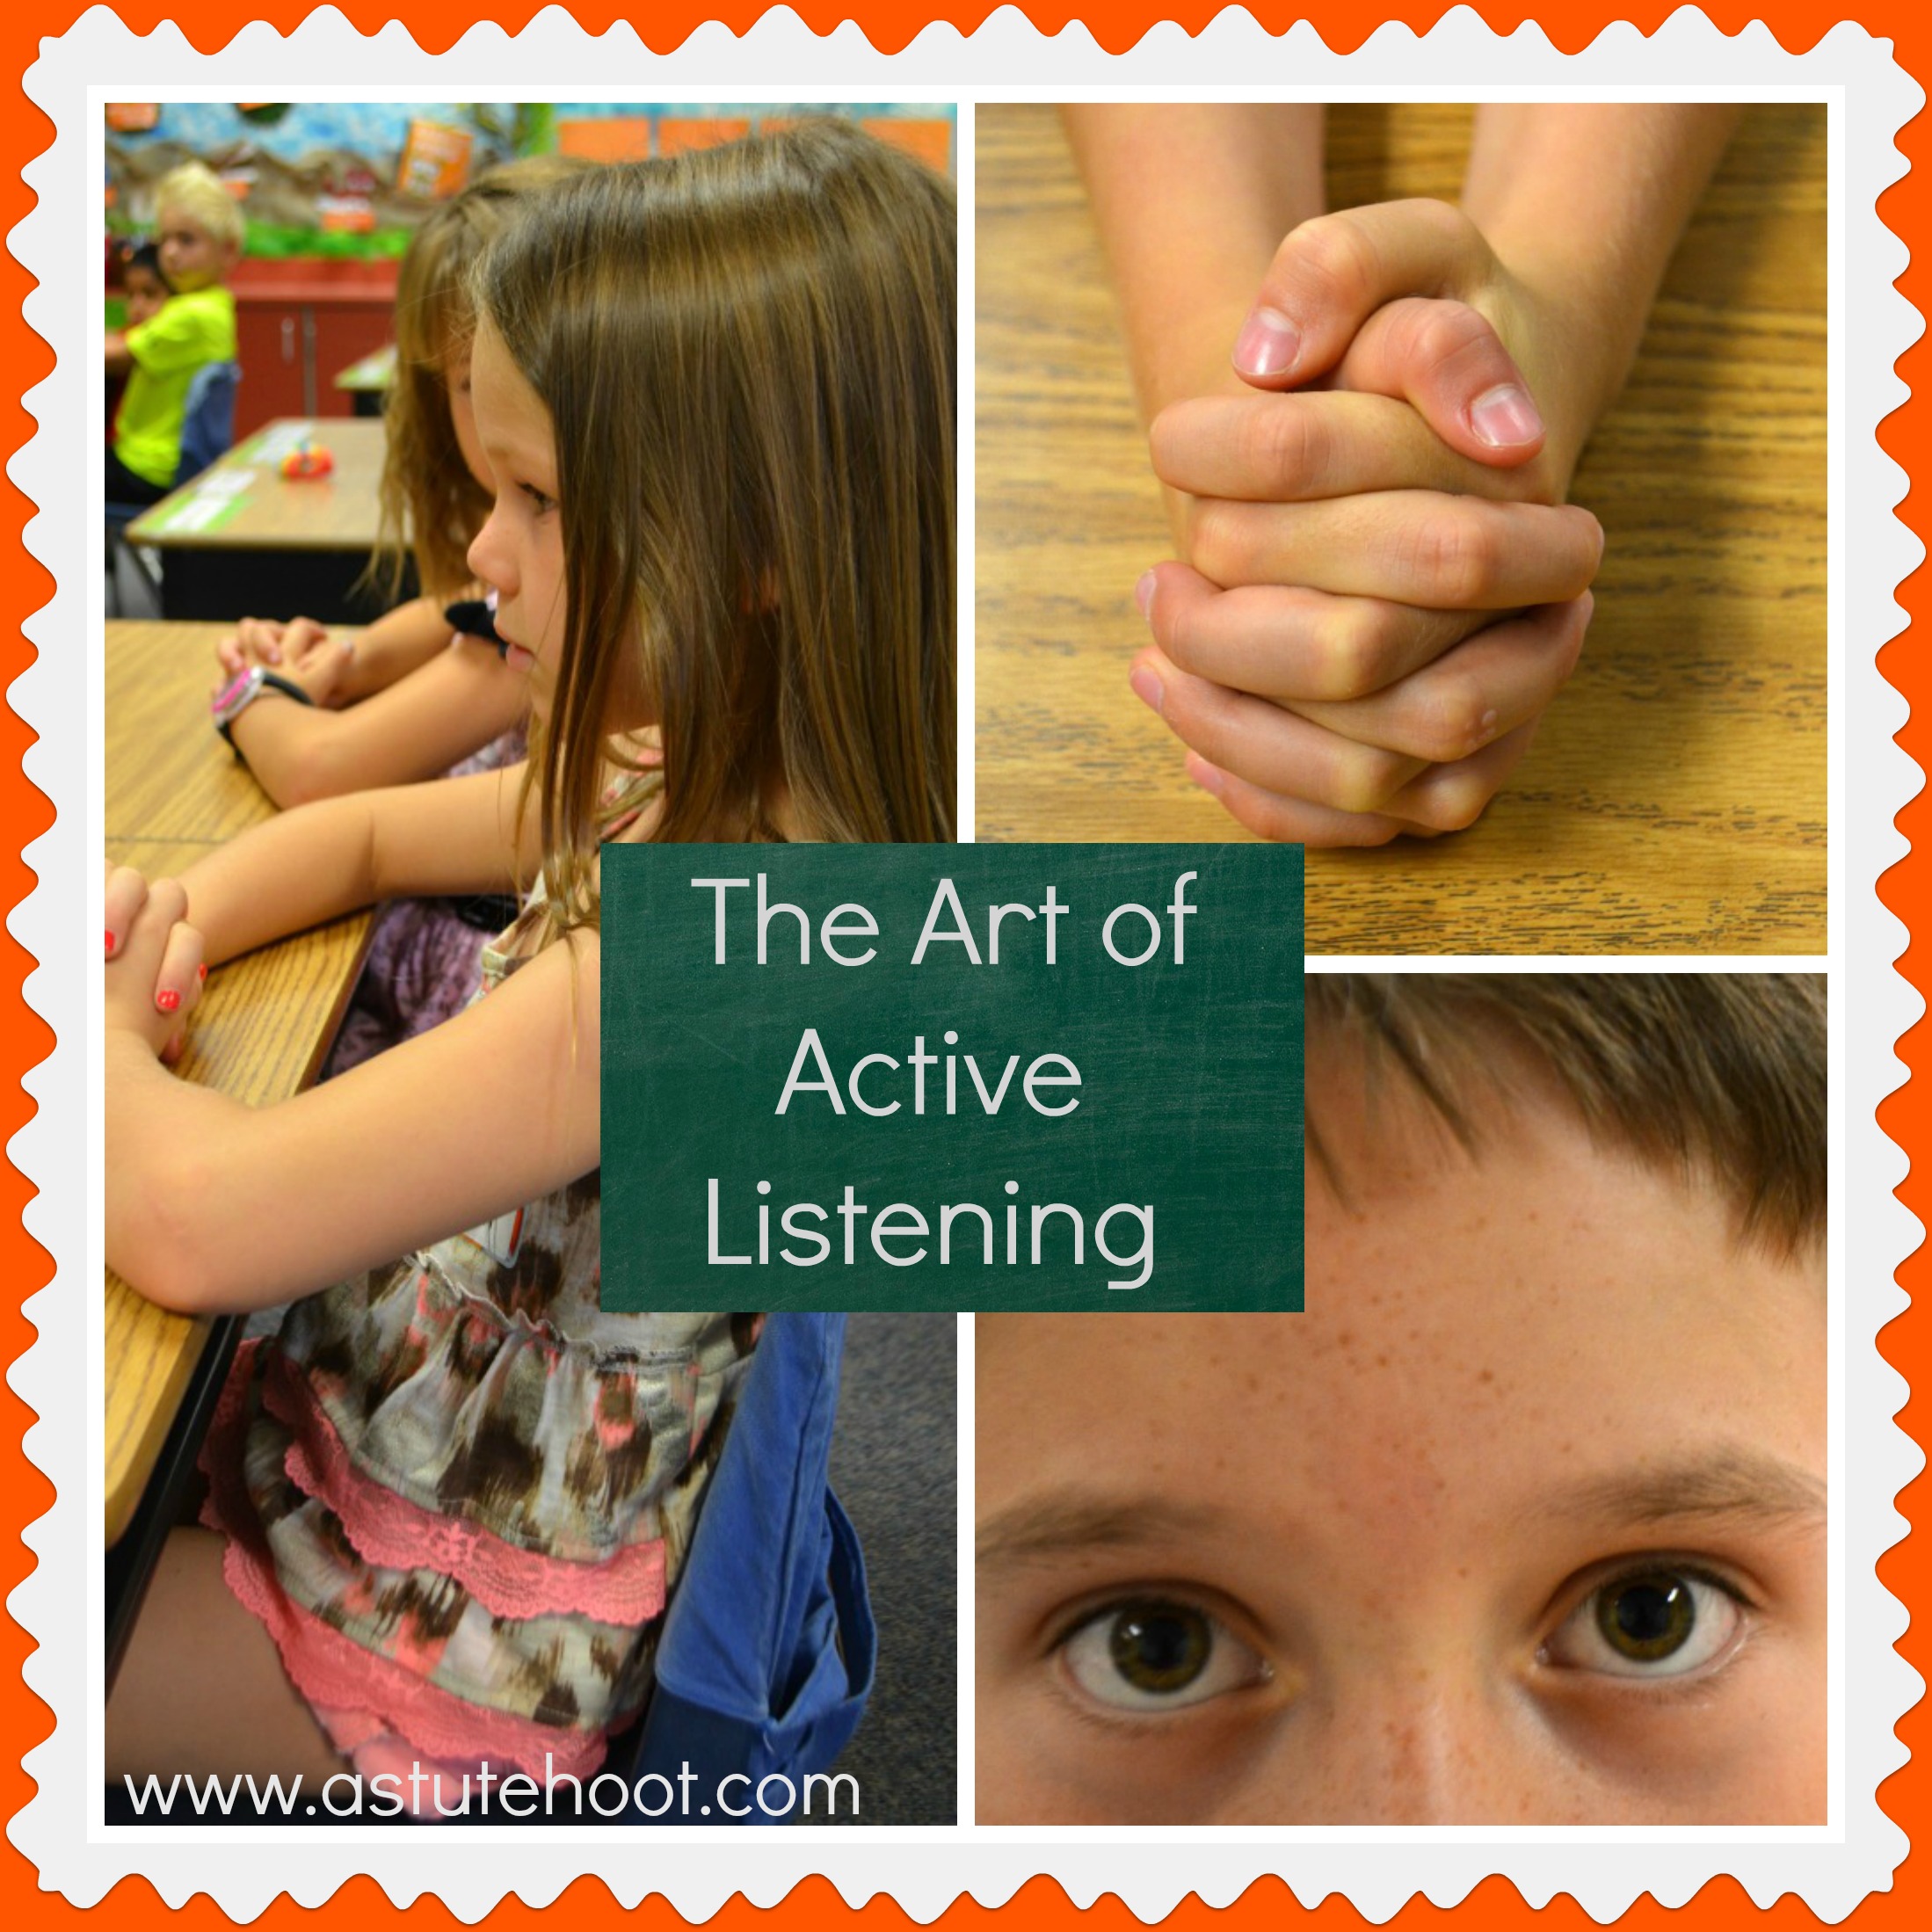
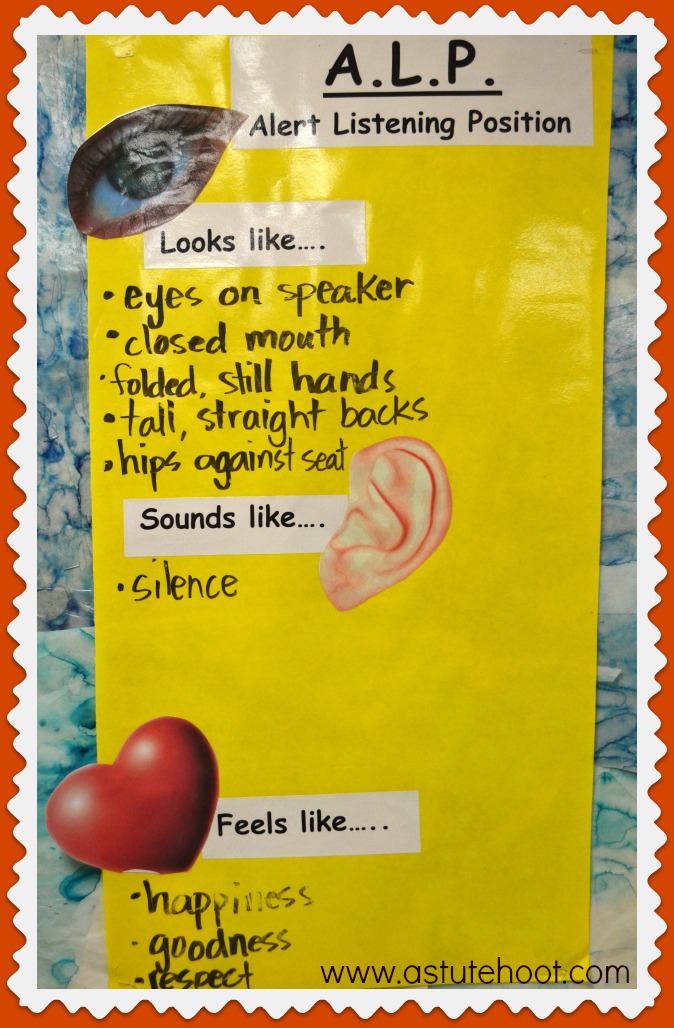
Listening, like any other concept or skill, must be explained, modeled, practiced and reinforced, especially the first few weeks of school.  Students must know what listening looks like, sounds like and feels like.

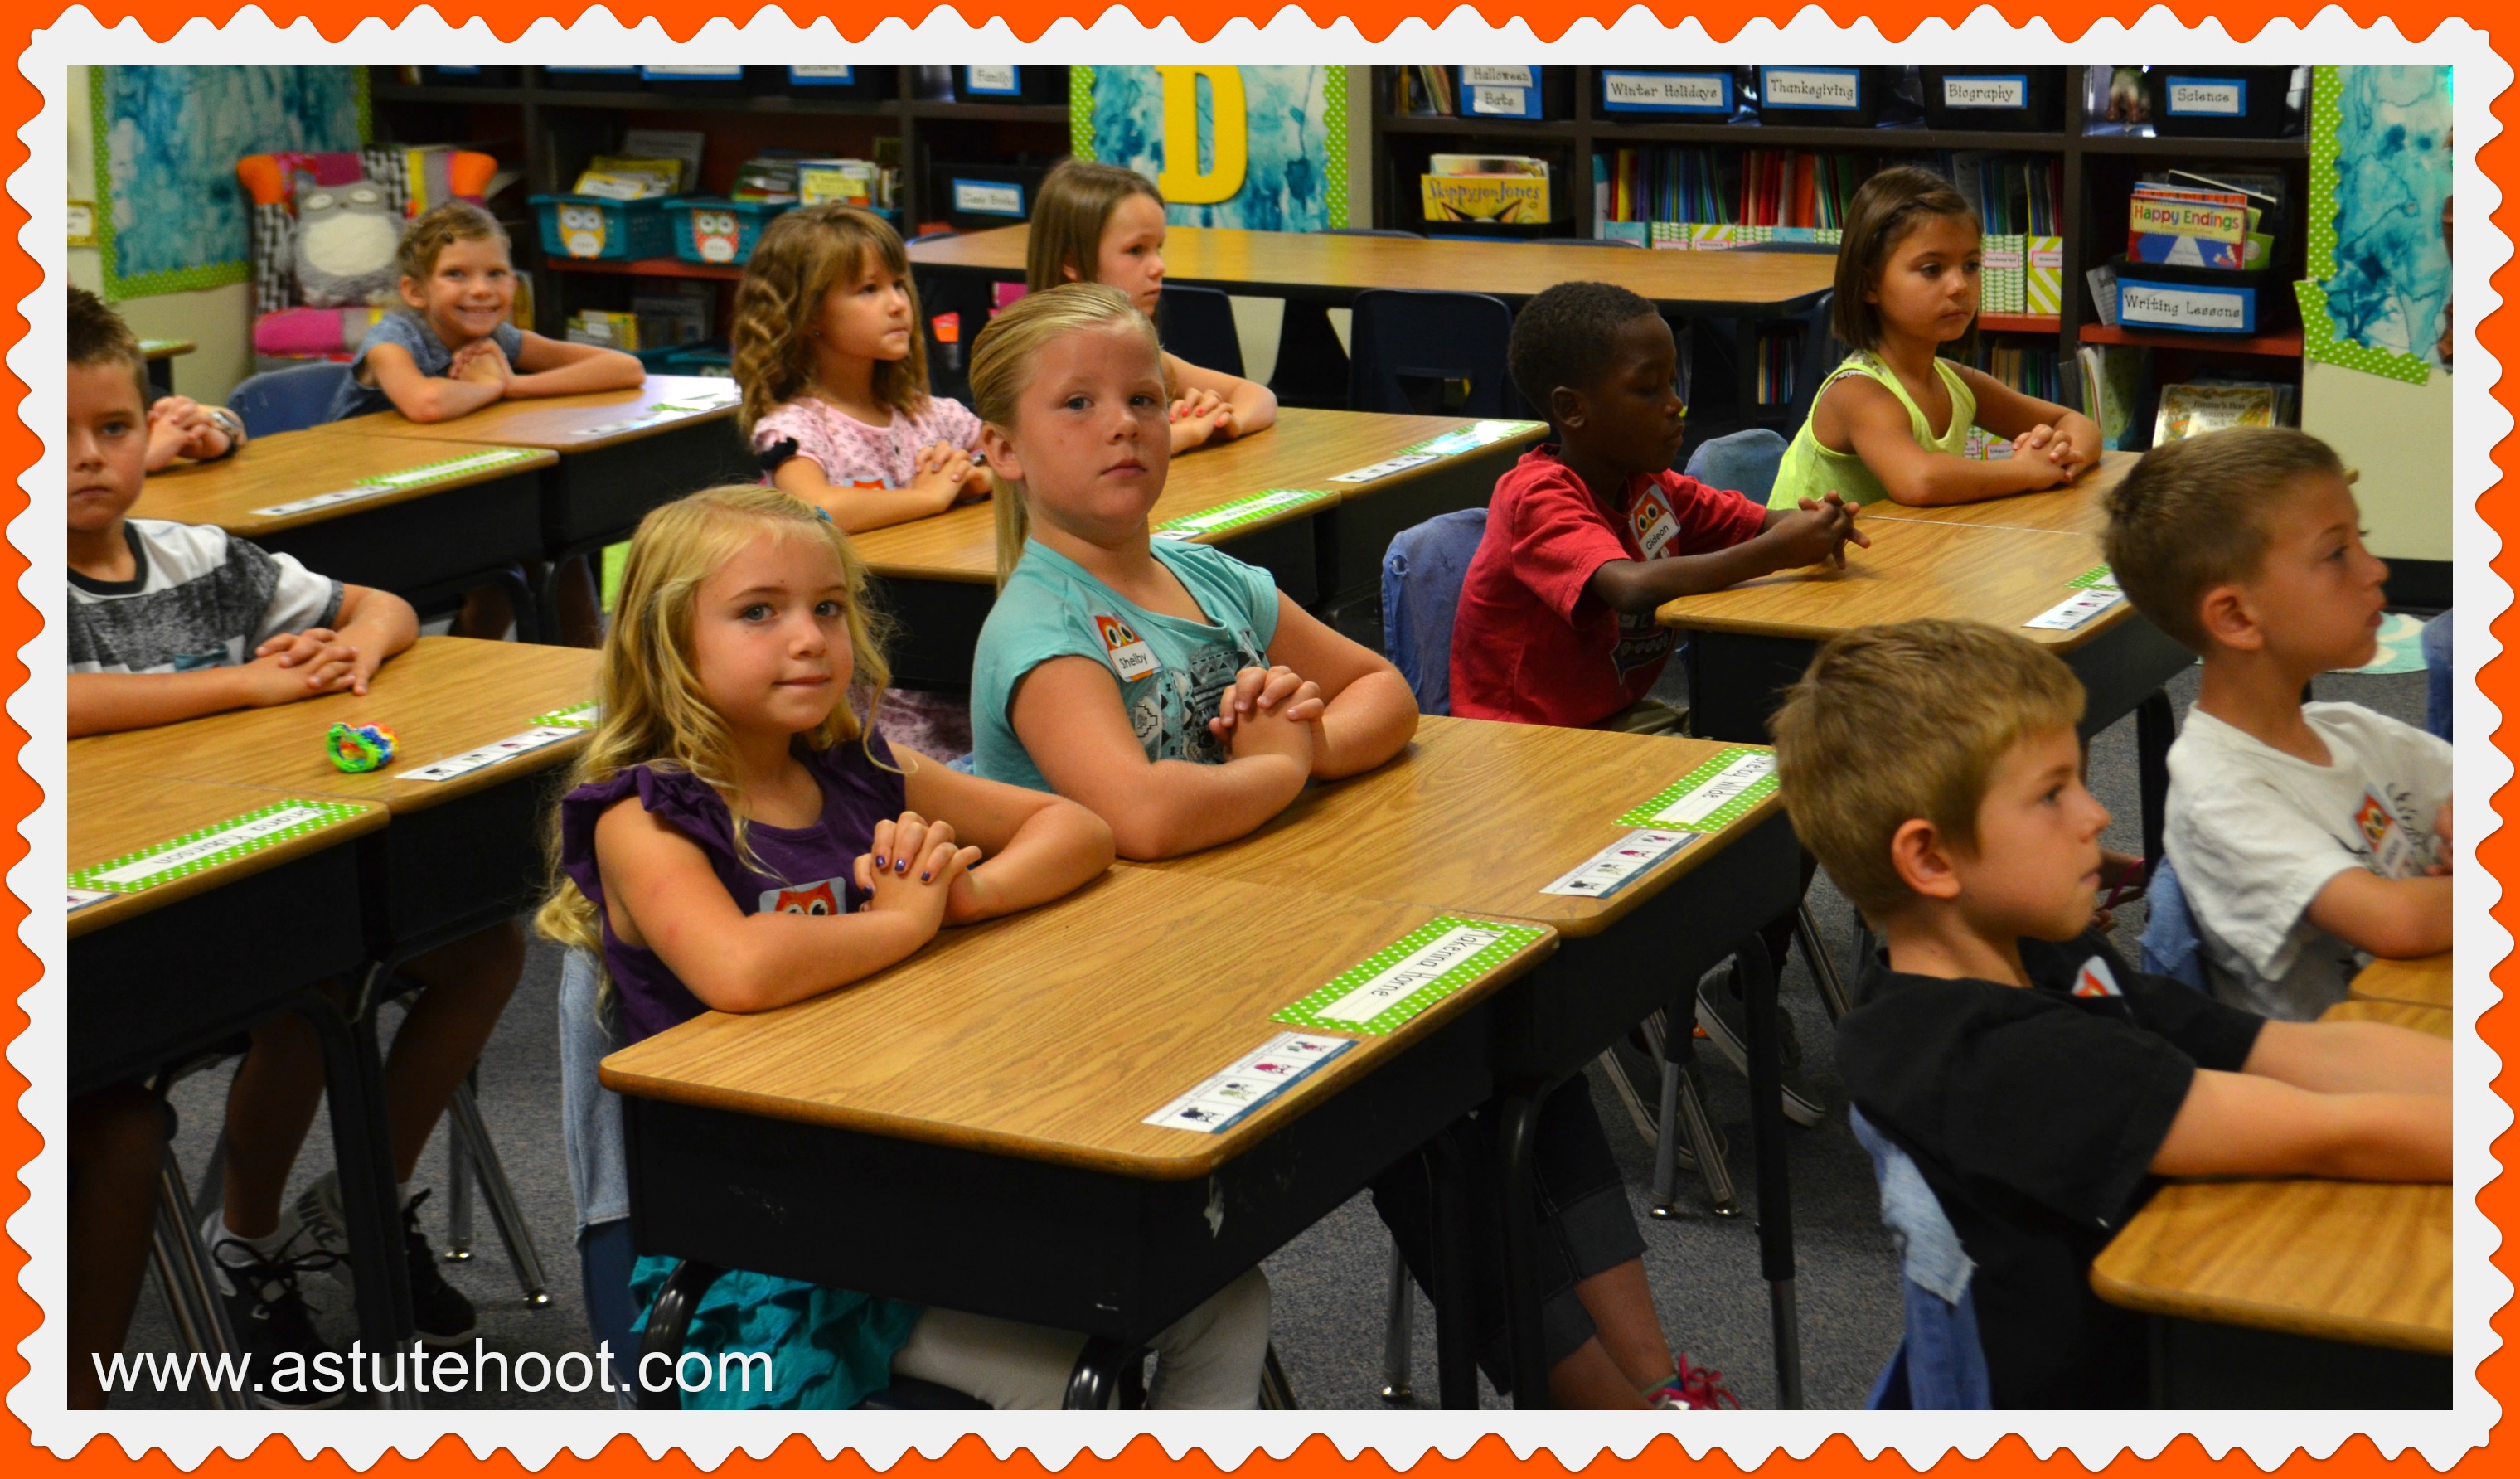
ALP example

Now I introduce active listening on the first day of school in 3 easy steps:

1. Create a common definition:  I give each student 3 colored Post-Its. On the first Post-It, I ask them to write down what active listening looks like. I call students up to the board and each student shares while I sort and label students’ responses. After all have shared, we come up with a consensus and repeat the process for the sounds like and feels like indicators. I record these on my Good Listening Poster.

ALP looks like

active listening behaviors collage

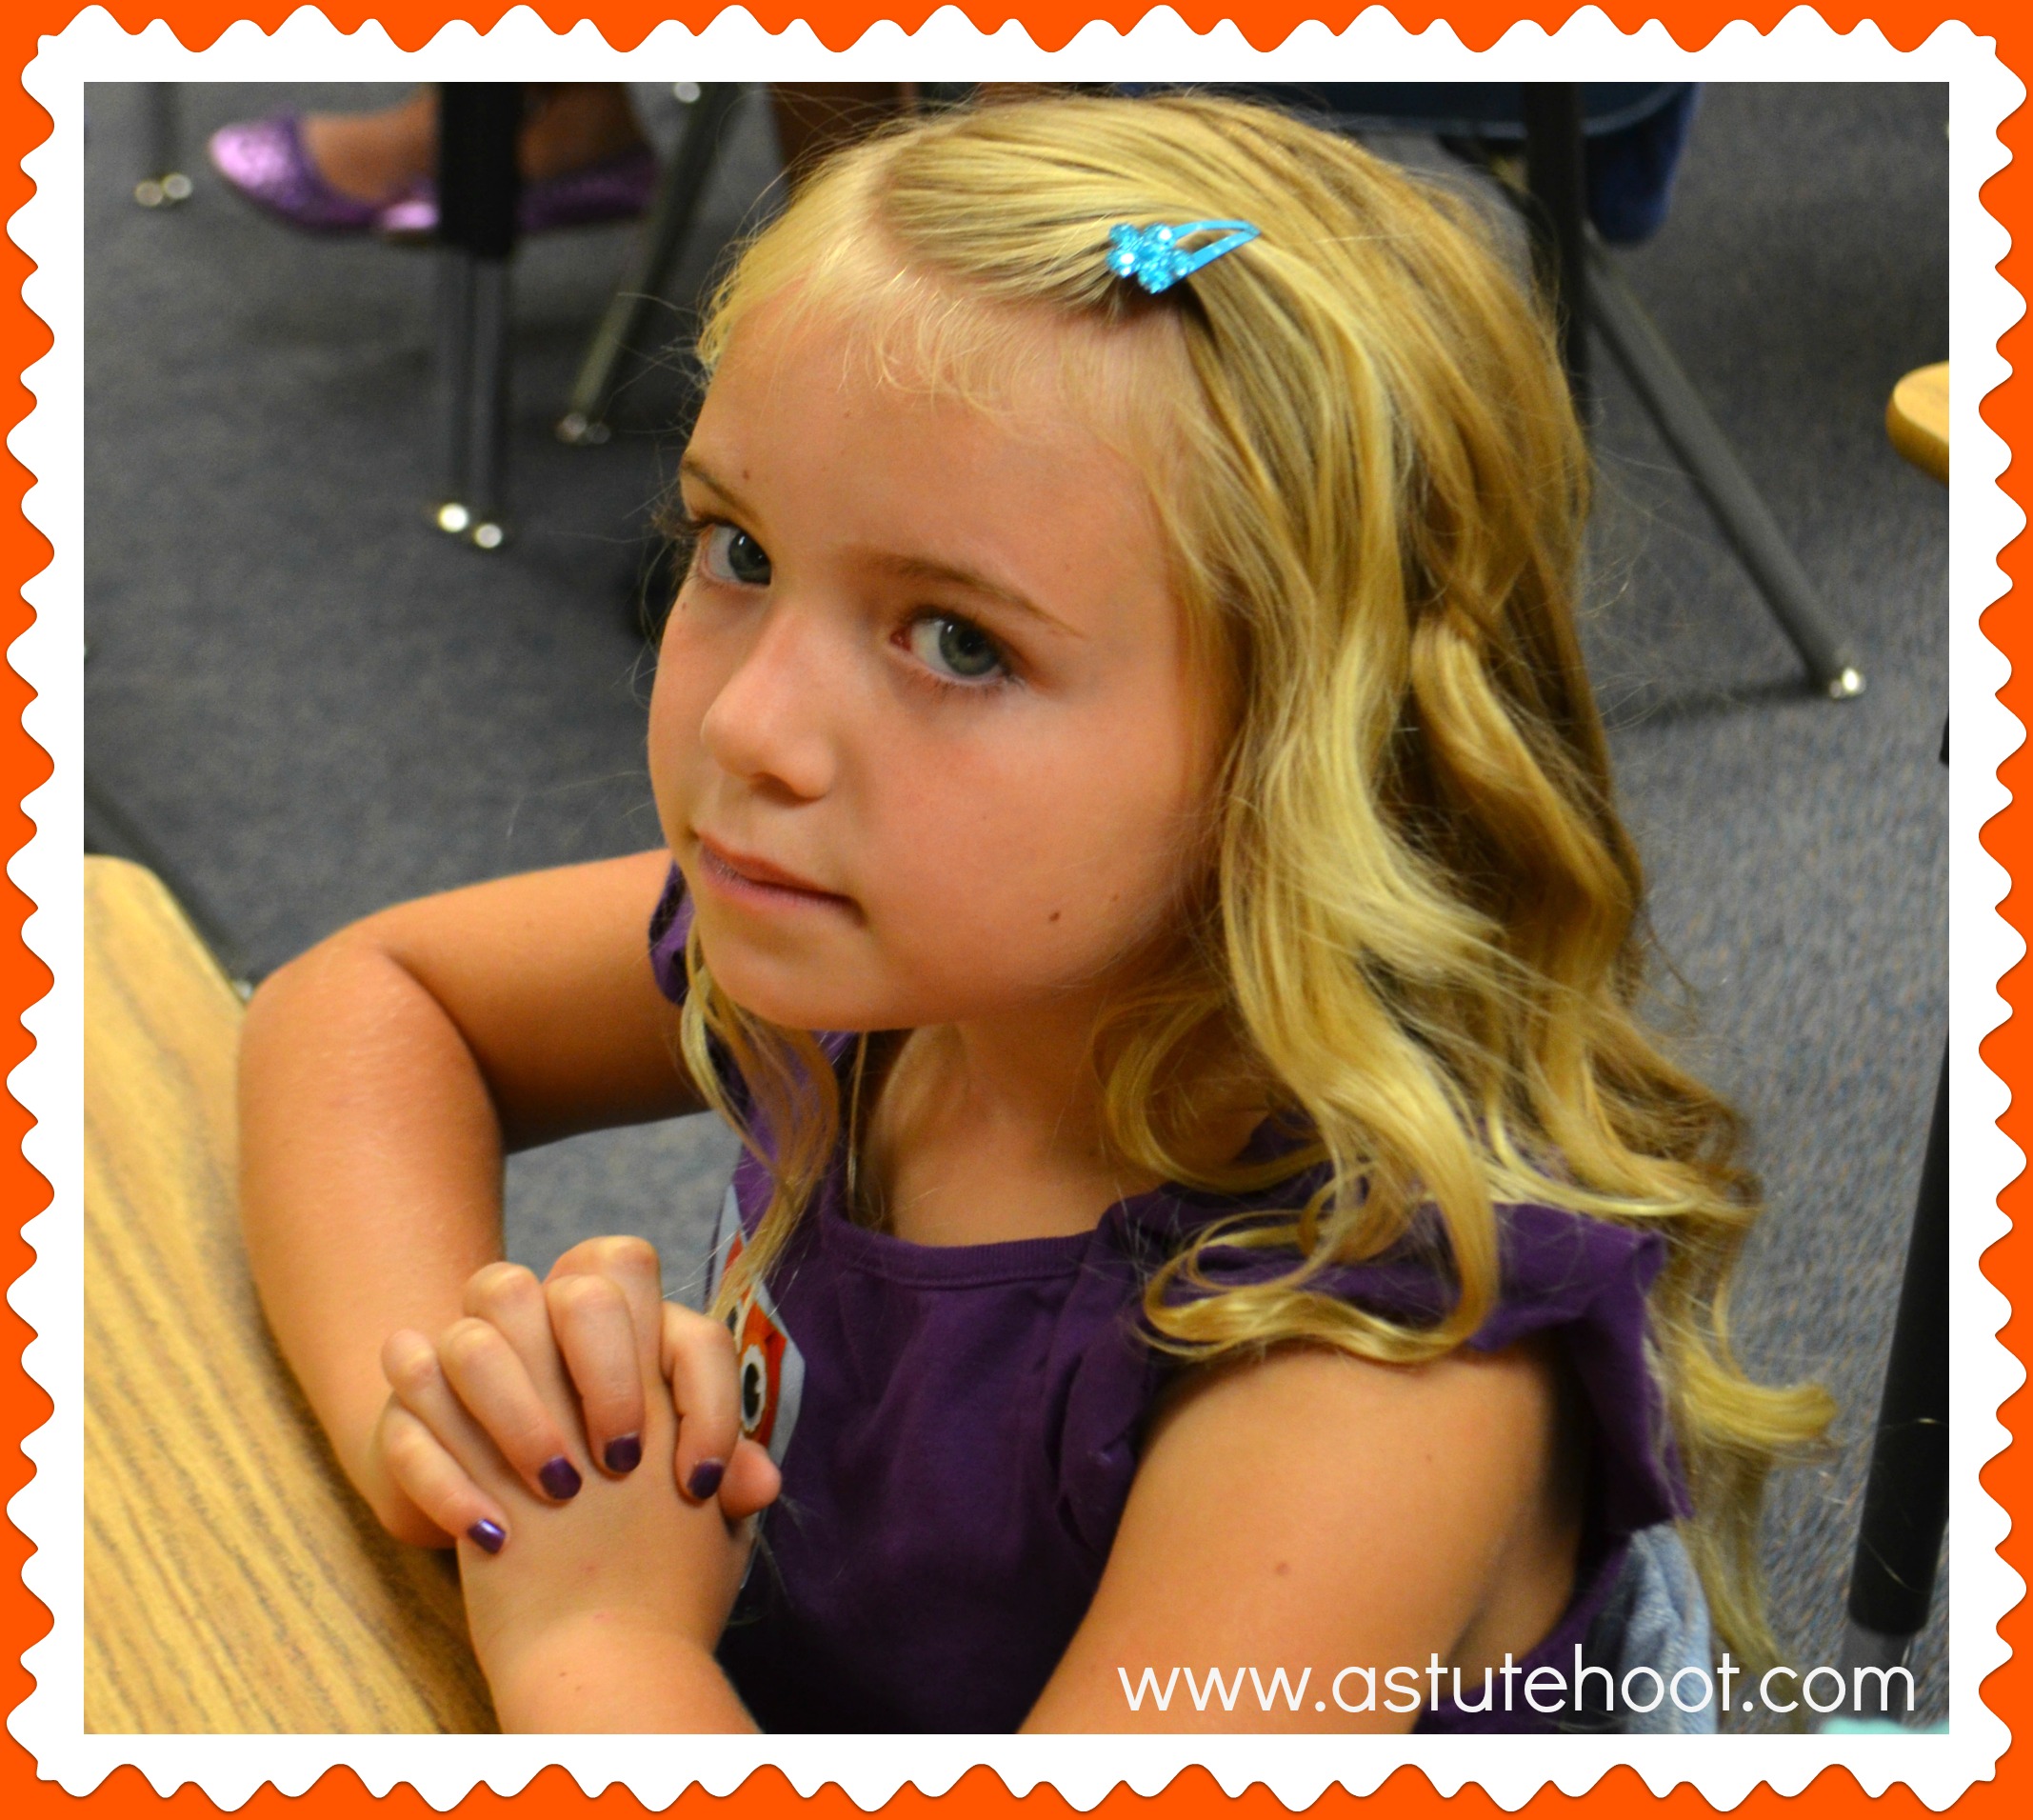
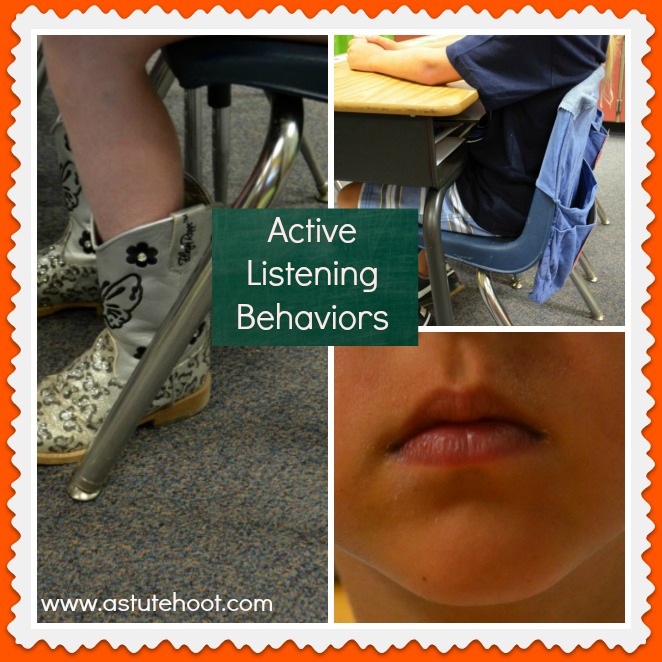
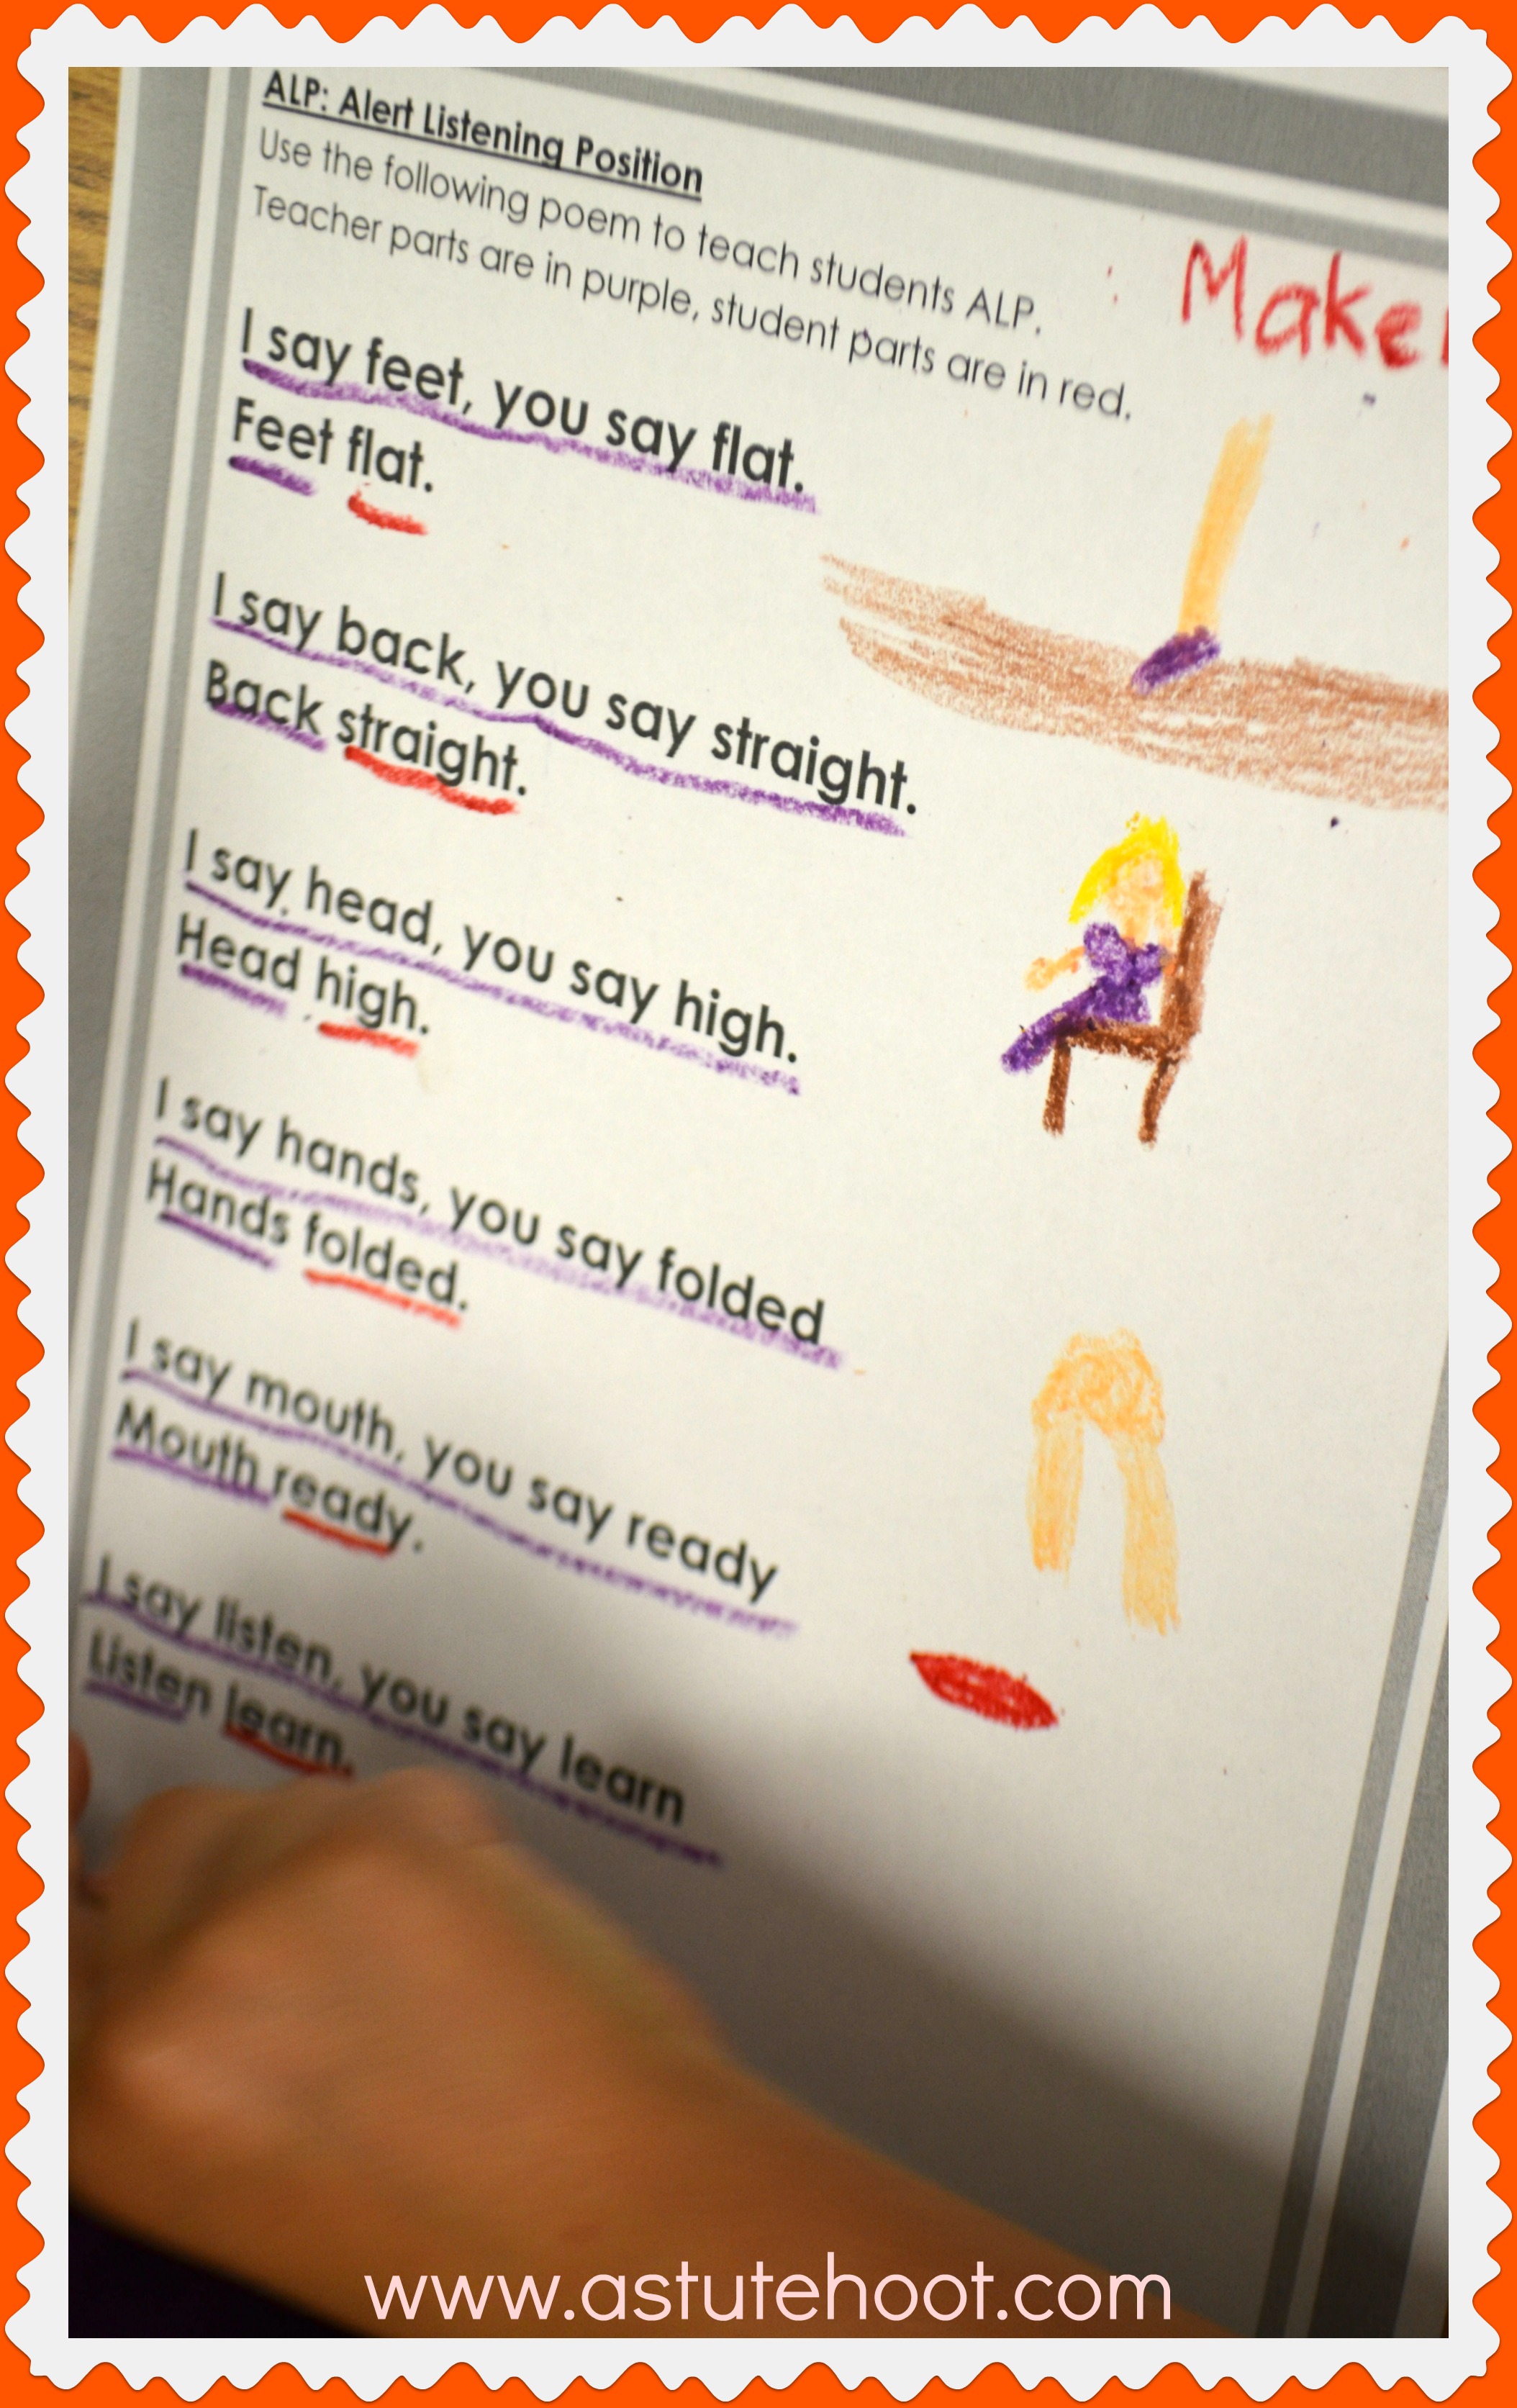
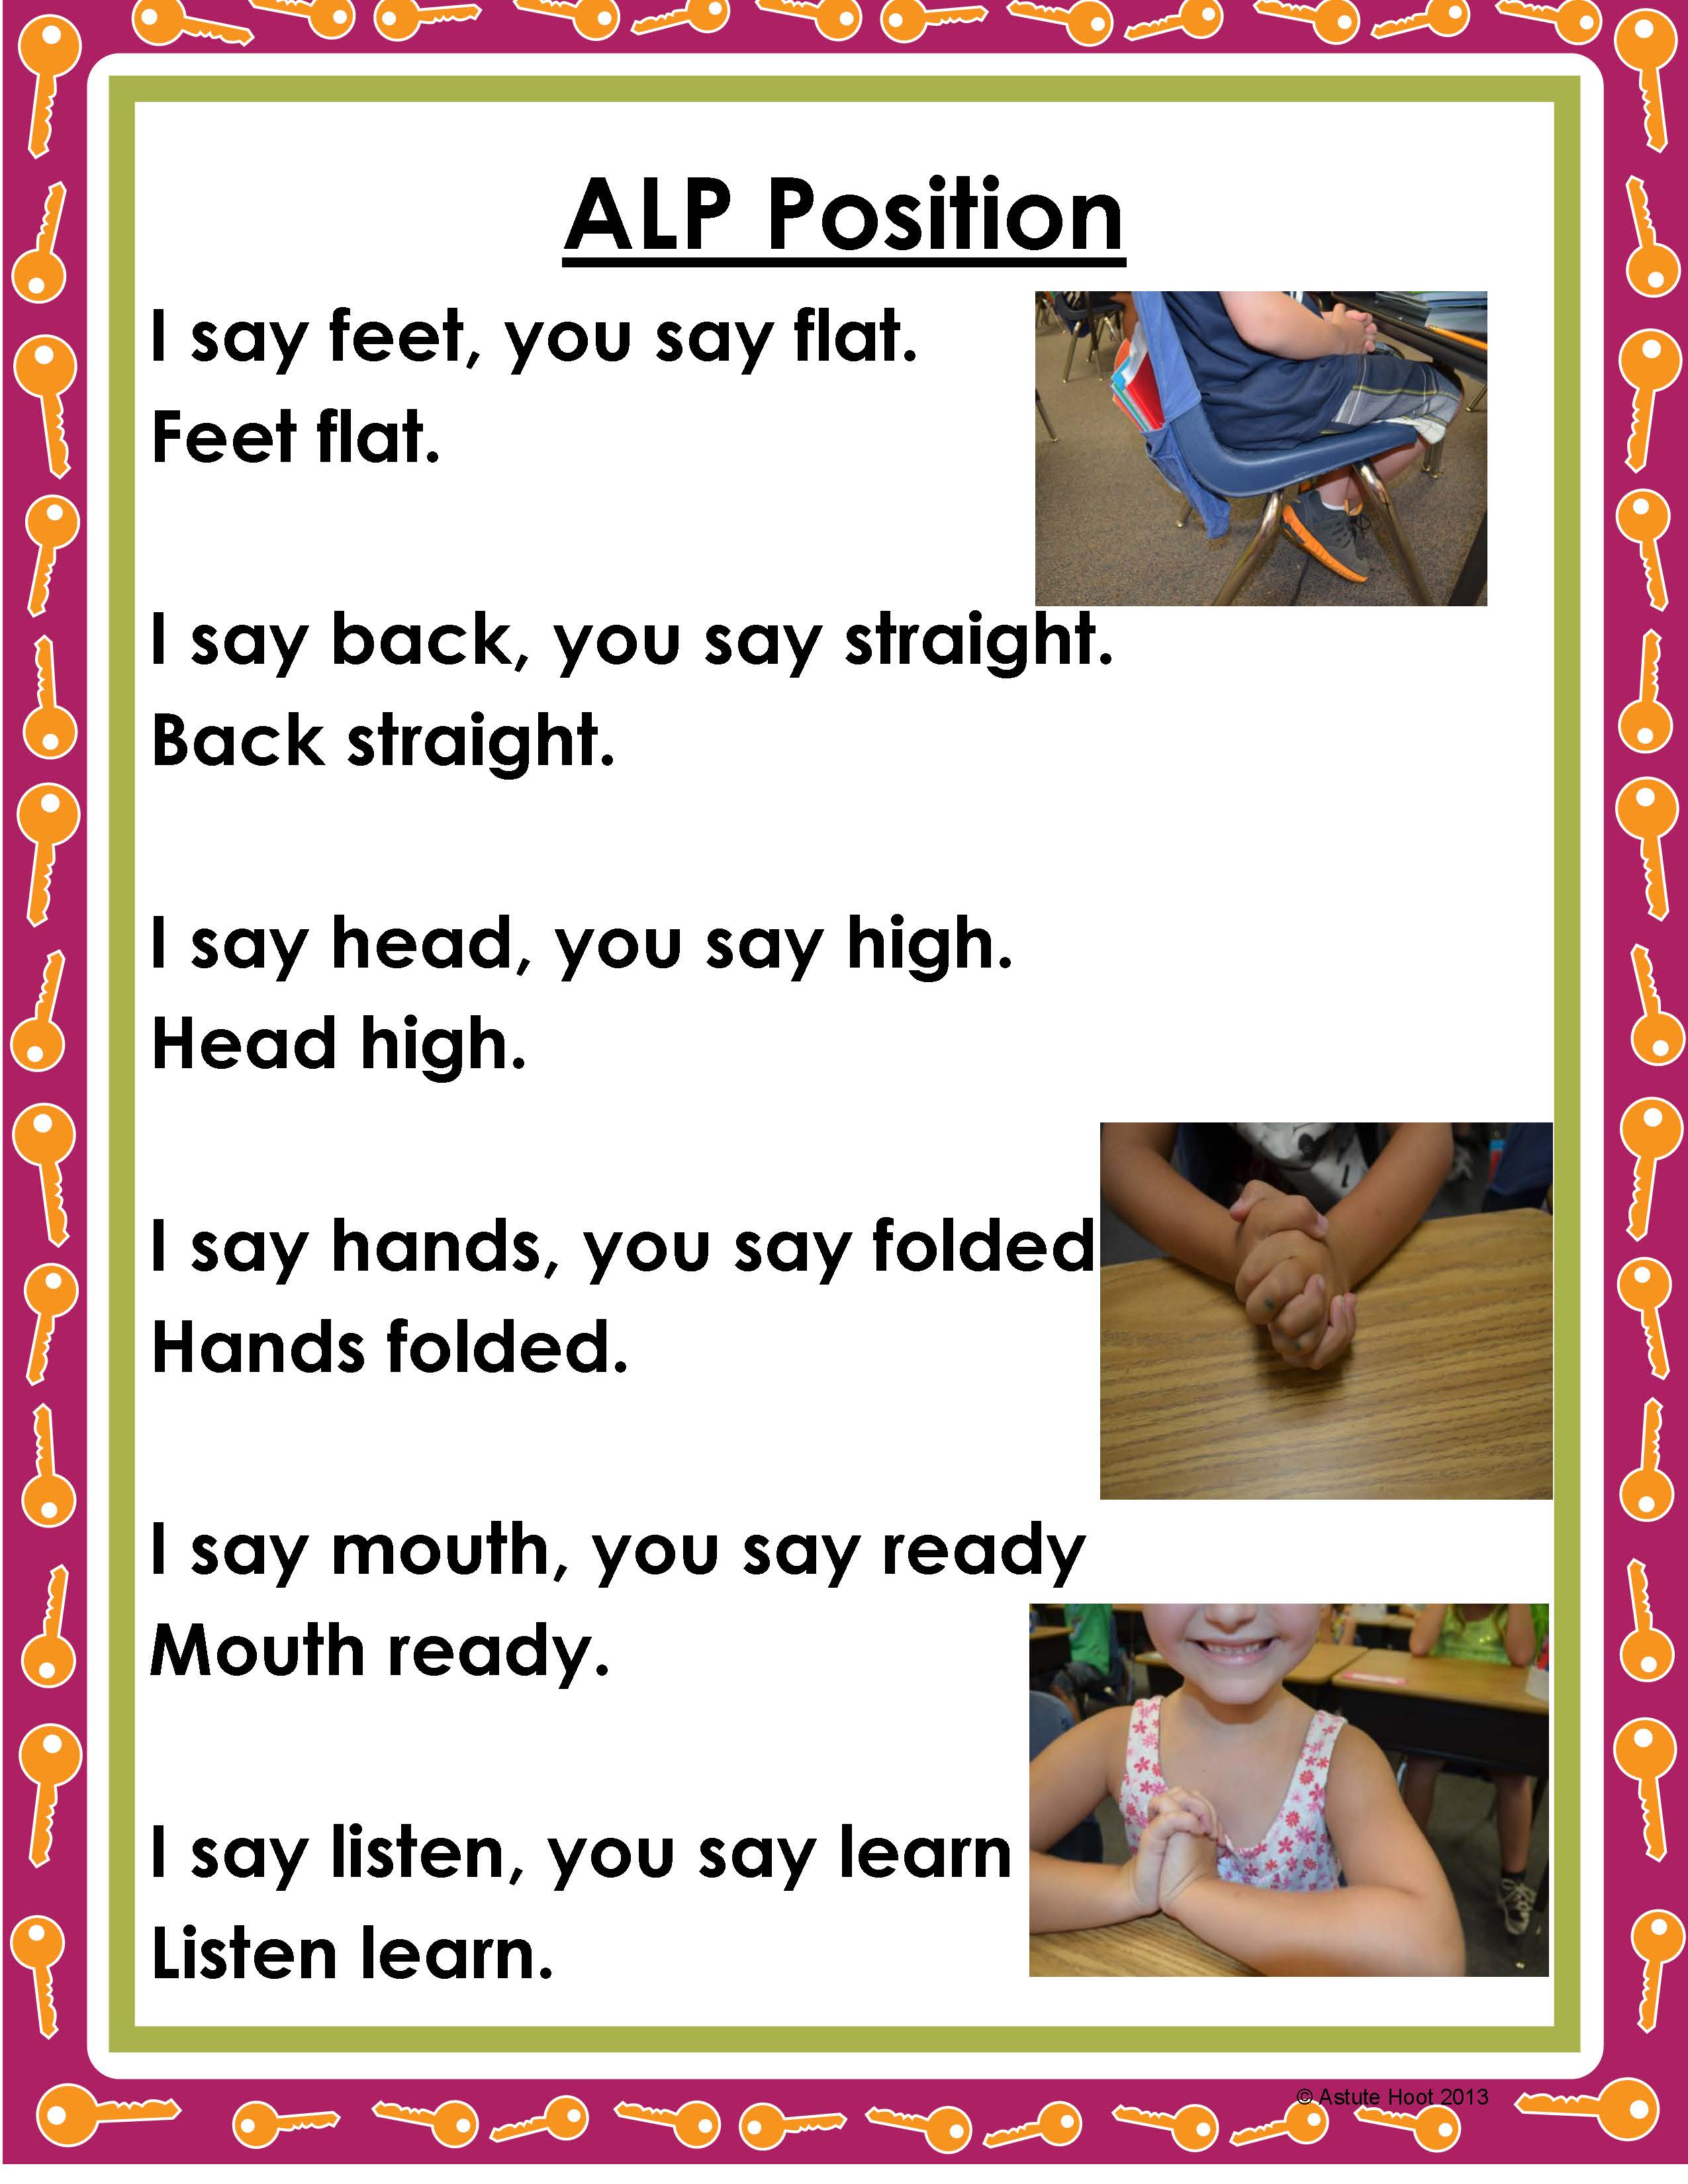
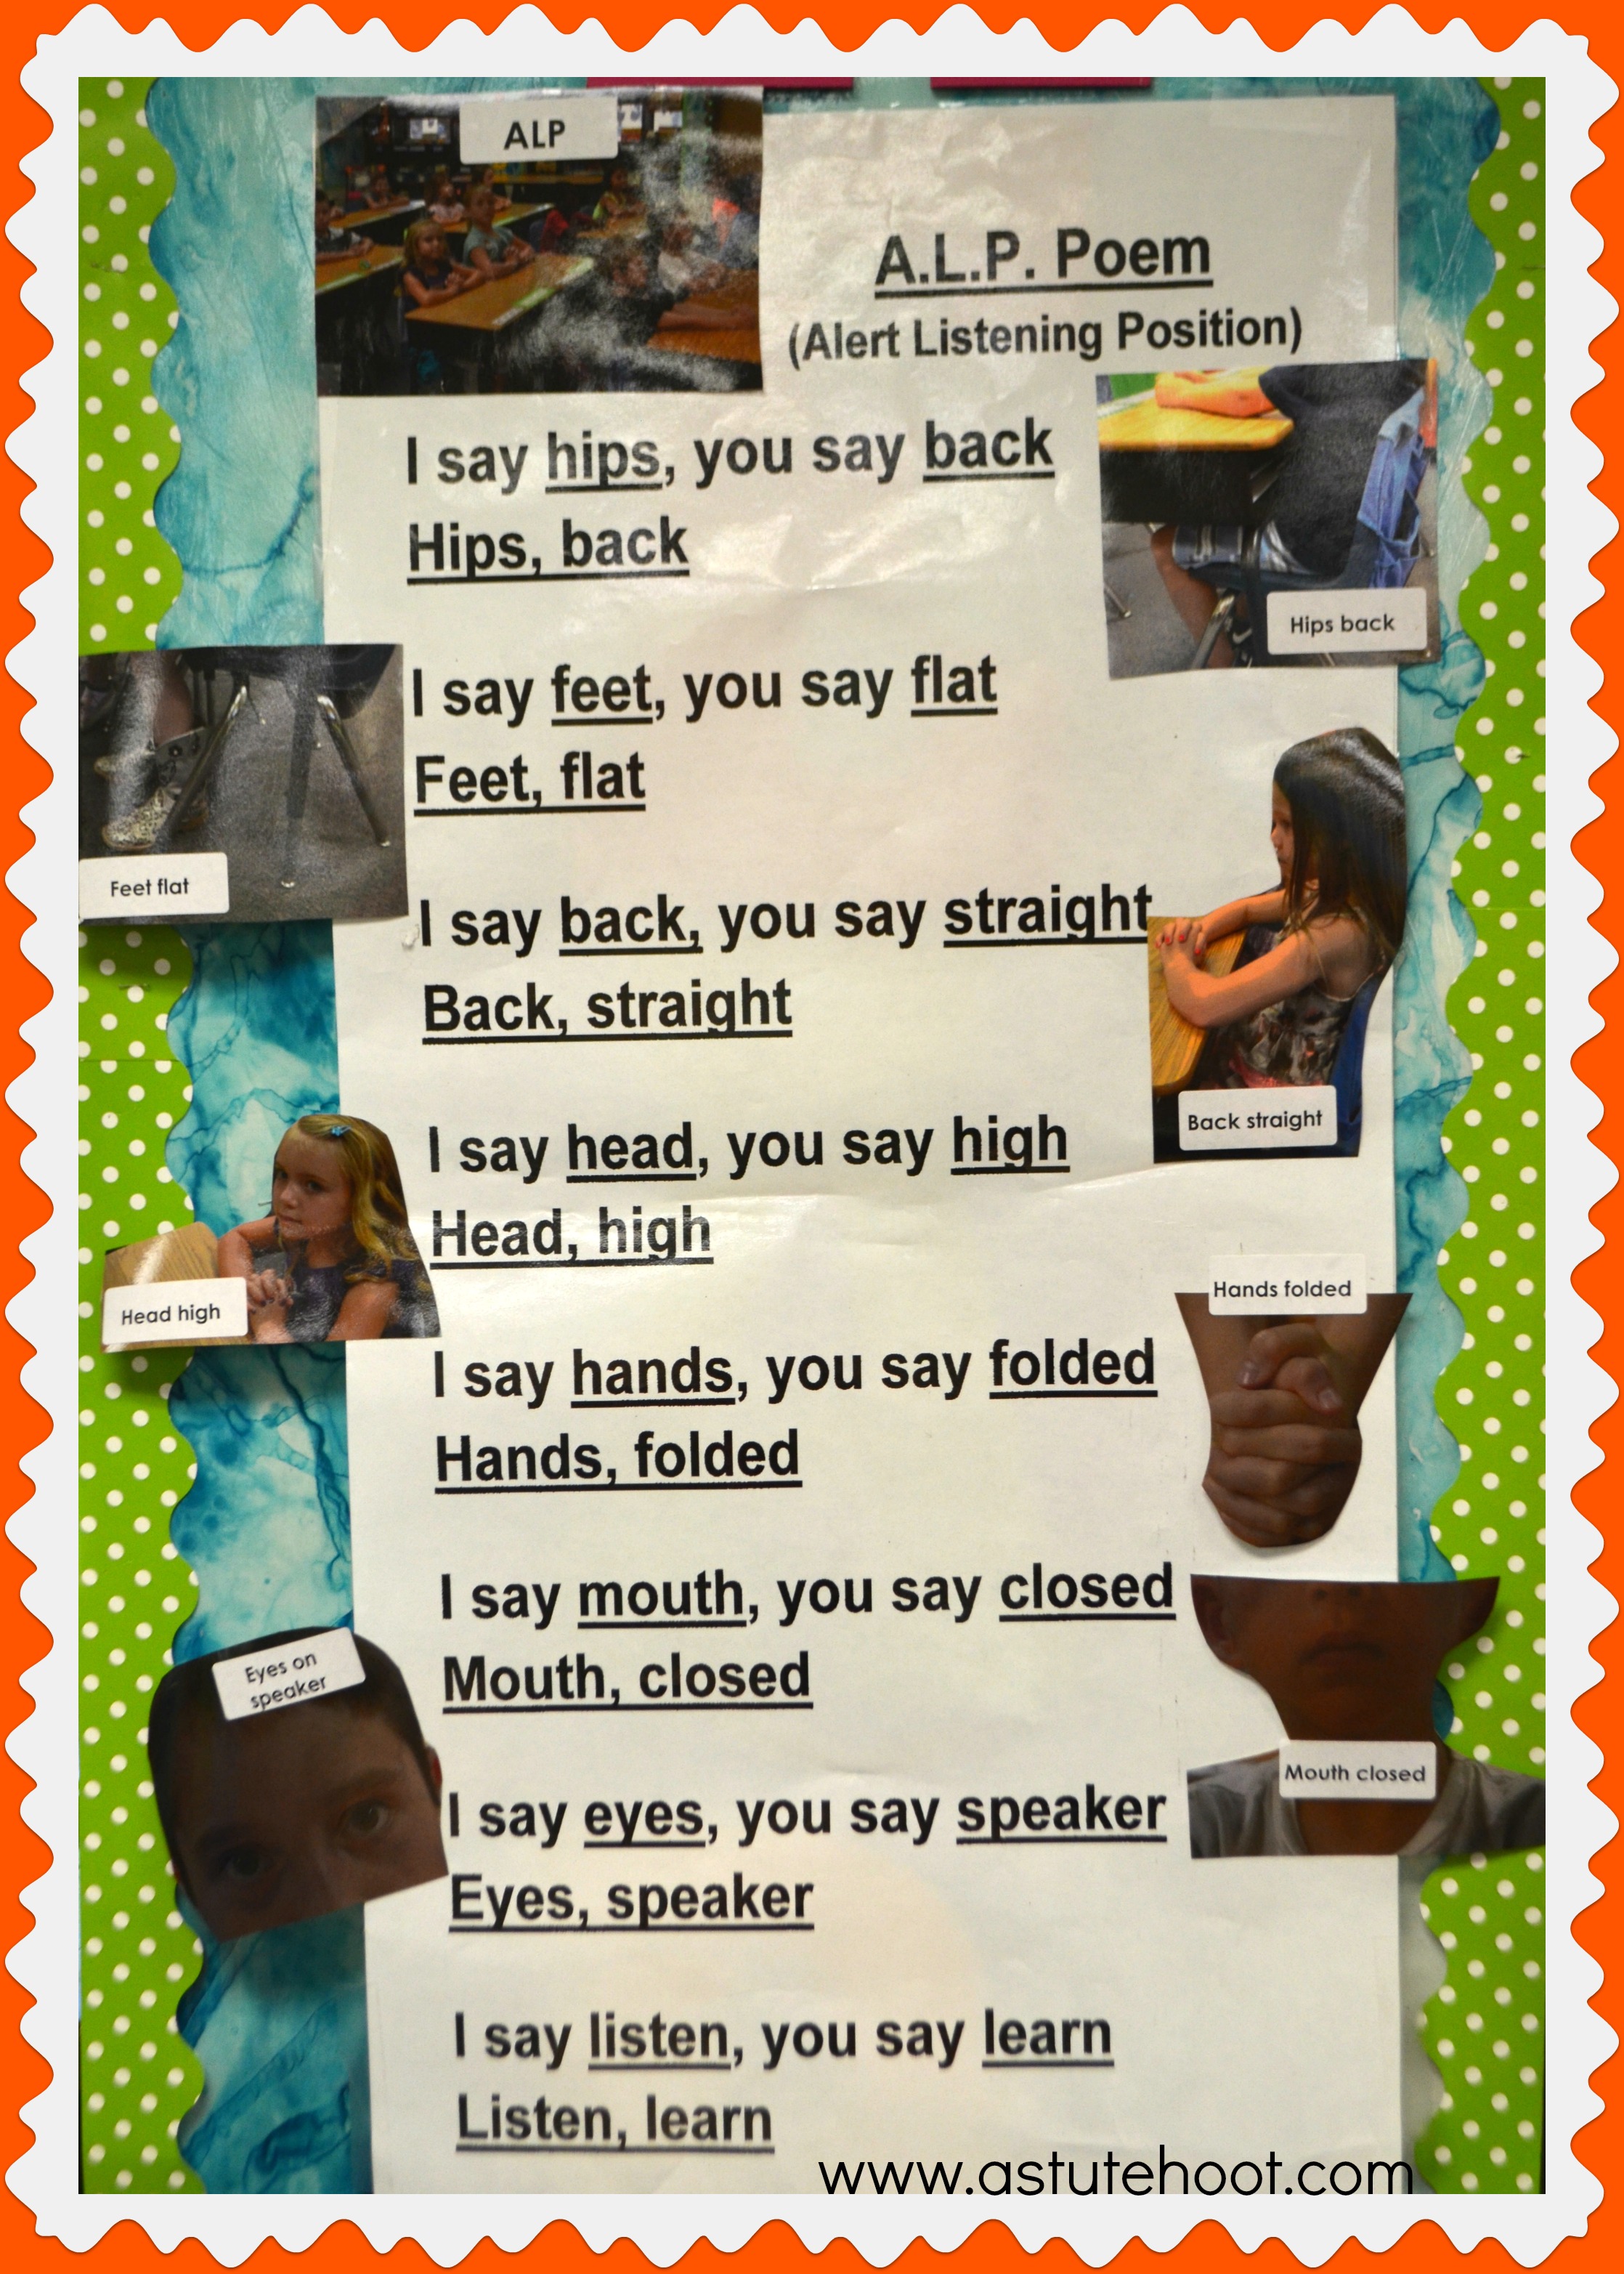
2. Practice active listening indicators: Next I share my Alert Listening Position (ALP) poem that teaches specific active listening behaviors and we practice these behaviors several times. Students are actively engaged in learning as they chant the second line of each stanza and model the listening behaviors with their bodies.  We also practice non-ALP behaviors such as slumping in seat, head on desk, no eye contact so students can understand non-examples.  While we are practicing, I rove the room and take pictures of excellent ALP examples and post to my ALP poem to use as visual reminders of expected behaviors. Students also get a copy of the ALP poem and add visual cues to help them remember active listening expectations.

ALP

ALP poem student example

ALP class page

3. Reinforce and provide regular feedback: During the first few weeks of school, we say the poem together before each lesson to ensure that all students are active listeners. As students become proficient, we recite poem in the morning only and I will give active listening reminders before each lesson by saying, “Let’s do an ALP check,” and provide feedback as necessary. I also share this with specials’ teachers as well as cafeteria aides so that students understand that I expect active listening throughout campus, not just in my classroom.

ALP poem class

Need suggestions for teaching other routines, procedures and transitions? Download our Back to School Teacher Toolbox: Routines, Procedures and Transitions that has engaging activities and lessons to teach 10 critical classroom routines.

PREVIEW Routines and Procdures_Page_1

Happy New Year!

Jessica_blog_signature-SMALL

Golden Keys to Success, classroom management plans, behavior modification

Flash Friday Freebie: Classroom Management Keys

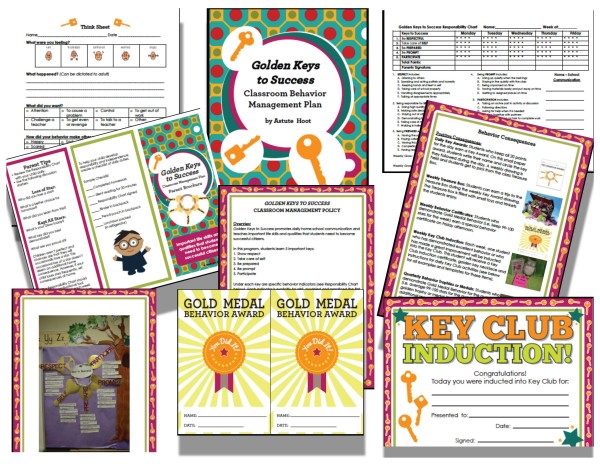
It’s our Flash Friday Freebie! Download the free Golden Keys to Success Classroom Management Plan and purchase the accompanying Golden Keys to Success Lesson Plans to start your year off on a golden note.

Do you every feel as if you are a glorified manager, simply trying to control the herd and maintain peace? Your classroom management plan is to blame.  Most of the current, trendy behavior plans focus solely on teacher-based management. In these systems, the teacher directs and tries to control students’ behavior with little student involvement or ownership.

The clip system is the perfect example. Each student has a clothespin labeled with his/her name on it and begins the day in the middle of the chart on green “ready to learn.”  During the course of the day students have the opportunity to move their clothespin up and down the chart according to their behavior choices.  Positive behavior choices allow the student to move up a level and inappropriate behavior choices cause the clothespin to move down a level.

This system is  extremely laborious as it requires constant teacher monitoring and feedback. What happens if the students didn’t move the clip when asked? What happens if you forgot to tell the student to clip up or down? What do you tell the concerned parent when you forgot why her son clipped down? How do you handle the student who “lost” his clip? Everyone who’s used the clip system has experienced these scenarios, probably more than once as in my case. These issues occur because we are trying to dominate students’ behavior rather than make them accountable.

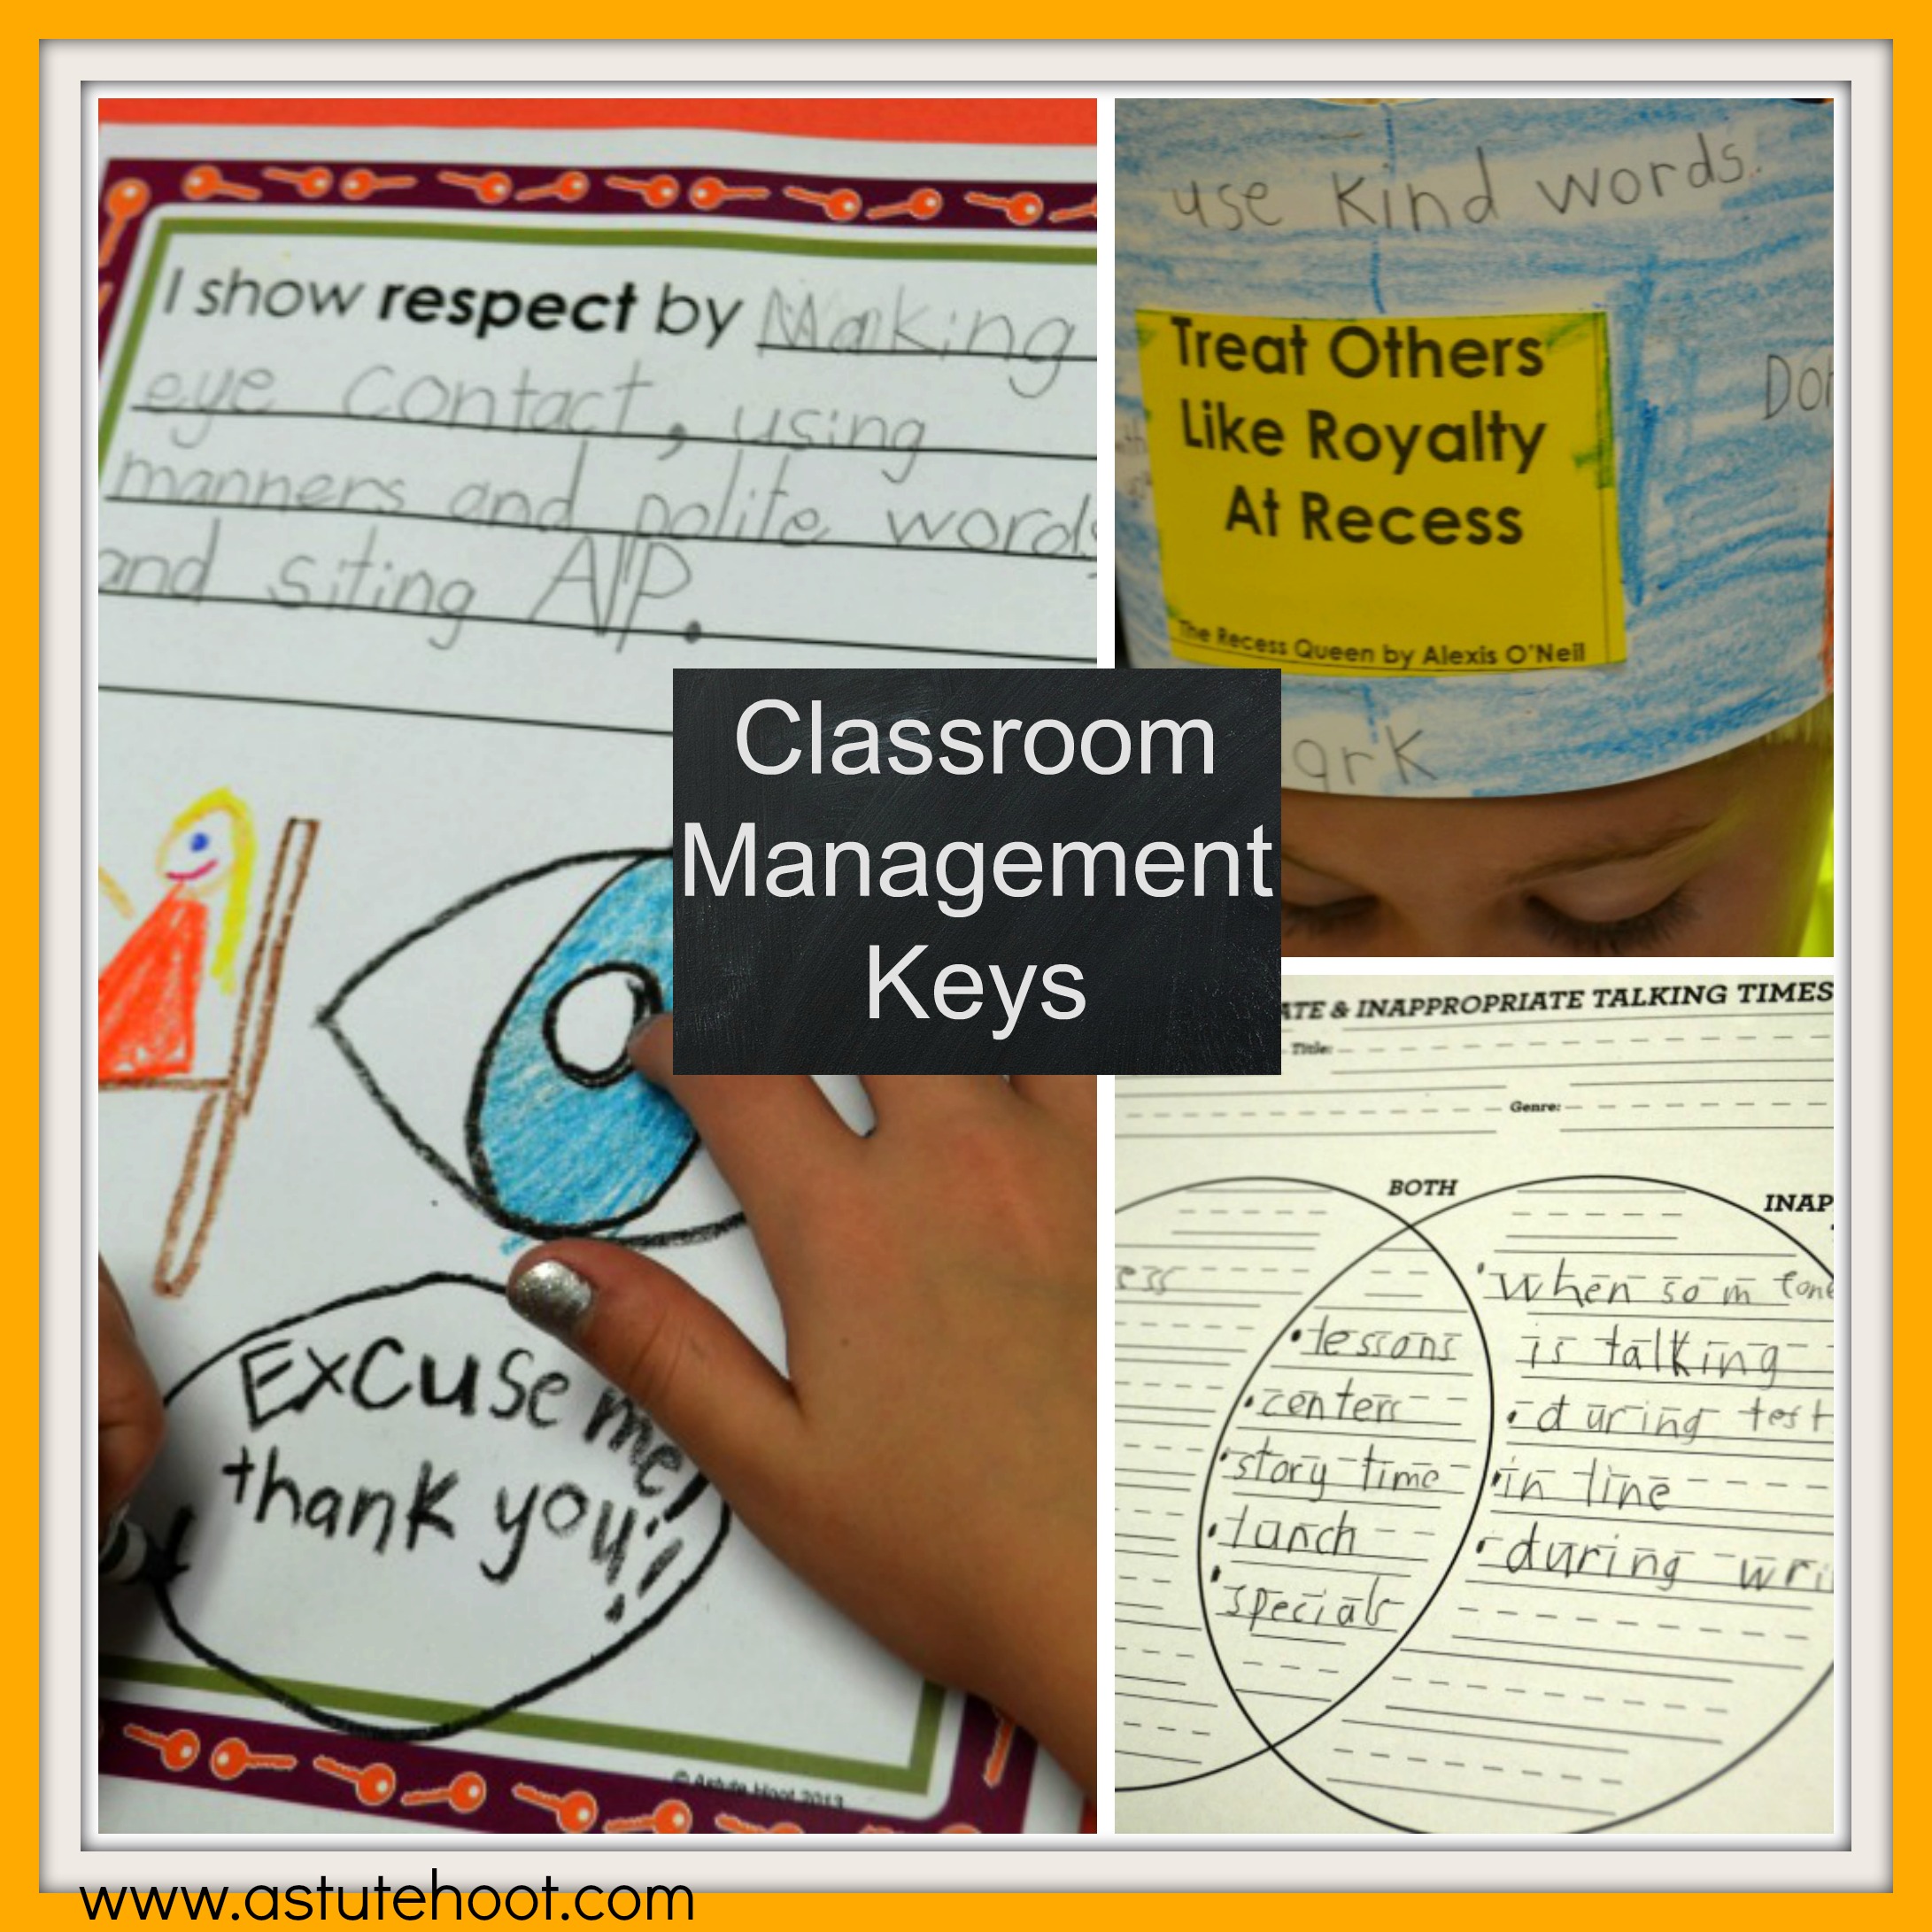
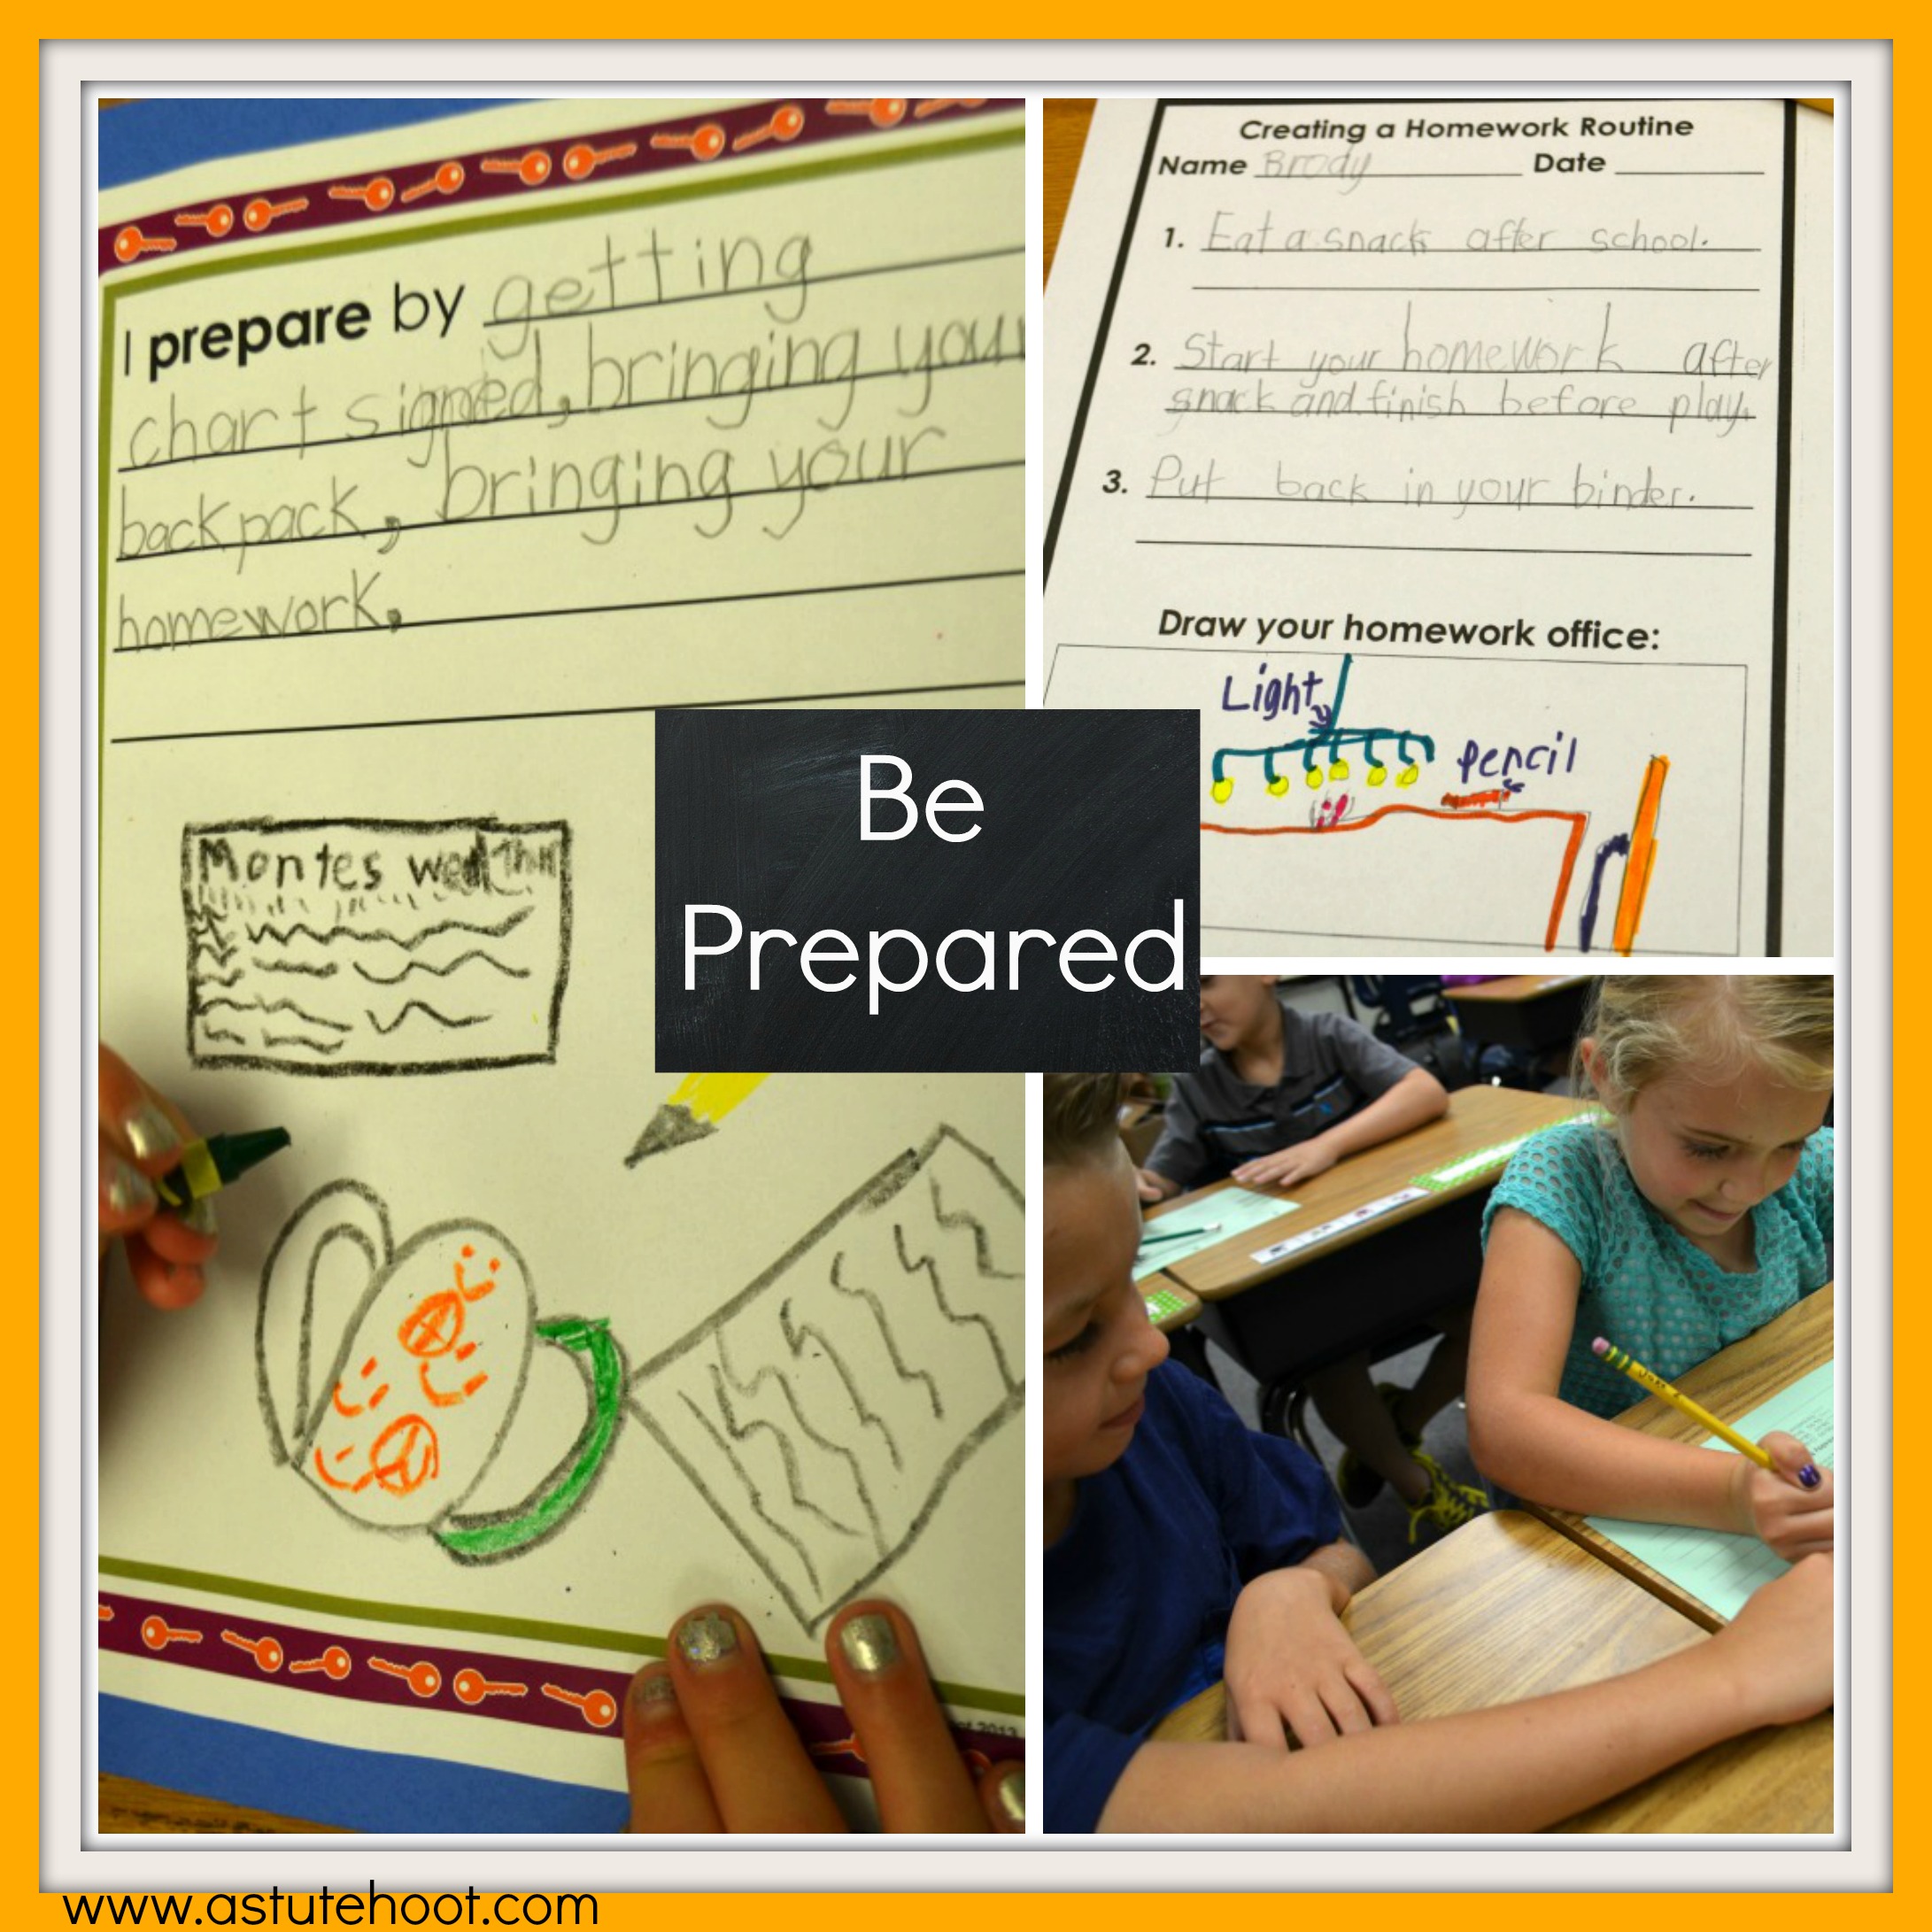
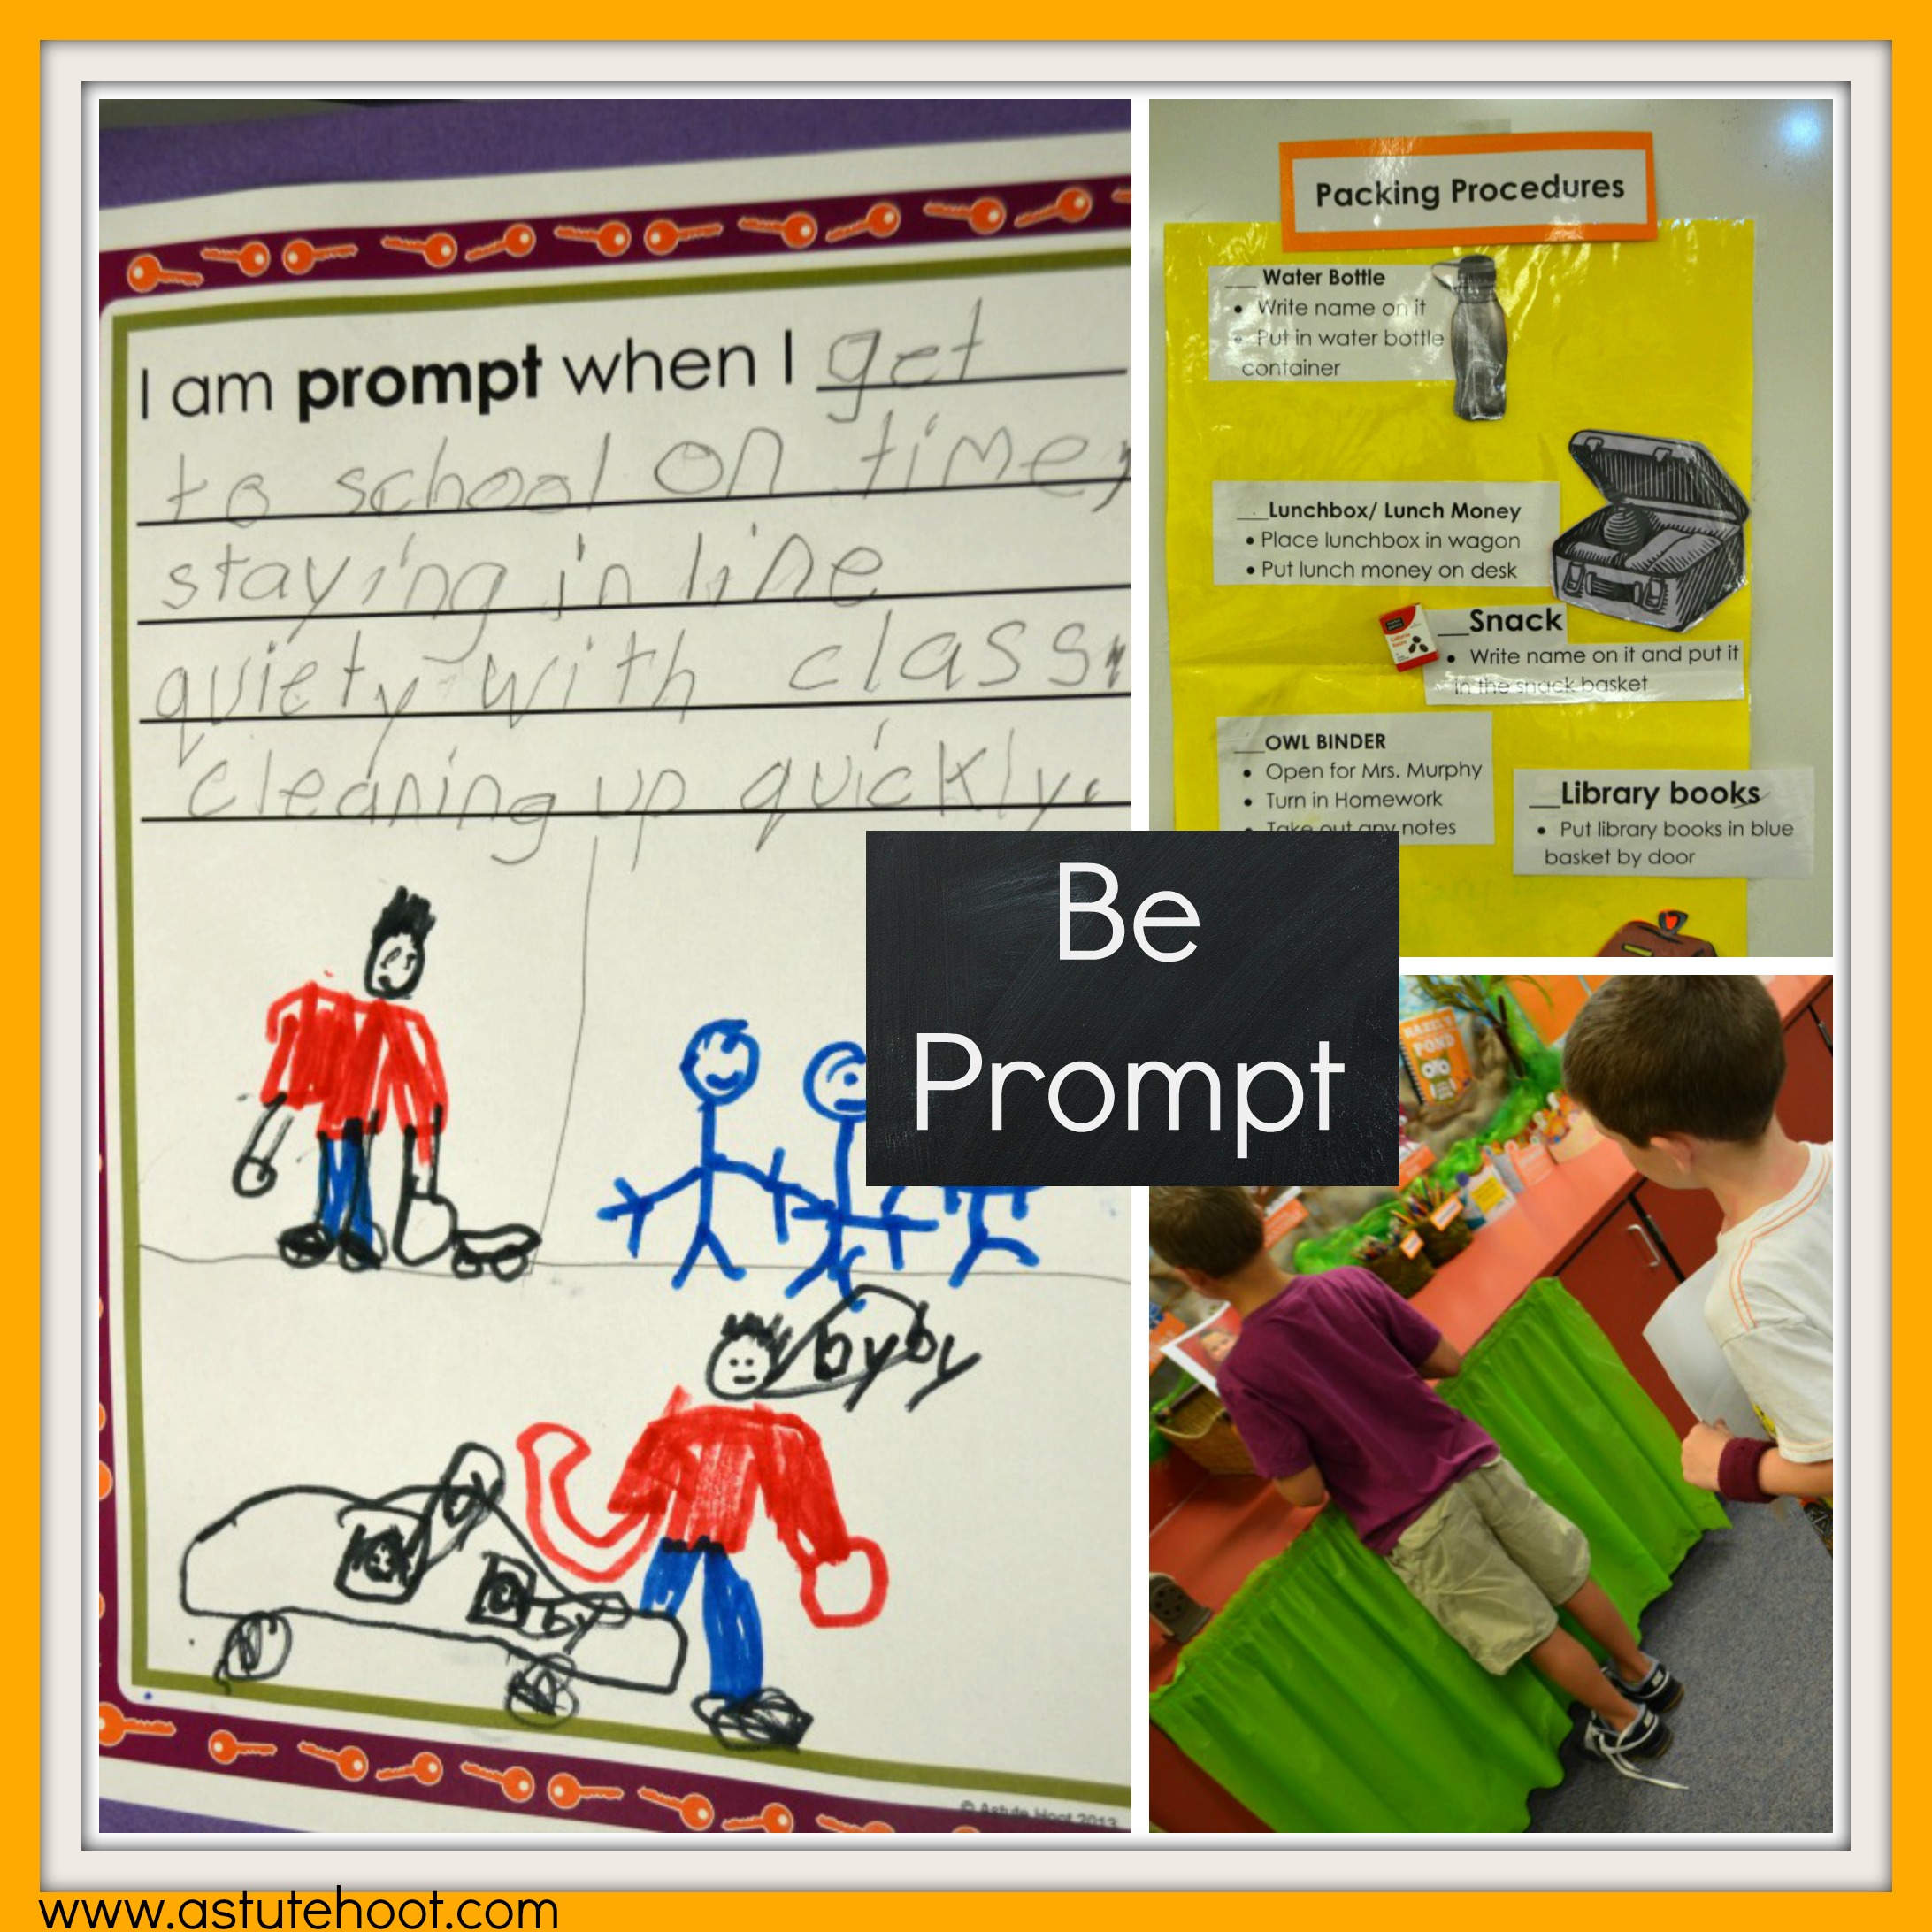
The Golden Keys to Success Classroom Management Plan and accompanying lesson plans are your answer! This program teaches five critical life skills: be respectful, take care of self, be prepared, be prompt and participate. Students learn how to apply them to the classroom and transfer them to new settings and situations.

Golden Keys to Success, classroom management plans, behavior modification

In this program students learn the definition of each key and practice the specific, accompanying behavior indicators. Furthermore, it provides daily home-school communication as students are required to get parental signature on the Keys to Success chart nightly. If an infraction occurs, parents can easily read the marked indicator to understand what happened.

Golden Keys to Success, classroom management plans, behavior modification

Golden Keys to Success, classroom management plans, behavior modification

The Golden Keys Success also provides weekly reflection; on Fridays, students write a Glow, an achievement, and a Grow, a short-term goal for upcoming week. A colorful, parent brochure explains the system, positive and negative consequences and essential questions about classroom behavior.

Golden Keys to Success, classroom management plans, behavior modification

The best part? It’s our Flash Friday Freebie! Download the free Golden Keys to Success Classroom Management Plan and purchase the accompanying Golden Keys to Success Lesson Plans to start your year off on a golden note.

Jessica_blog_signature-SMALL


Flash Friday FREEBIE

The first week of school is a time to focus on establishing procedures, explaining expectations and building classroom community. Infuse some fun into these lessons with our FLASH FRIDAY FREEBIEBack to School Character Education Classroom Cooking Unit.

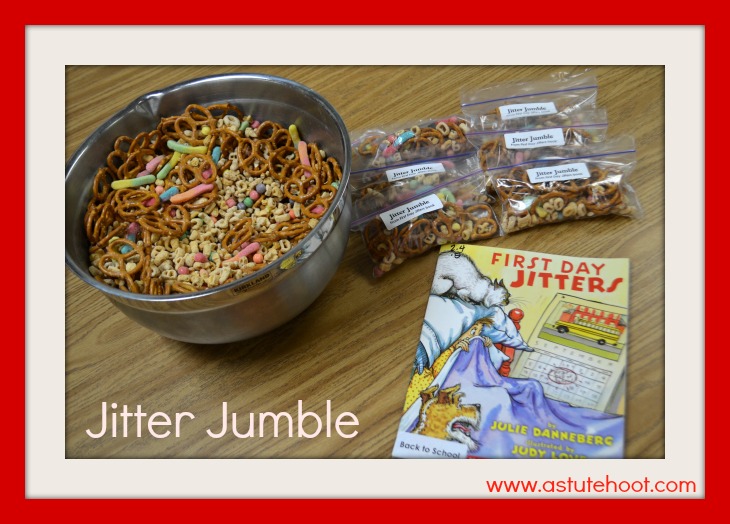
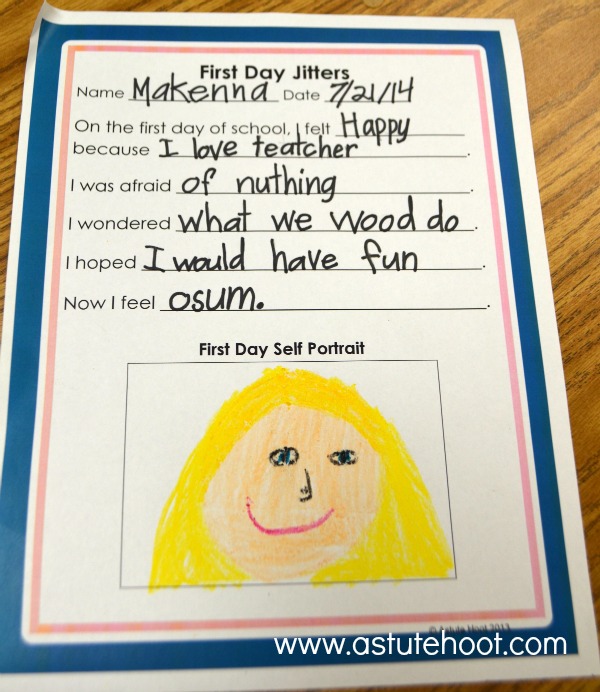
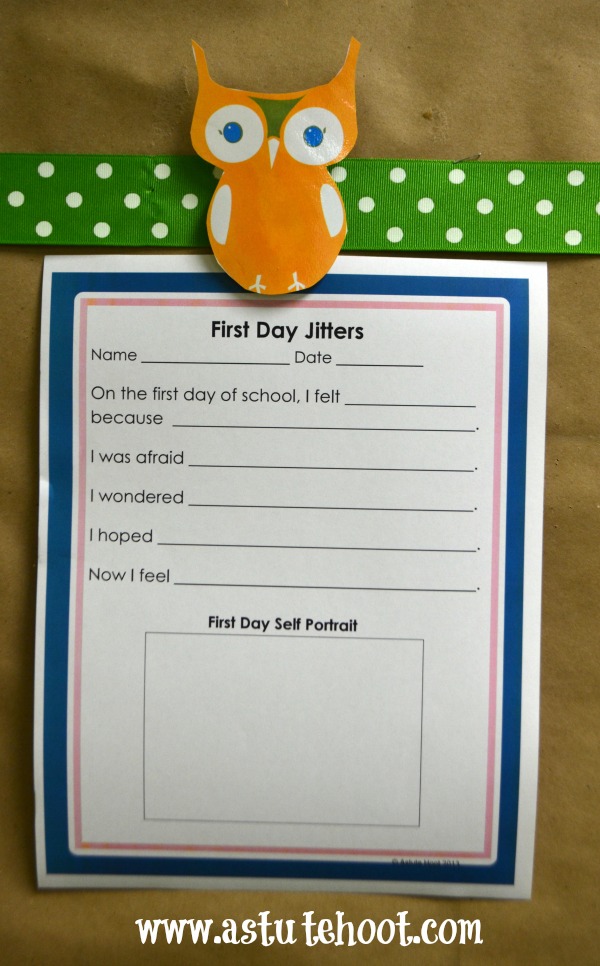
First Day Jitter Jumble: Students often feel nervous and anxious on the first day of school and it is important to address to help them feel more comfortable in the classroom. Read First Day Jitters by Julie Danneberg and discuss Sarah’s feelings and compare to students’ initial feelings. Then follow recipe to make Jitter Jumble together, discussing and recording what each ingredient represents. Students can then complete First Day Jitters recording sheet as you serve Jitter Jumble snack to class.

Jitter Jumble

jitter jumble student page

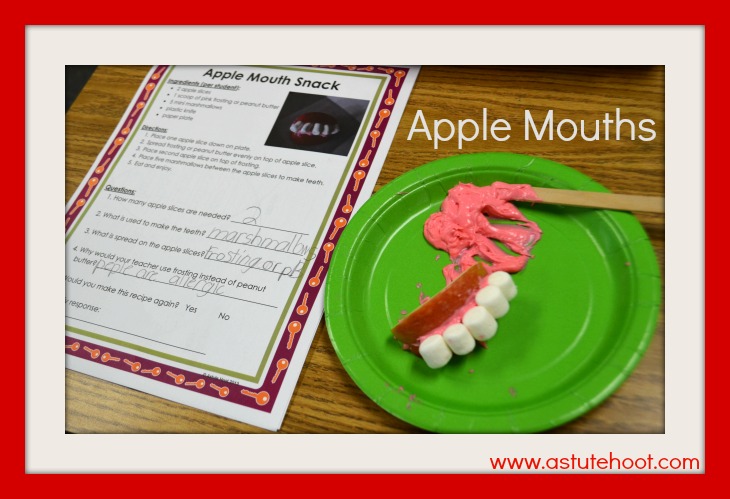
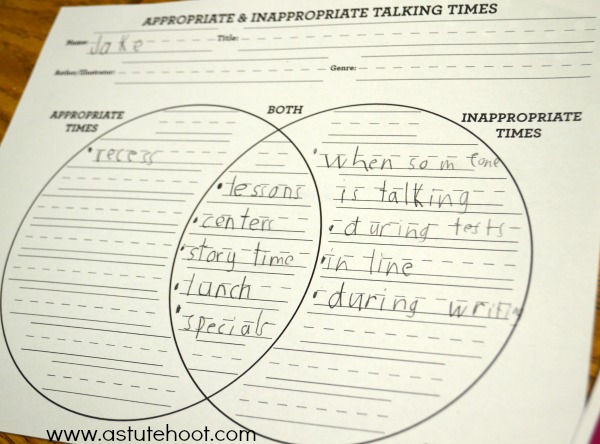
Apple Mouth Snacks: Teach students the appropriate times to talk in class with this easy snack recipe. Discuss the importance of talking times and quiet times at school; reinforce that both are needed throughout the day. Complete Venn diagram together to compare appropriate and inappropriate talking times.  Students can then follow recipe to make the apple mouth snack.

apple mouths

Venn diagram

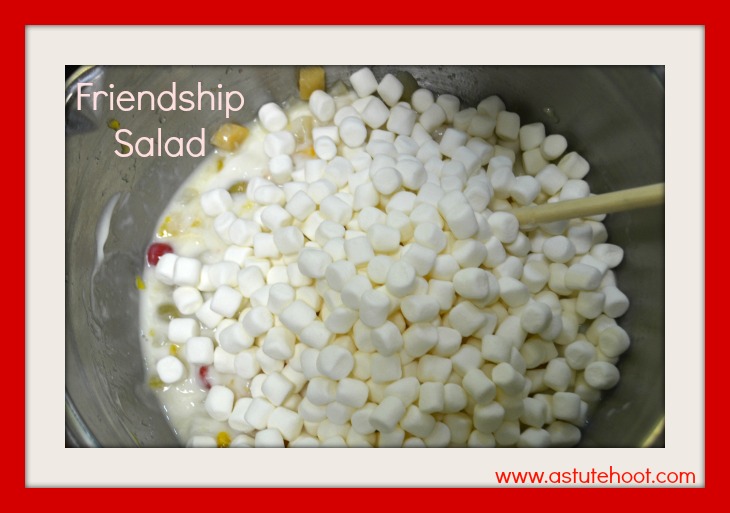
Friendship Salad: Help students define key qualities of friendship with Friendship Salad.

friendship salad

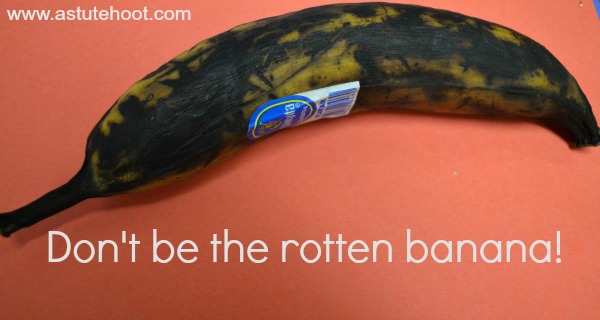
Read Horace, Morris but Mostly Delores by James Howe, stopping when Horace and Morris kick Delores out of the Mega Mice Club. Ask students if they’ve been in a similar situation and then brainstorm a list of strategies Delores could use to solve this problem. Read to the end, stopping to discuss as needed. Make Friendship Salad afterwards, discussing what each ingredient represents. Walk Friendship Salad around the room, allowing students to see and smell it (they will be very anxious to eat it). Then pull out the final ingredient…..a rotten banana. Start to peel the banana and move towards bowl; students will scream in disgust. Explain that the rotten banana ruins the salad, just like cruel behavior can ruin a friendship. Remind them to treat others with kindness and respect….don’t ever be the rotten banana. I post a picture of the rotten banana on our classroom door as a reminder.

rotten banana

Unit details: Detailed lesson plans are included with essential questions, materials list along with suggestions for teacher modeling, guided practice and independent practice. Each lesson includes accompanying worksheets and graphic organizers to help students understand and reflect on these important character traits and life skills.

Start your year off right with our comprehensive line of Back to School products! Be sure to check out our Best of Back to School Lesson Plans & Activities, Golden Keys to Success Behavior Management Planand Back to School Teacher Toolbox: Routines, Procedures & Transitions.

Happy New Year!

Jessica_blog_signature-SMALL

Blast Off Back to School Sale!

As veteran teachers, we know that the beginning of year often means countless meetings, endless hours of preparation and a great deal of stress. Let us alleviate some of your stress with our tried and true back to school resources guaranteed to help you work smarter, not harder. Plus, everything’s ON SALE!!!!


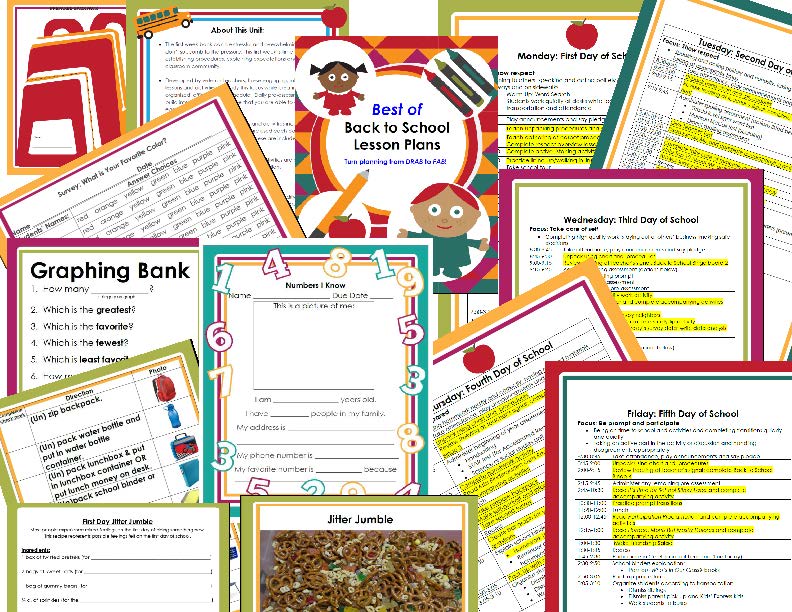
Best of Back to School Lesson Plans & Activities:  This unit focuses on establishing procedures, explaining expectations and building classroom community while creating an organized, efficient schedule with minimal preparation. Our comprehensive first week lesson plans  include 50+ interactive, engaging activities with objectives & detailed instructions, homework ideas,daily math lessons and art projects.

Best of Back To School Preview

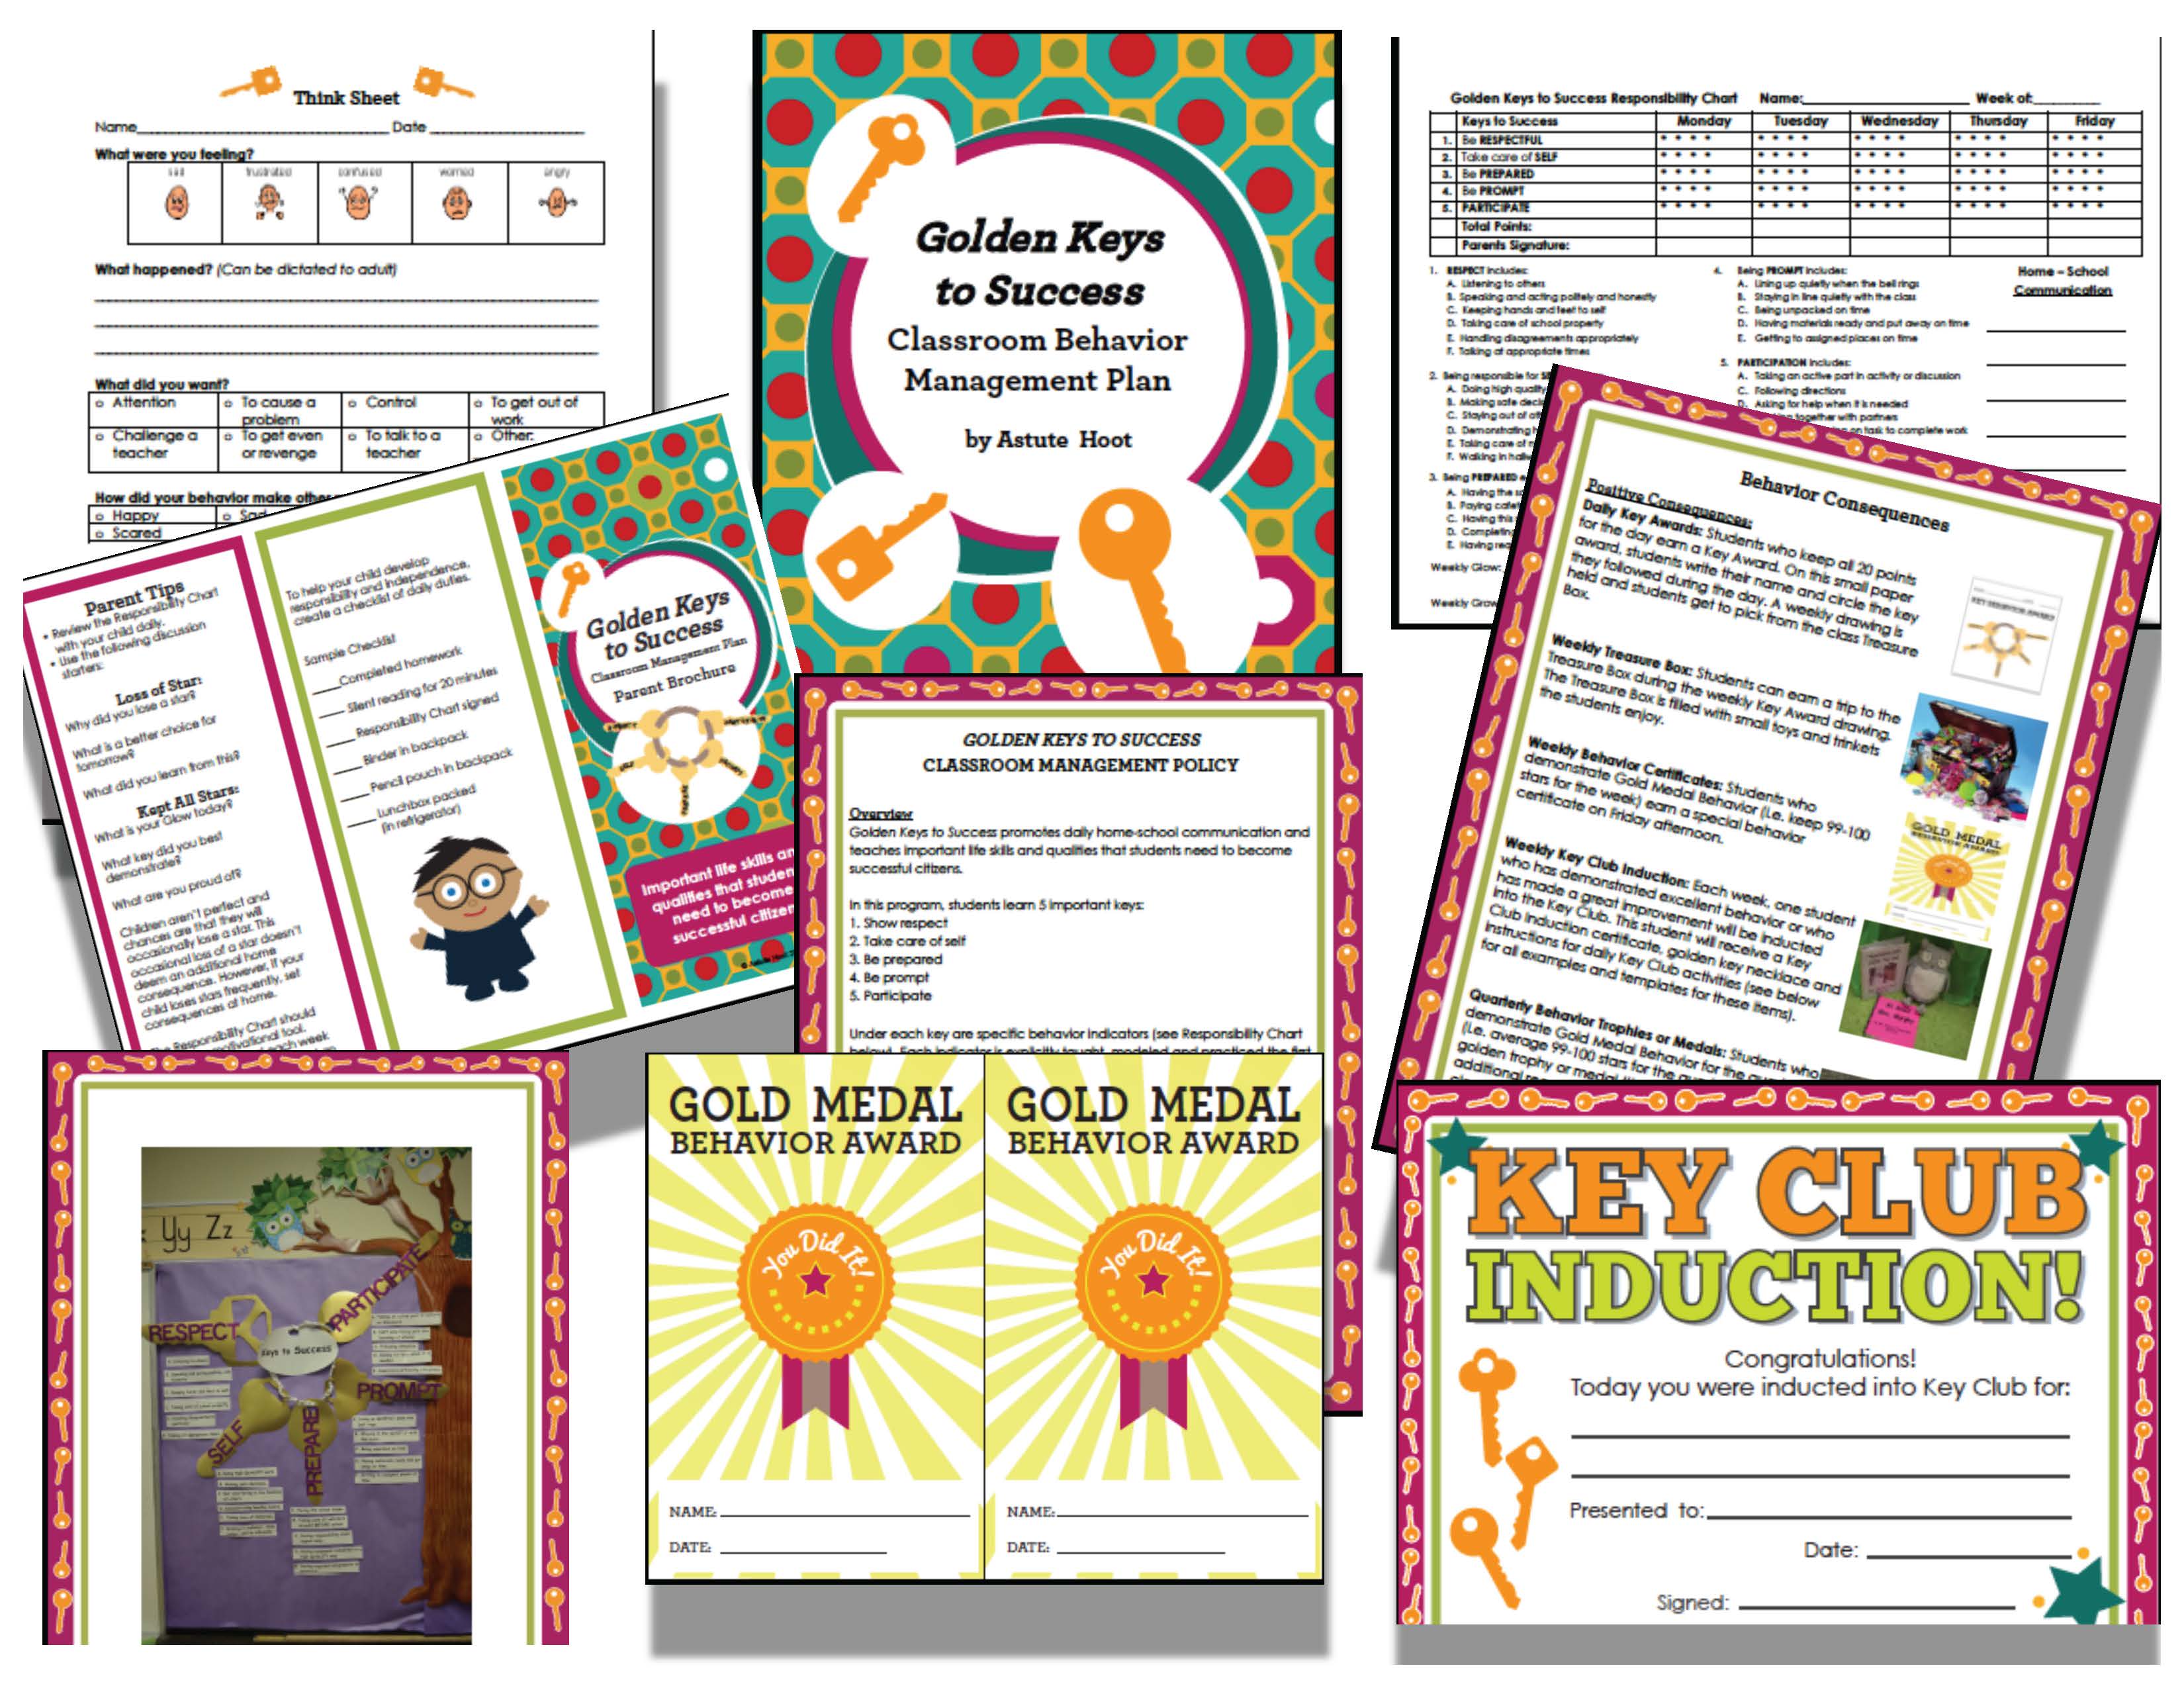
Golden Keys to Success Classroom Management Plan: Golden Keys to Success is an efficient behavior management program that builds character, promotes self-monitoring and ensures high behavioral expectations. This program has made a huge difference in my students’ behavior because it teaches them to be responsible for daily choices. Golden Keys to Success focuses on 5 important life skills and qualities that students need to become successful citizens. This 90 page unit includes 21 detailed lessons with essential questions and quality literature, 34 engaging activities and projects, a Weekly Responsibility Chart (for students) and a parent brochure with overview of program, consequences and helpful parent tips.

Preview Keys to Success_Page_1

Common Core Math Problem-Solving Essentials Bundle: This ultimate bundle provides an entire year’s worth of differentiated Common Core problem-solving activities to give students the strategies they need to solve word problems. Perfect for general education, special education, RTI and math intervention! This 636 page file has all of the lessons, activities, worksheets and printables you need for comprehensive problem-solving instruction. It is the perfect supplement to any existing curriculum or can be used as a stand alone resource.

Problem solving bundle preview

We hope that these products reduce that dreaded back to school stress and make your life easier.

Happy New Year!

Jessica_blog_signature-SMALLJennifer_blog_signature-SMALL

Owl Themed Classrooms are a Hoot!

Clearly I love owls and my students do too! Here is a peek into my second grade classroom, my home away from home. Each year, I refine my classroom with special finds from Target and Hobby Lobby (my favorite!) to make it comfortable and inviting. My goal is to make the room a safe, creative space that promotes engagement and exploration.

Welcome to my classroom!

HAZEL HOOT’S READING ROOST:
This area is my students’ favorite place. Each day students attend Hazel’s Reading Roost (my guided reading group) as one of their four reading rotations. During this time, we use a woodland strategy animal as we learn and practice specific reading concepts through the context of authentic literature. Students read text at their instructional level using our Hoo Can Read? Reading Fluency and Comprehension flashcards and complete graphic organizers that accompany the strategy animals.

Hazel’s Reading Roost revolves around Hazel Hoot, a struggling reader, who comes across a magical tree one day on the way home from school. She meets 10 strategy animals who help her learn the necessary skills and strategies needed to become a successful reader. To replicate the magical tree, I purchased an inexpensive faux tree from Goodwill and gave it a dusting of gold glitter spray paint. I glued glitter foam leaves to give it an enchanted gleam and used Velcro to attach the animals. This allows for easy removal during reading group time.

Hazel's Reading Roost: Guided Reading Center
Hazel’s Reading Roost: Guided Reading Center

HAZEL HOOT’S PROBLEM-SOLVING POND:
Our Problem-Solving Pond features 10 strategy animals that help students solve story problems. In the pond story, Hazel Hoot swoops down to eat a fish and he begs her to let him go as he is Upton Understanding Fish, the ruler of Problem-Solving Pond. Hazel lets him go and Upton introduces her to the strategy animals, teaching her critical problem-solving skills in the process. Each week students learn and practice new strategies as they complete a differentiated template in their problem-solving journal.

In order to recreate the Problem-Solving Pond, I covered a bulletin board with fadeless blue water paper and added green tulle and pond stems to border the pond. I found this stuffed animal on Ebay that looks just like Upton Understanding Fish at the top along with his problem-solving steps. As I introduce each strategy animal, I put it in the pond for students to reference.

Hazel's Problem Solving Pond: Math Bulletin Board
Hazel’s Problem Solving Pond: Math Bulletin Board

O.W.L. BULLETIN BOARD:
Observe, Wonder, Learn are the key themes in my room and this bulletin board is the first thing you see when you walk into the room. I made the paper using turquoise water color paint, water and white butcher block paper. I love the watercolor effect. I purchased the owl rug from Target (in the bath section) and painted thin wooden letters purchased from Hobby Lobby. I added laminated orange cardstock squares as a backdrop for student work. I change this board frequently to display our learning.


OWL Bulletin Board
OWL Bulletin Board

THE LEARNING NEST:
This area serves as our whole-group space for activities such as morning read-alouds, writing lessons and center activities. In the beginning of the year, I create a carpet seating chart. The owl rugs are the start of each row; I put horizontal lines of masking tape on the carpet and write each student’s name in his/her spot. After students are trained, I remove the tape (I’ve learned that custodians hate masking tape). I place thematic, leveled books in the bookcase and hang student work from the owl clips made from clothespins and our owl templates.

The Learning Nest
The Learning Nest
Owl clips for displaying work

STORAGE BINS:
I used owl-shaped labels to organize and clearly mark the contents of supply baskets, book bins, and other storage containers throughout my classroom. It not only pulls the classroom theme together, but also creates a literacy rich environment.

Storage bins
Storage bins
Books bins for classroom library

DETAILS, DETAILS, DETAILS:
Sometimes it’s the small things that matter most. I regularly add new owl accents, picture frames, rugs, and other items to the classroom (I might have a problem….). Ebay and Target have a wide variety of owl accents and I love the fuchsia, turquoise and apple green frames and accents found at Hobby Lobby. Here is an example of how I used masking tape and an owl rug to teach students the correct pathway to pick up their mail from their cubbies for their dismissal routine.

Perfect pathways
Perfect pathways
Owl decor details
Owl decor details

CLASSROOM BEHAVIOR:
Even my newsletters, parent communication forms and behavior charts coordinate with my owl themed classroom! Here are two FREEBIE behavior chart files for you!

Hootin’ for a Great Day:

Hootin' for a Great Day!
Hootin’ for a Great Day!

Look “Hoo’s” Behaving:

Look "Hoo's" Behaving!
Look “Hoo’s” Behaving!

INSPIRATION:
It is fun to collaborate and share ideas with fellow owl lovers! I’ve started an Owl Themed collaborative Pinterest board to collect inspiration for my classroom and share ideas. If you’d like to be added to the board, please follow the board and comment with your Pinterest information below and I will add you.

Owl Themed Classroom Collaborative Board

Thanks for stopping by!

Jessica_blog_signature-SMALL

Lights, Camera, Action!!!

We just finished filming our newest video that shares the story of how Astute Hoot came to be!  Our goal was for our mission statement, “Creating innovative learning tools to awaken the joy of learning and spark enthusiasm in all students” to come to life in this video.  Even though the finished product is only 2 minutes long, it took hours upon hours to prepare, shoot the video, and make revisions until it was just right.  It sure was a learning experience for us, but we are so excited to share our final video with you!

My favorite parts of the video are the children!  My sons, Alec and Jake and my adorable niece Miranda were the stars!  They were genuinely excited about interacting with our reading and math strategy characters so no acting was necessary.  Their pure enjoyment and curiosity about learning was able to shine through in a wonderful way.  They had so much fun!  Alec even said “I hope every classroom in the world could have the Astute Hoot animals!  Then kids would love to come to school and they wouldn’t be bored anymore!”

Jessica, Tina, and I on the other hand, had more outtakes and redos until we got it just right.  There were plenty of giggles, jumbled words, and even some strange animal sounds.  All in all, we had a blast with whole process, but are very glad it is done!

We would truly love to hear your feedback and comments!  Did our mission come to life? Is this an effective way to tell our story?  What are your favorite parts of the video?

Thanks for watching!  We’d appreciate it if you could share the video to help spread the word about Astute Hoot!

Jennifer_blog_signature-SMALL

Proudly powered by Wpopal.com